Anaconda Platform
7.0.0 is available through a limited early access program. Contact your Anaconda Technical Account Manager (TAM) if you’re interested in adopting the latest version.Management of service accounts is determined by your assigned role. Only users with the
Service accounts count as a user against your license limit!
admin role can create and manage service accounts.Service accounts count as a user against your license limit!
Viewing service accounts
Access to service accounts is determined by your assigned role.- Administrators
- Users
Administrators can view service accounts for channels that they own or have Manage permissions for through group membership.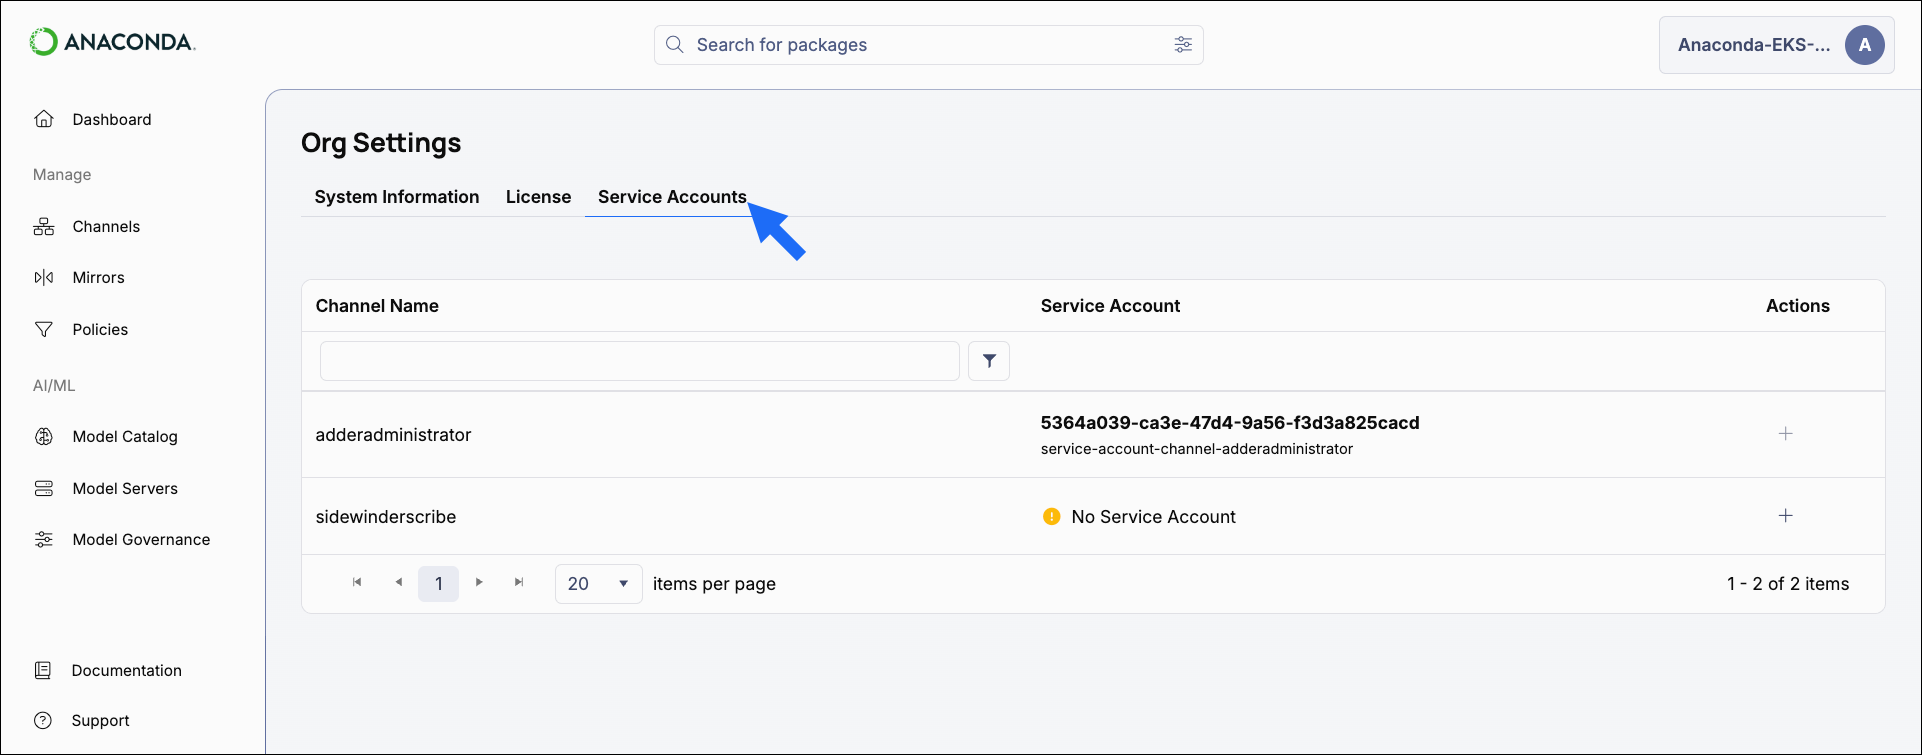
- Open the user dropdown and select Org Settings.
- Select the Service Accounts tab.

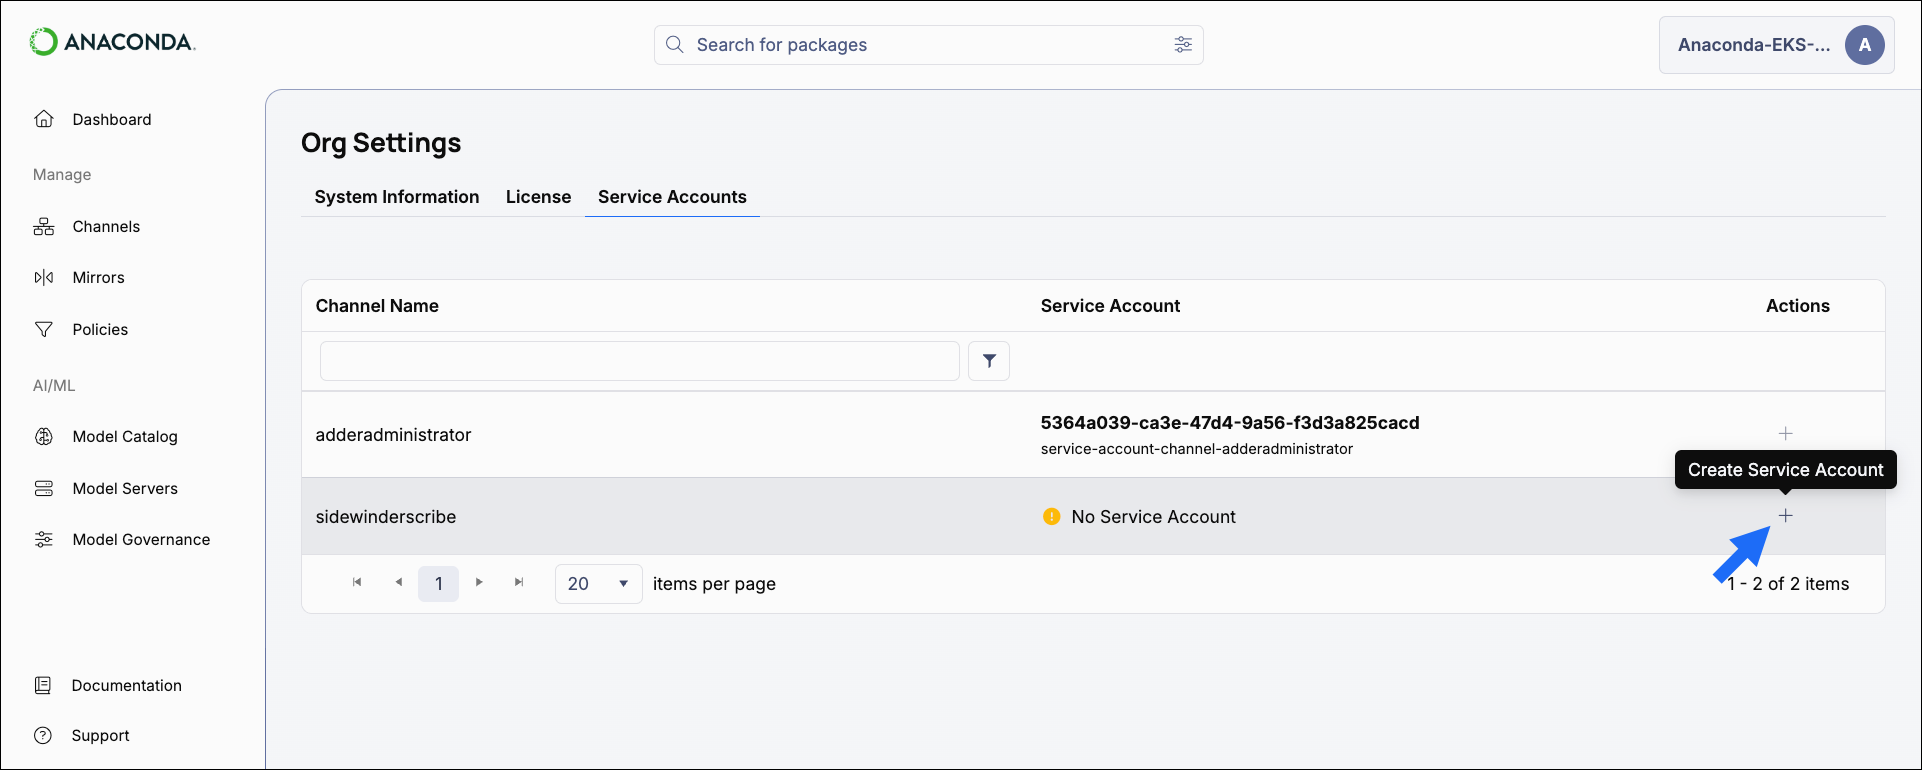
Creating a service account
Administrators can create service accounts for channels that they own or have Manage permissions for through group membership.- Open the user dropdown and select Org Settings.
- Select the Service Accounts tab.
-
Select Create Service Account beside the channel you want to create a service account for.
-
Select Create.
Service accounts are created with the name
service-account-channel-<CHANNEL_NAME>.
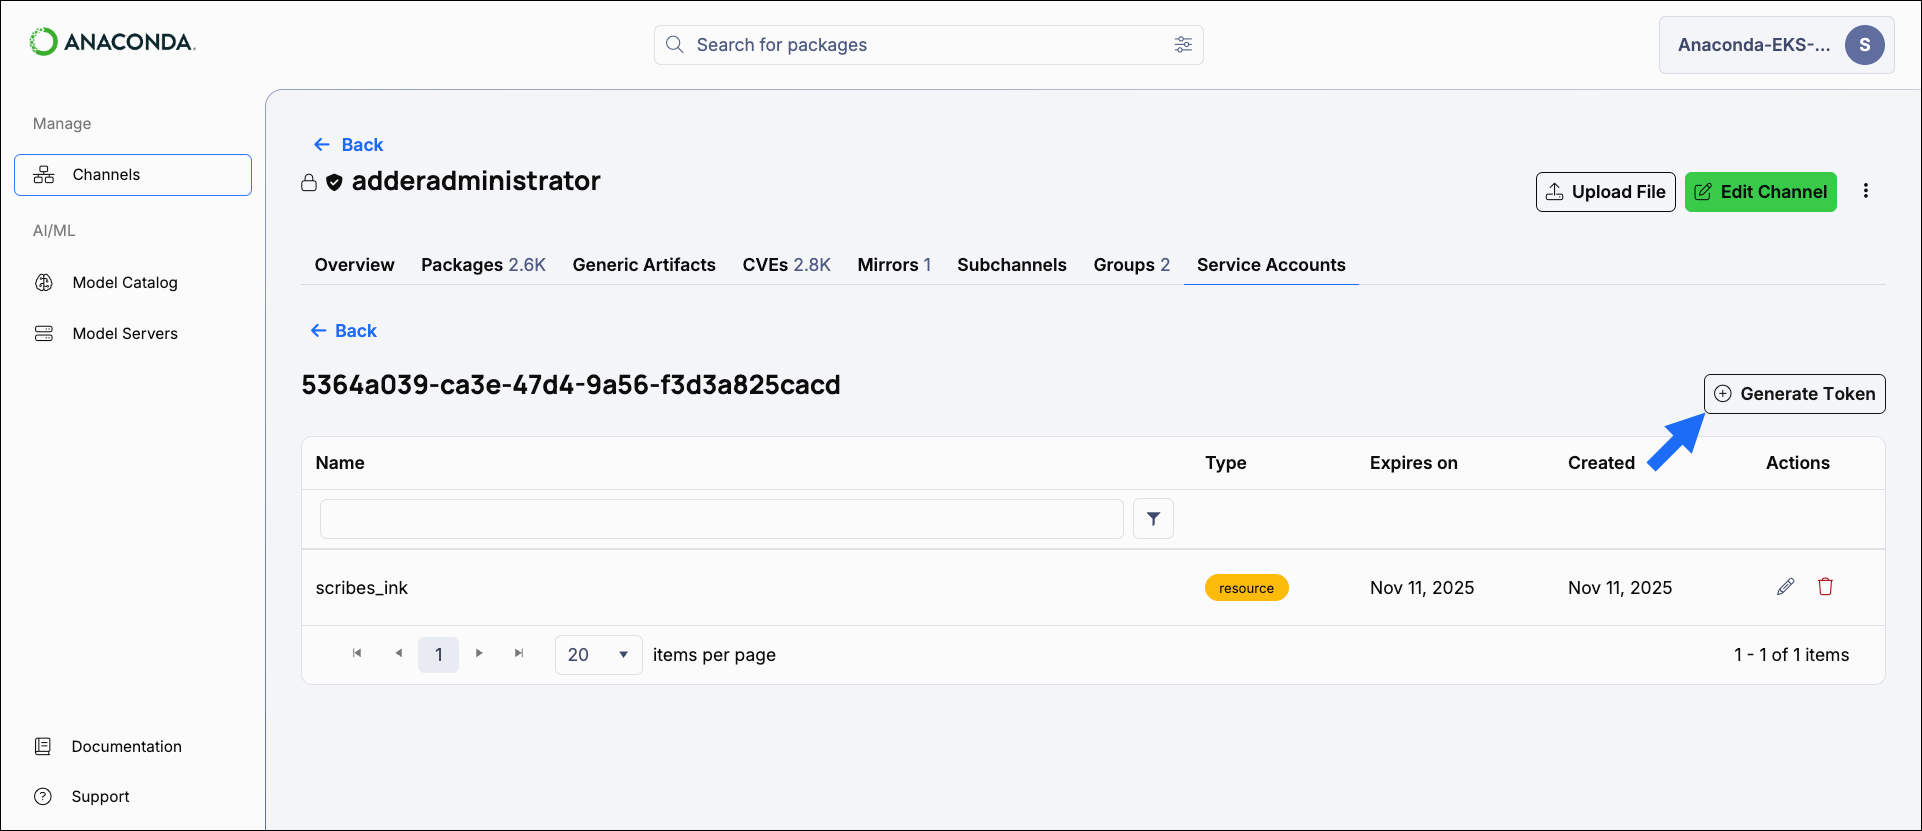
Creating a service account token
Service accounts can have multiple tokens, each configured with unique permissions, descriptions, and expiration dates.- Select Channels from the left-hand navigation.
- Open a channel that has a service account.
- Select the Service Accounts tab.
- Select the service account.
-
Select Generate Token.
- Enter a unique name for your token.
- (Optional) Provide a description of the token’s intended purpose.
-
Select an expiration date for your token.
Service account tokens can have a maximum lifespan of one year.
-
Open the Permission dropdown and select a permission level for this token.
You can only grant permissions that you currently hold to the service account token.
- Open the Channel dropdown and select a channel for this token to provide access to.
- Click Create. Your token appears in the lower-right corner.
-
Copy your token, save it in a secure location, and then close the notification.
The notification containing your service account token remains visible until you close it, giving you plenty of time to copy the value. Once closed, the token value cannot be retrieved again, and you will need to issue a new token.
Managing service account tokens
You can manage your service account tokens from the channel’s Service Accounts tab. Use the icons in the Actions column to manage your tokens.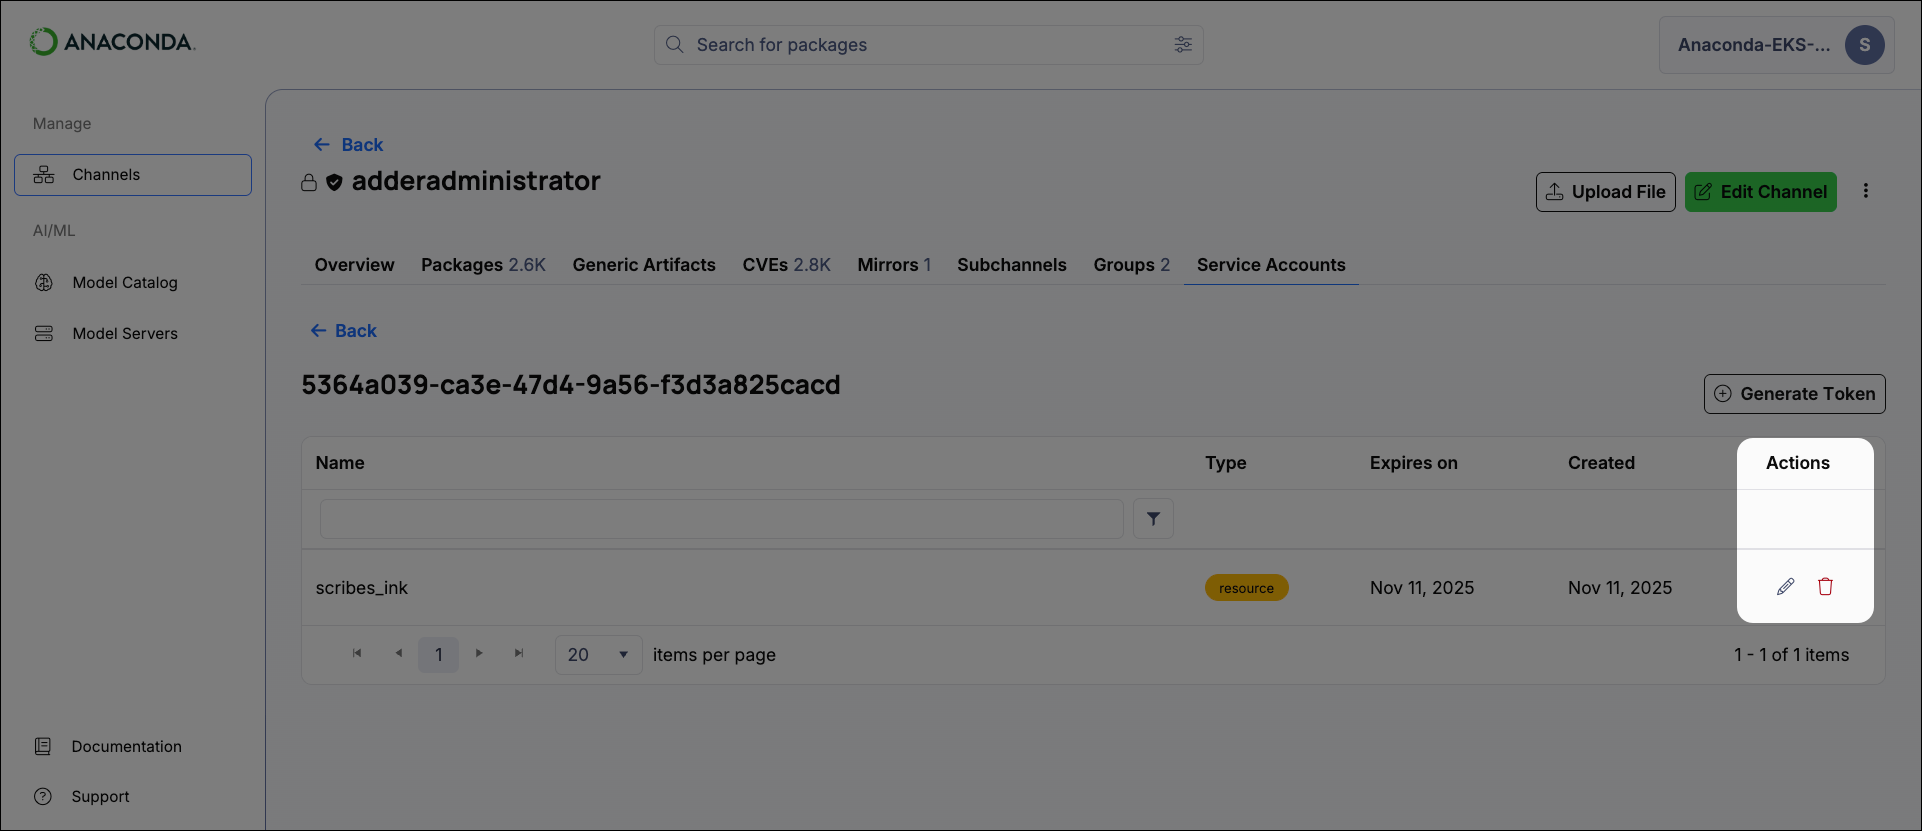
Edit
You can edit the name, description, and expiration date of your token without changing the token’s value. If you want to invalidate and replace the previous token, select the Issue a new token checkbox.
Adding a service account to a channel
If you want your service account to be able to provide access to another channel, you must request that the channel owner add your service account to their channel’s<CHANNEL_NAME>_owners group. For instructions, see Adding members to a group.
Setting/using a service account token
Once you have generated a token, you can share it with other users however you’d like. If you have received a token from another user and you would like to use it to access packages on a channel it provides access to, add the channel to your.condarc file by running the following command: