Anaconda Platform
7.0.0 is available through a limited early access program. Contact your Anaconda Technical Account Manager (TAM) if you’re interested in adopting the latest version.Visibility and management of channel features depend on your assigned role.For example:
- Mirror creation requires Write or Manage permissions for Channel Mirrors/Subchannel Mirrors.
- Policy creation requires Write or Manage permissions for the Policy Engine.
Administrator’s can view all channels in the system, or just the channels that they own and have access to through group permissions.
Creating channels
- Creating a channel
- Creating a subchannel
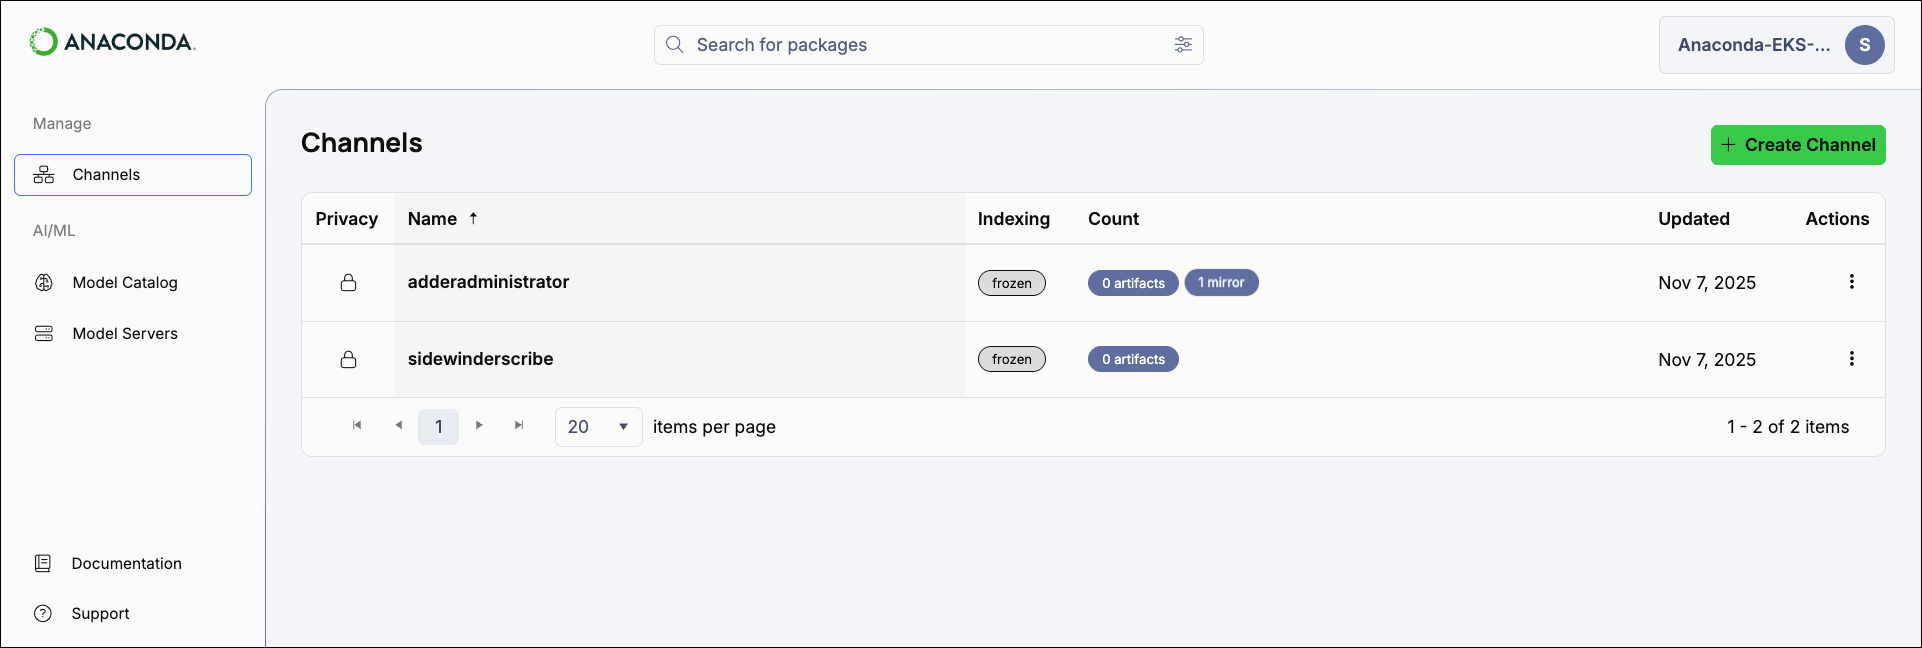
- Select Channels from the left-hand navigation.
-
Click Create Channel.
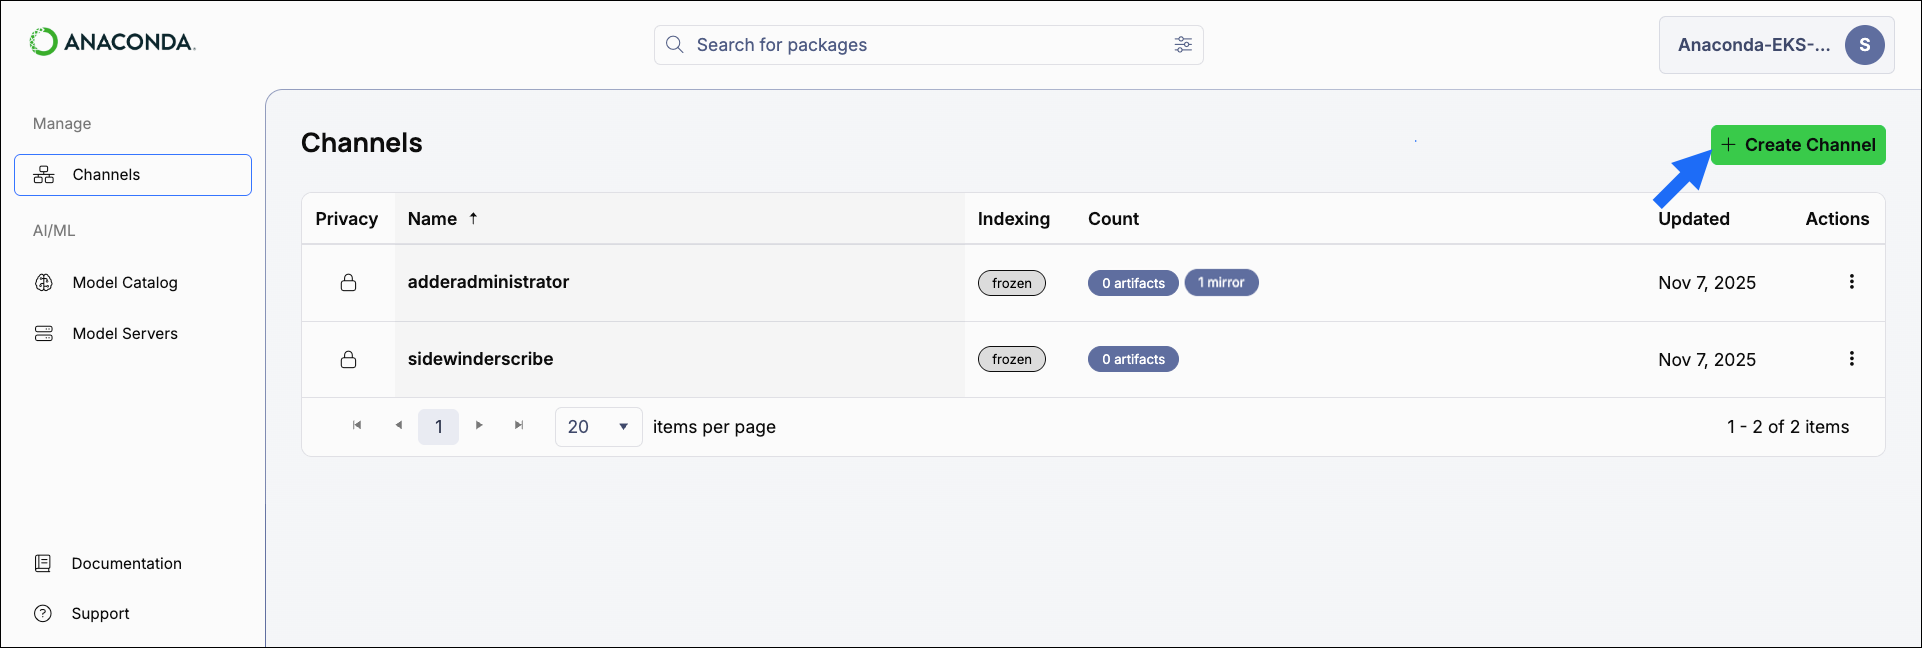
- Complete the Create Channel form.
- Click Create.

Create channel form
The Create Channel form allows you to set configurations for a channel. Let’s take a look at the different sections of the Create Channel form and what configurations they control: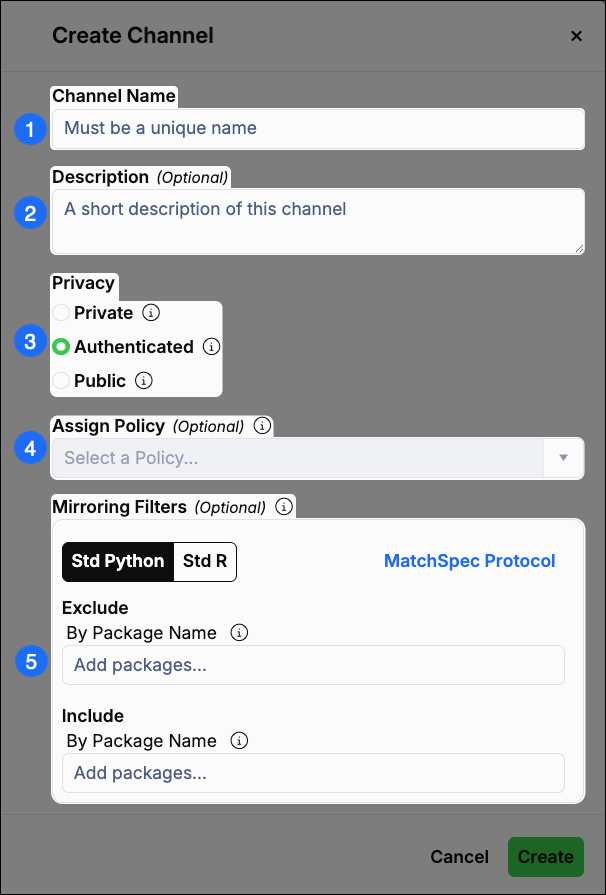
Assign Policy
Policies only apply to conda artifacts within a channel. For more information, see Policies.
Mirroring Filters
Set filters for packages if you are mirroring from PyPI or CRAN repository sources. Mirror filters must use MatchSpec protocol to specify packages.
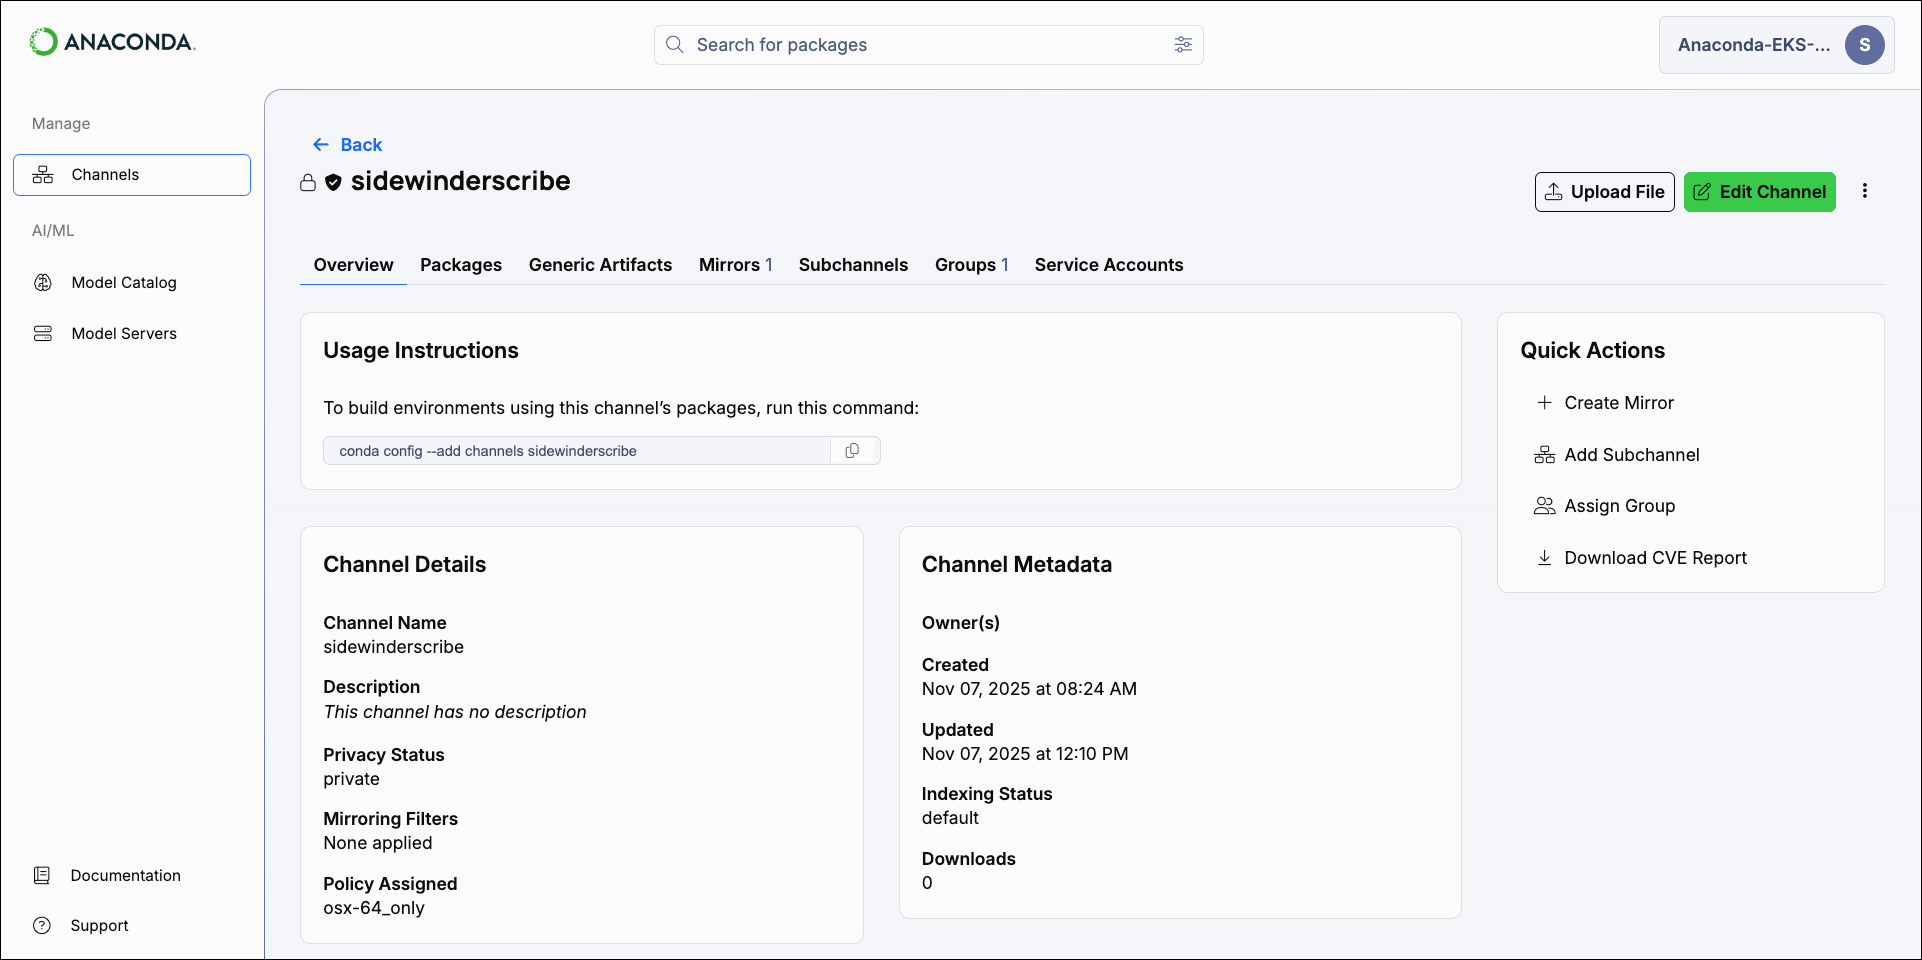
Viewing channel information
Channels and subchannels have an Overview tab that includes helpful information such as usage instructions, configuration details, and metadata information.- Select Channels from the left-hand navigation.
- Select a channel from the list to view its details.
Private channels display a beside their name.
Channels that have a policy applied to them display a beside their name.
Channels that have a policy applied to them display a beside their name.
Viewing channel changes
Package availability within a channel can change as mirror synchronizations run, policies are enforced, and packages are manually uploaded or removed. The Channel Changes tab provides a complete record of every addition and removal in a channel, including the reason for each change and when it occurred. Use channel changes to investigate missing packages, verify that policies are being enforced, or confirm that no unexpected changes occurred before running a workflow.- Select Channels from the left-hand navigation.
- Open a channel and click the Channel Changes tab.
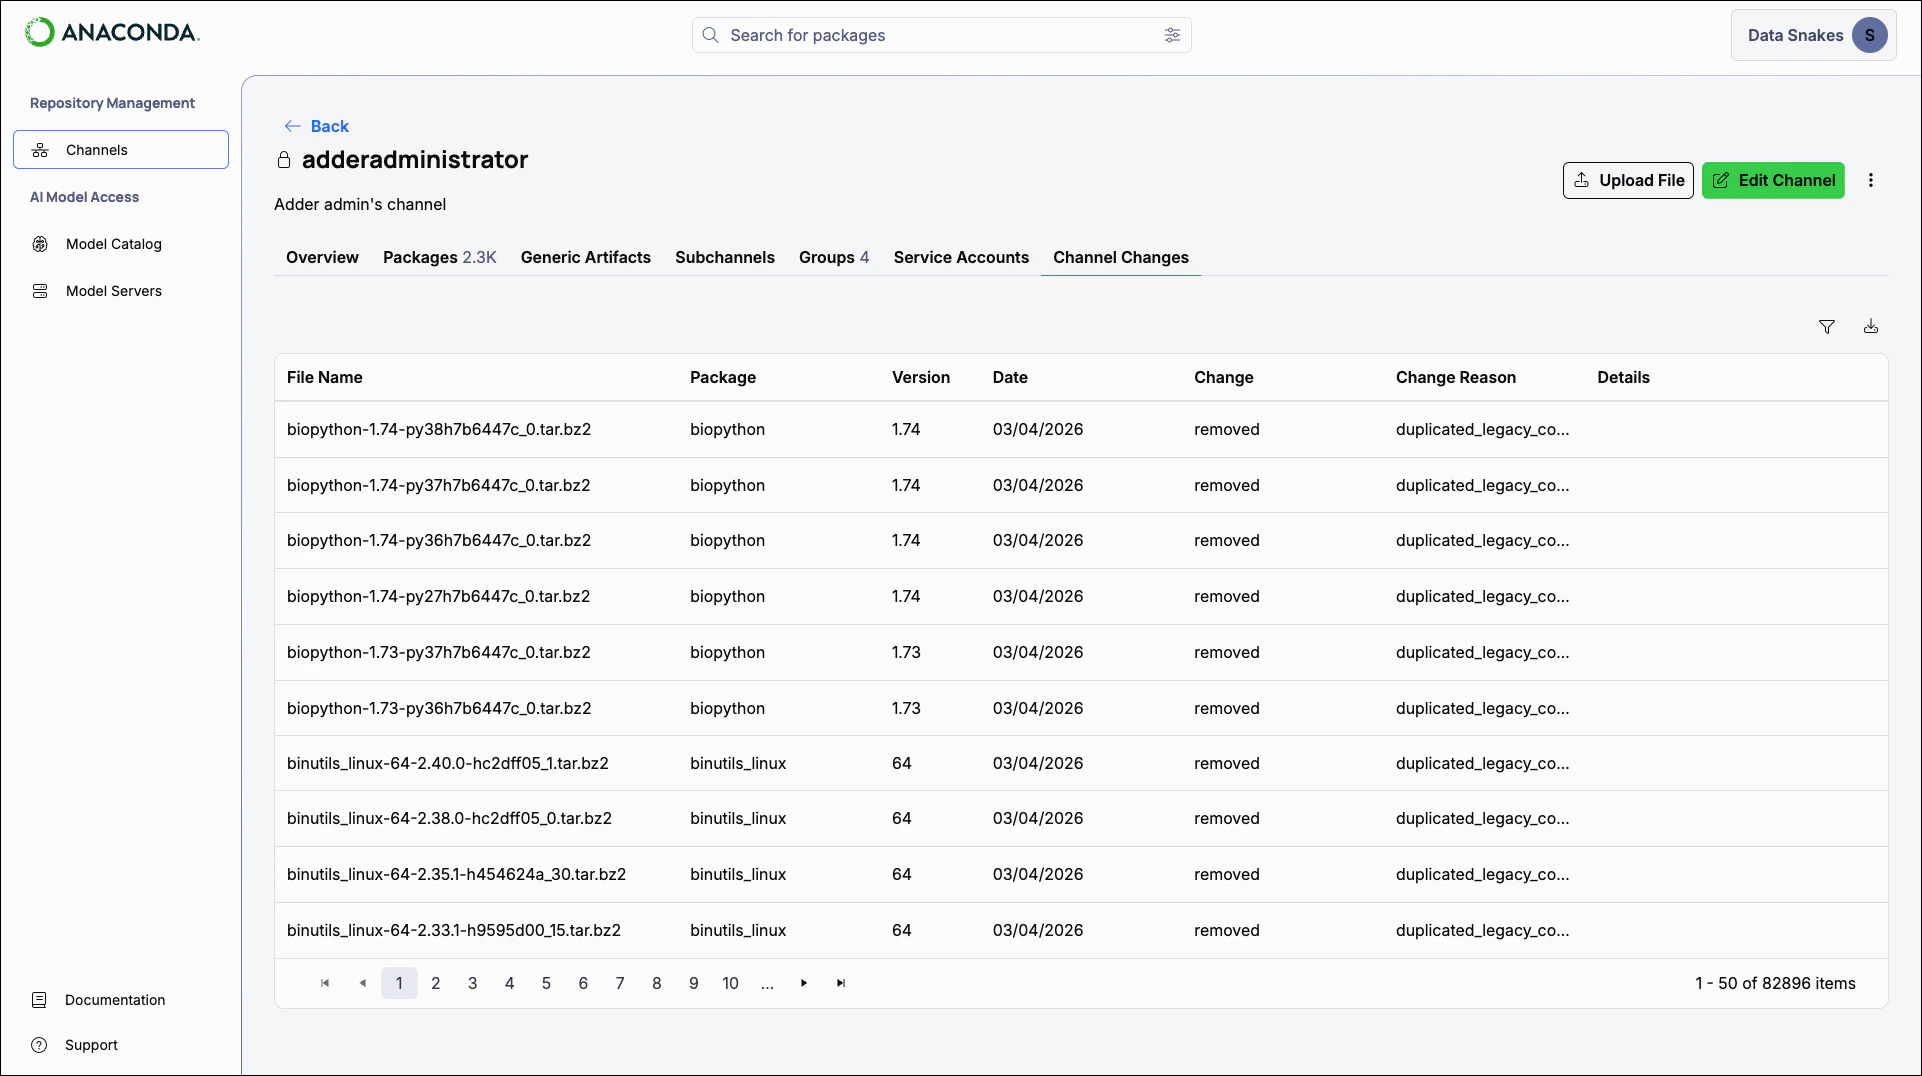
- File Name: The filename of the affected package artifact
- Package: The package name
- Version: The package version
- Date: The date the change occurred
- Change: Whether the package was added or removed
- Change Reason: The reason the change was made
- Details: Additional context about the change
Filtering channel changes
To narrow the list of changes, click the filter icon in the upper-right corner of the table. The Channel Changes Filter panel opens on the right side of the screen. You can filter by the following:- Package: Enter a package name to locate it in the dropdown list, then select it to add it to the filter.
-
Change Reason: Select a reason from the dropdown list to show packages that were added or removed for that reason.
Change reasons
- Date: Select After or Before from the dropdown, then choose a date using the calendar picker.
Downloading a channel changes report
To export channel changes as an Excel spreadsheet, click the download icon in the upper-right corner of the table. The spreadsheet includes the complete set of recorded changes for the channel. If filters are applied, only the filtered results are included in the download.Editing channels
- Select Channels from the left-hand navigation.
- Select the channel from the list.
- Click Edit Channel.
- Update channel configurations as needed.
- Click Save.
Managing channels
Some channel tasks can be performed from the Quick Actions menu on the Overview tab. For all other channel management tasks, open the channel actions dropdown:
Create Mirror
Open the Create mirror form to configure and initiate a new mirror for the channel.
Anaconda recommends only one mirror per channel or subchannel to avoid package source conflicts.
Assign Group
Assigning a group to a channel provides members of the group with access to the channel and its contents at a specified permission level (Read/Write/Manage).For more information, see Groups.
Rebuild Index
Manually rebuild the channel index. This ensures all of the channel’s artifacts are listed in the Packages tab.
Download CVE Report
Download a CVE report for all packages in the channel in a
.csv file.For more information, see Downloading CVE reports.Freeze/Unfreeze Channel
Prevent or allow the channel index from being rebuilt when artifacts are added to the channel.Mirroring consumes a large amount of CPU resources. Each time an artifact is added to the channel during mirroring, the channel index is rebuilt to include the artifact in the channel’s Packages tab. To conserve or reduce your CPU usage, freeze your channel before creating a mirror. While the channel is frozen, the index is not rebuilt when artifacts are added. Once the mirror completes, unfreeze the channel to rebuild the index.If you unfreeze your channel before your mirror completes, the indexing operations for artifacts registered while the channel was frozen will occur simultaneously. Once those indexing operations are complete, the mirror resumes performing normal indexing operations for artifacts as they are registered from the mirror’s source.
The Rebuild Index option is disabled while a channel is frozen, and packages cannot be moved, copied, or deleted from the channel.
Frozen channels display a Frozen tag on the Channels page and a Frozen indexing status in the Channel Metadata on the Overview tab.
Frozen channels display a Frozen tag on the Channels page and a Frozen indexing status in the Channel Metadata on the Overview tab.
Adding a channel to your .condarc file
If you want to use packages from a channel in your conda environments, you need to add the channel to your.condarc file. This informs conda of where to look for packages when you run conda commands.
To add a channel to your .condarc file, run the following command:
Setting your default channel
Your Default Channel is the channel Anaconda Platform uses when you perform actions from the CLI without specifying a channel. You can change your default channel at any time if your role providesManage permissions for the Default Channel category.
- Open the user dropdown and select Set Default Channel.
-
Start typing to search for and select the channel you want to set as your default.
You can only set channels you own as your Default Channel.
- Click Save.
Managing channels with the CLI
If you want to create and manage your channels using the CLI, see Anaconda Platform CLI.Managing channels with the API
You can also use the API to perform various functions for channels and subchannels. Access the API interface and view the API documentation by logging in as an administrator user, opening a new tab, and then navigating tohttp(s)://<FQDN>/swagger/ui, replacing <FQDN> with your Anaconda Platform fully qualified domain name.
The following is a list of available endpoints you can use to manage your channels in Anaconda Platform.