Starting your Python journey should be exciting, not frustrating. If you’re completely new to programming or coming from other tools like Excel, the prospect of “setting up a development environment” can feel daunting. The good news? With Anaconda Navigator, you can go from zero to coding in just a few minutes.
This guide will walk you through your very first Python setup and show you how quick start environments eliminate the complexity that often stops newcomers in their tracks.
Step 1: Installing Anaconda Navigator
Think of Anaconda Navigator as your Python control center – it’s where you’ll launch notebooks, manage packages, and access all your Python tools through a simple, visual interface.
Download and Install
- Go to anaconda.com/download, register with your email address or skip registration
- Download the installer for your operating system
- Run the installer with default settings
- Launch Anaconda Navigator from your applications menu
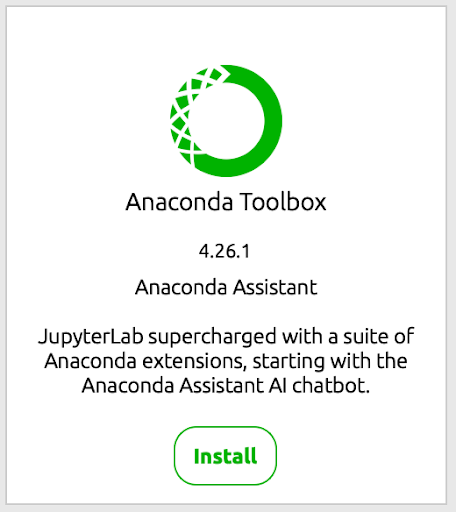
- Click “Install” on the Anaconda Toolbox tile
Step 2: Launch Jupyter
- In Navigator, click “Launch” under Jupyter Lab
- Your web browser will open with the Jupyter Lab interface
- You’re ready to create your first coding environment!
What’s an Environment?
Environments are self-contained, isolated spaces where you can install specific versions of software packages, including dependencies, libraries, and Python versions. This isolation helps avoid conflicts between package versions and ensures that your projects have the exact libraries and tools they need.
Understanding the Base Environment (Important!)
Before we start coding, let’s understand what the “base” environment is. The “base” environment is where packages like conda, Anaconda, and Anaconda Navigator are installed. You can think of the “base” environment like your smartphone’s operating system; it includes all the core files that make the system work.
Just like you wouldn’t want to delete or modify your phone’s system (unless you really know what you’re doing!), you don’t want to install additional packages into your “base” environment. Instead, you want to leave your “base” alone and use project environments built for your project’s specific needs. This is similar to how you might install different apps on your phone for different needs: for example, one for music, one for photos, one for maps, and so on.
Creating individual project environments lets you:
- Isolate dependencies – Environments isolate software and their dependencies from the rest of the software installed on your machine.
- Easily reproduce and replicate projects – By creating an environment for each project, you can ensure that your code runs consistently across different machines, and share the exact same setup with your teammates.
- Test and develop your code – Environments are perfect for testing new packages or libraries without affecting your stable development setups.
While you can make your own environments in Notebooks, we created quick start environments to streamline environment setup. Just install the quick start environment that works best for your project and start coding!
What Are Quick Start Environments?
Quick start environments are pre-configured environments that include all the packages you need for specific types of projects. Think of them as expert-assembled toolkits that work out of the box. A subscription is required to access some of the more specialized quick start environments. See our pricing page for details.
Recommended Environment for Beginners:
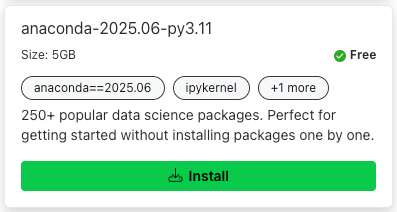
anaconda-2025.06-py3.11: Everything for data analysis – pandas, matplotlib, NumPy, Plotly, Seaborn and much more! If you’re just starting out in Data Science, Analytics or anything similar, this is likely to be a good starting point.
Create Your First Quick Start Environment
- In Jupyter Lab, click the Anaconda Toolbox icon in the left sidebar
- Look for “Quick Start Environments”
- Click “Install” on the environment that matches your project
- Wait 3-5 minutes for installation (depending on your internet connection)
- Click Open New Notebook on the installed environment card to launch an empty notebook in your new environment.
Start Coding
In your newly created notebook, copy and paste the following code to the first cell, then click Run.
# This works immediately in the anaconda-2025.x environment

import pandas as pd

import matplotlib.pyplot as plt

data = {'Name': ['Alice', 'Bob', 'Charlie'], 'Score': [85, 92, 78]}

df = pd.DataFrame(data)

print(df)

df.plot(x='Name', y='Score', kind='bar')

plt.title('Test Scores')

plt.show()
That’s it! Now you’re coding in a project-specific environment while keeping your “base” environment clean.
Simple Rules for Success
Keep Base Clean: Install only essential tools (like Jupyter Lab) in your base environment. Do your coding work in separate environments.
Use Quick Start Environments: They solve the “what packages do I need?” problem and create proper separate environments for your projects.
Focus on Learning Python: Quick start environments handle the setup complexity so you can focus on coding.
Project Specific Environments: Each new project or learning topic gets its own environment – quick start environments make this easy.
Common Questions
Q: Should I do my coding work in the base environment? A: No – keep your “base” environment for conda- and Anaconda-specific tools only. Use quick start environments to create separate environments for your coding projects with the packages you need to write the code. This keeps everything stable and organized.
Q: Which quick start environment should I choose? A: The latest Anaconda distribution environment is the best for beginners: anaconda-2025.06-py3.11. This environment contains the most popular packages for all kinds of Python coding.
Q: What if I break something in my coding environment? A: That’s the beauty of this approach! If a quick start environment breaks, you can uninstall and reinstall it without affecting your “base” environment or other projects.
Q: I’m really struggling with environment setup, is there somewhere I go and not even worry about any of this? A: Yes! You can try out our Cloud Notebooks solution, where we have pre-built environments and no installation required at all. Try it out by creating an Anaconda account and visiting nb.anaconda.com.
Your Learning Path
Now that you understand the fundamentals, follow these steps to continue your learning journey.
Getting Started: Keep your “base” environment clean with system level tools. Use quick start environments to create separate environments for your coding projects. Focus on Python basics.
Next Steps:
- Learn to create custom environments, add specific packages you need, and manage multiple project environments efficiently.
- Master advanced environment management for production deployment and team collaboration.
- Take our Simplifying Python Environment Set Up course to master your environment management skills!
Start Here
Ready to begin without the technical headaches?
- Download Anaconda and follow the steps above
- Install Anaconda Toolbox and Jupyter Lab
- Create your first quick start environment
- Start coding!
Coming next week: We’ll explore creating specialized Jupyter environments with custom extensions and when to start using separate environments for different projects. For now, focus on learning Python fundamentals. Happy coding!