Channel types
- Anaconda channels: Anaconda hosts several channels that connect to our premium, curated and provide you with thousands of the most popular data science platform software packages available on the open source market today.
-
Community channels: Community channels provide organizations with access to a broader ecosystem of conda packages that are built and maintained by volunteers in the open-source community. These packages are included in Anaconda’s security pipeline and are compatible with Anaconda packages.
While the individual packages in the community channels are maintained by volunteers, the channels themselves are hosted and maintained by Anaconda.
Community-maintained packages are selected for inclusion in the community channels based on Anaconda’s review of their compatibility with Anaconda-built packages.
Community channels are not enabled by default. For more information about enabling community channels, see Enabling community channels.Differences between Anaconda and Community channels
Feature Anaconda official channels Community channels Package Maintenance Maintained by Anaconda Maintained by community contributors Package Security Comprehensive security review; includes package signatures and CVE curation metadata Security is on par with official channels; CVE reporting Support Anaconda support - Community support
- Anaconda support
Policy Use - CVE score
- CVE status
- License family
- conda spec
- Package age
- Platform
- CVE score
- License family
- conda spec
- Package age
For more information about policies, see Policy filters.Community channel best practices
When building using thecommunitychannel, Anaconda recommends the following best practices:-
Only use the
communitychannel when you cannot find the package you need in Anaconda’s channels. -
When installing packages from the
communitychannel, try to get as many dependencies as possible for those packages from Anaconda’s channels. To accomplish this, use the following syntax when installing packages from thecommunitychannel:This helps ensure that the package is compatible with other packages in your environment by instructing conda to install only the named package from the community channel, then use the channels configured in yourReplace <PACKAGE_NAME> with the name of the package you want to install..condarcfile to install the dependencies for the environment in priority order. -
List the community channel in your
.condarcfile at the end of thechannels:list to give them the lowest priority. Conda will only use this channel when necessary to fulfill transitive package dependencies, because conda’s default setting is for strict channel priority. Edit the.condarcfile manually or run the following command to add the community channel to thechannels:list:Because all community packages have a CVE Status of Reported, virtual channels that use community as a source should not include filters for CVE Status in their policies.
Enabling community channels
Community channels must be enabled by an organization administrator before they can be used. To enable community channels:- Navigate to your Organizations page.
- Select your organization.
- Select Channels from the left-hand navigation.
- Select the Community packages tab.
- Click Enable Channel beside the channel.
- Click Confirm to accept the Terms of Service (ToS) and enable the channel.
Access to community channels can also be managed from the Organization Settings page. -
Virtual channels: Virtual channels are copies of their source channel. For example, if you create a virtual channel from the Anaconda
mainchannel, it contains the same packages as themain.You can create virtual channels using any of Anaconda’s hosted channels as a source. -
External channels: External channels point to an anaconda.org URL to look for packages.
You cannot apply policy filters to external channels. Currently, Anaconda only supports connection to external channels located at https://conda.anaconda.org/, but we plan to support any URL soon.
Channel permissions
There are two levels of permissions associated with channels in Anaconda: internal and private.- Internal channels: Internal channels are visible to all members of your organization who have been assigned a seat.
- Private channels: Private channels have their contents restricted to those members who are part of the group the channel is assigned to. For more information about assigning channels to a group, see Groups.
- From the Channels page, open the actions dropdown beside the channel.
- Select either Make Channel Internal or Make Channel Private. (Your available option depends on the current permissions level of the channel.)
Private channels that are not assigned to a group are only visible to organization administrators.
Creating a channel
- Virtual channel
- External channel
- From the Channels page, select Add channel to open the Create Channel dialog.
- Enter a unique channel name.
- Select Virtual as your channel type.
- Select channel from the Source dropdown.
- Set the permission level for the channel.
- Select Save.
Virtual channels using
community as a source might take a few minutes to complete.Channel tracking
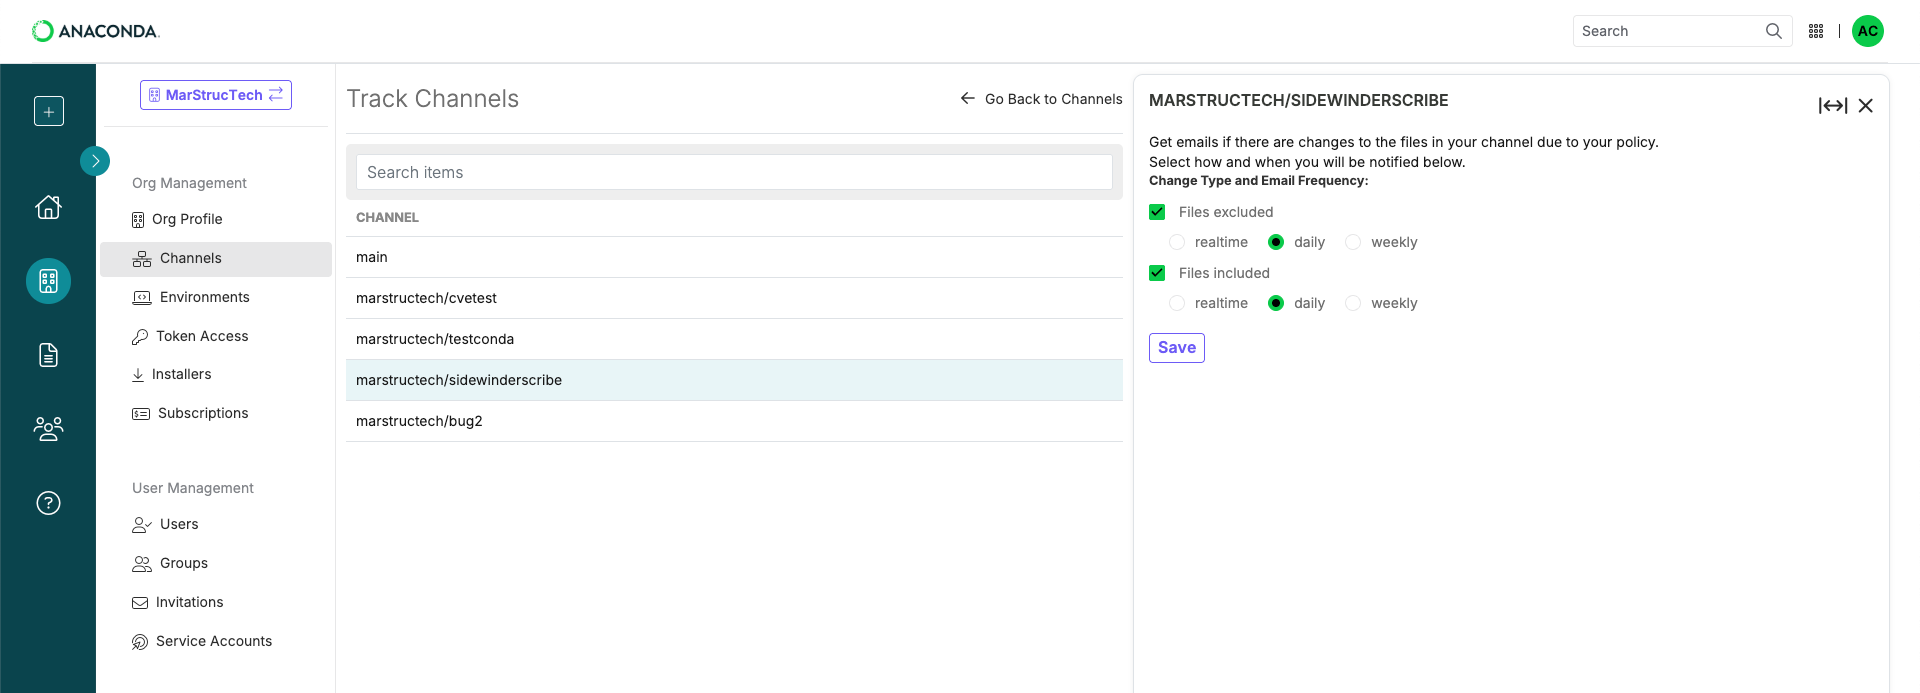
Track your channels to receive emails at configurable intervals to keep up-to-date with the latest changes to your channels’ contents.-
From the Channels page, select Channel Tracking to view the Track Channels page.
You can also track a channel from the channel details page.
-
Select your channel from the list, choose which types of emails you would like to receive, and then set the frequency at which you would like to receive them. You can receive emails in realtime, daily, or weekly. Select Save to retain your changes.