Enabling environment management
In order to utilize the Environments feature, you must first complete the required setup steps.Prerequisites
Environment logging and scanning requires the following:- An Anaconda.com account
-
Python 3.10 or later in your
(base)environmentVerifying Python in your (base) environment
Check to see which Python version you have in(base)by opening Anaconda Prompt (Terminal for macOS/Linux) and running the following command:The output of the command might look something similar to this:If you need to upgrade Python, run the following command:
Installing required plugins
Environment logging and scanning requires the installation of a few plugins in your(base) environment that expand the functionality of conda.
Obtain the necessary plugins by installing the anaconda-env-manager “metapackage” (which contains all of the plugins listed below). To install anaconda-env-manager, run the following command:
Plugins provided by the anaconda-env-manager metapackage
Plugins provided by the anaconda-env-manager metapackage
The following plugins extend the functionality of your installation of conda:
-
anaconda-env-log- Automatically logs the current state of an environment whenever a user performs acreate,install,remove,rename, orupdateaction with conda (manual logging of existing environments is also supported). -
anaconda-activate-check- Provides checks that validate environments against administrator-defined security controls before activation and notifies users of warnings or access restrictions with guidance for resolution. -
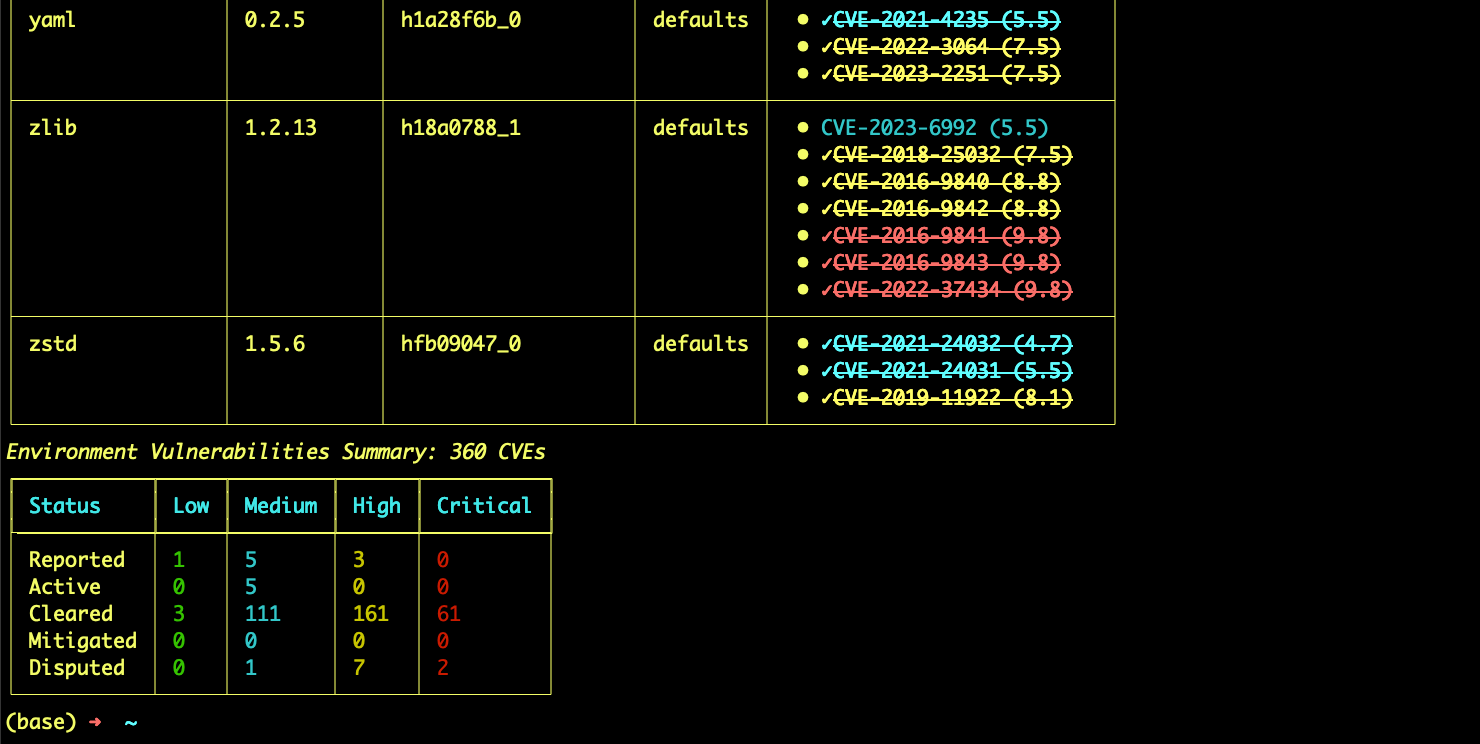
anaconda-audit- Allows you to scan local environments to assess the security impact of actions like installing or updating packages, so you can proactively address potential issues without requiring administrator intervention. It also serves as a valuable tool for identifying issues when troubleshooting security concerns flagged by administrators.
Once you’ve installed
anaconda-env-manager, it is a good idea to keep it updated by running conda update anaconda-env-manager periodically.Registering your organization
To ensure your environments are properly logged to your organization on Anaconda.com, you must log in via the CLI and register your organization with conda. To register your organization:- Open Anaconda Prompt (Terminal on macOS/Linux).
-
Authenticate to Anaconda by running the following command:
When prompted for your username and password, enter your Anaconda.com credentials and complete the login process in the browser window that opens.
-
After successfully logging in, return to the command line and register your organization by running the following command:
anaconda-env-log installed in the (base) environment), newly created environments are logged to the registered organization.
Logging environments
Withanaconda-env-log installed, all newly created environments are automatically logged within conda, and existing environments are automatically logged whenever you perform certain conda actions (install, remove, rename, or update) in them. Existing environments can also be logged manually by running the following command:
Viewing logged environments
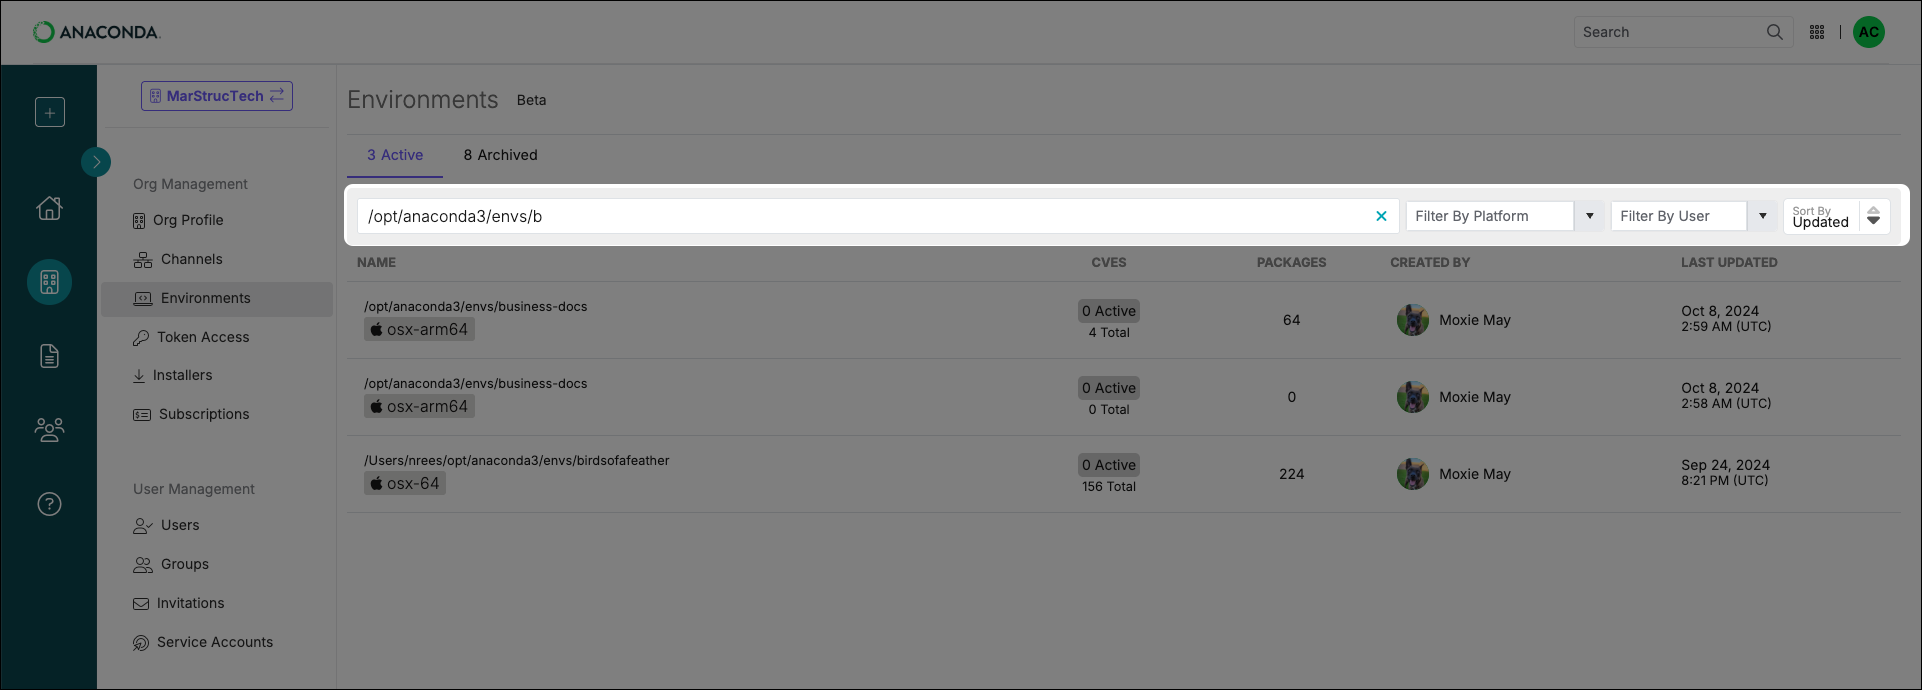
Environments logged with an organization can be viewed at any time from the Environments page.- Navigate to your Organizations page.
- Select your organization.
-
Under Org Management, select Environments.
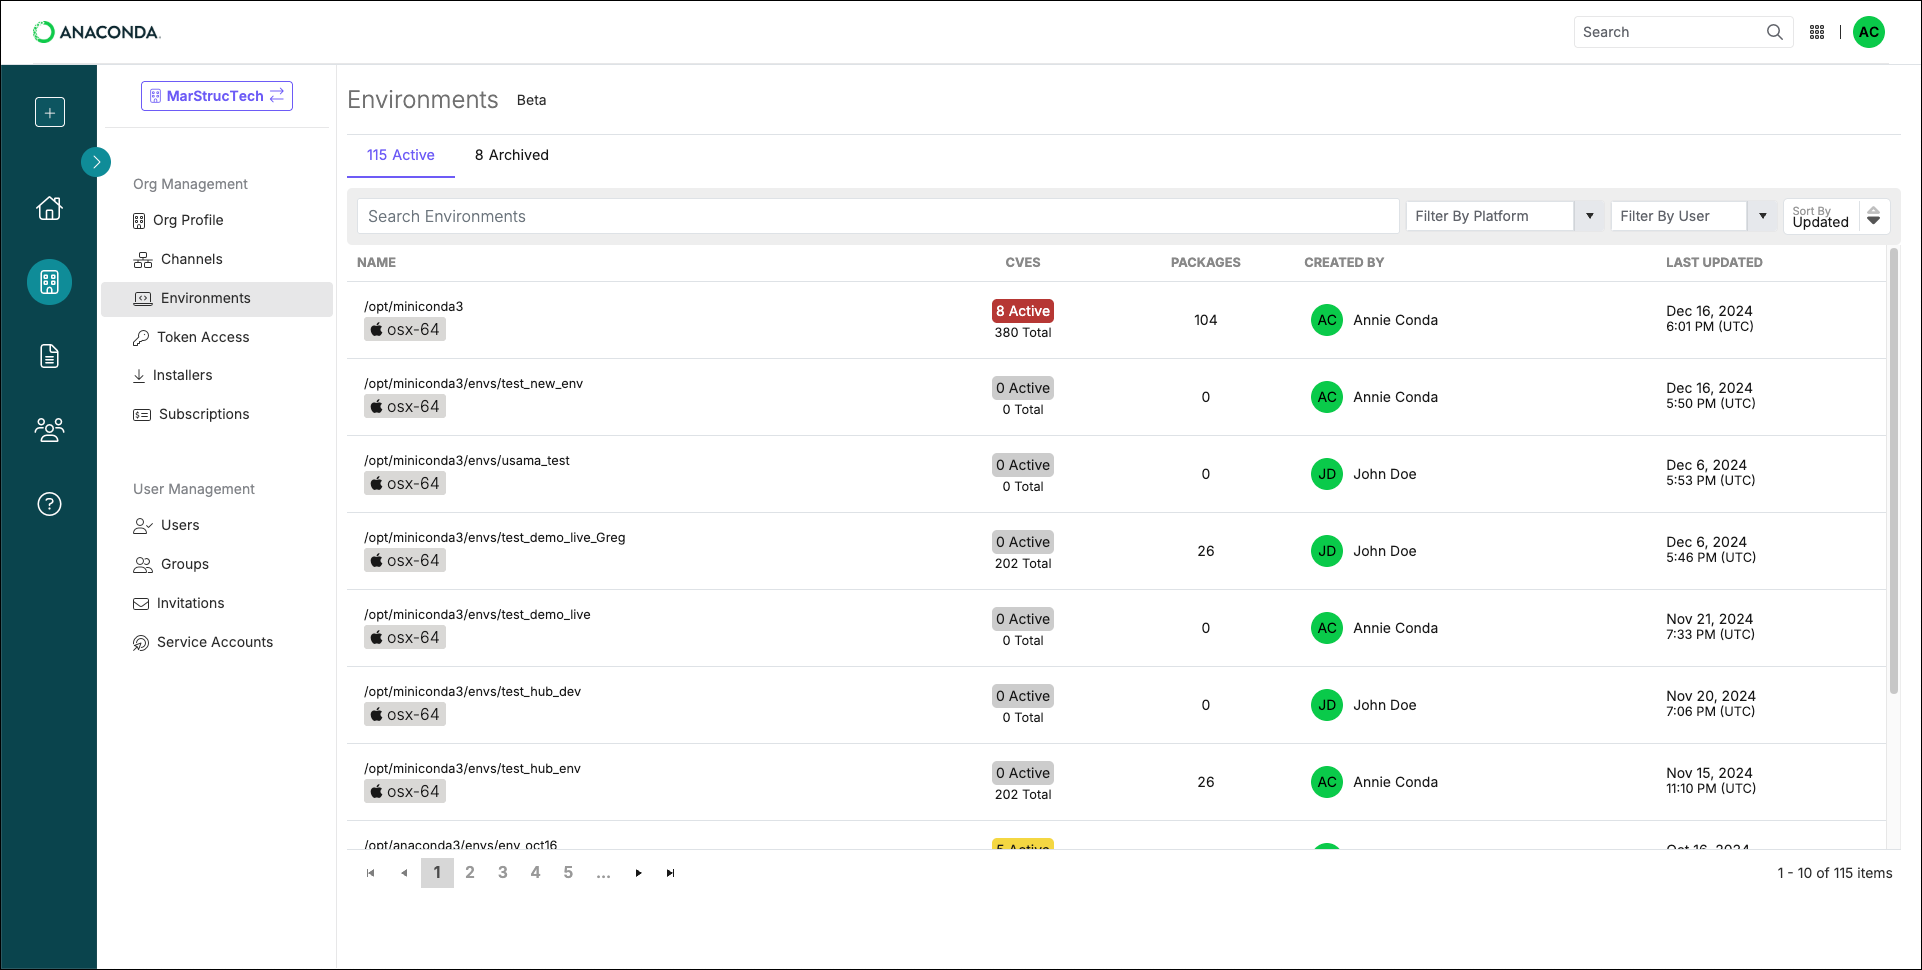
- Environment paths
- The number of CVEs associated with the packages in the environments and how many have an Active status.
- The number of packages in the environments
- The last time the environments were updated
Exploring logged environments
Browse your logged environments to gain insights into the packages that they contain. You can see which packages are present in the environment as well as any CVEs associated with them.Viewing environment packages
The environment’s Packages page shows you which packages are in an environment and what they were sourced from.- Navigate to your Organizations page.
- Select your organization.
- Under Org Management, select Environments.
-
Select the package count displayed under the PACKAGES column.
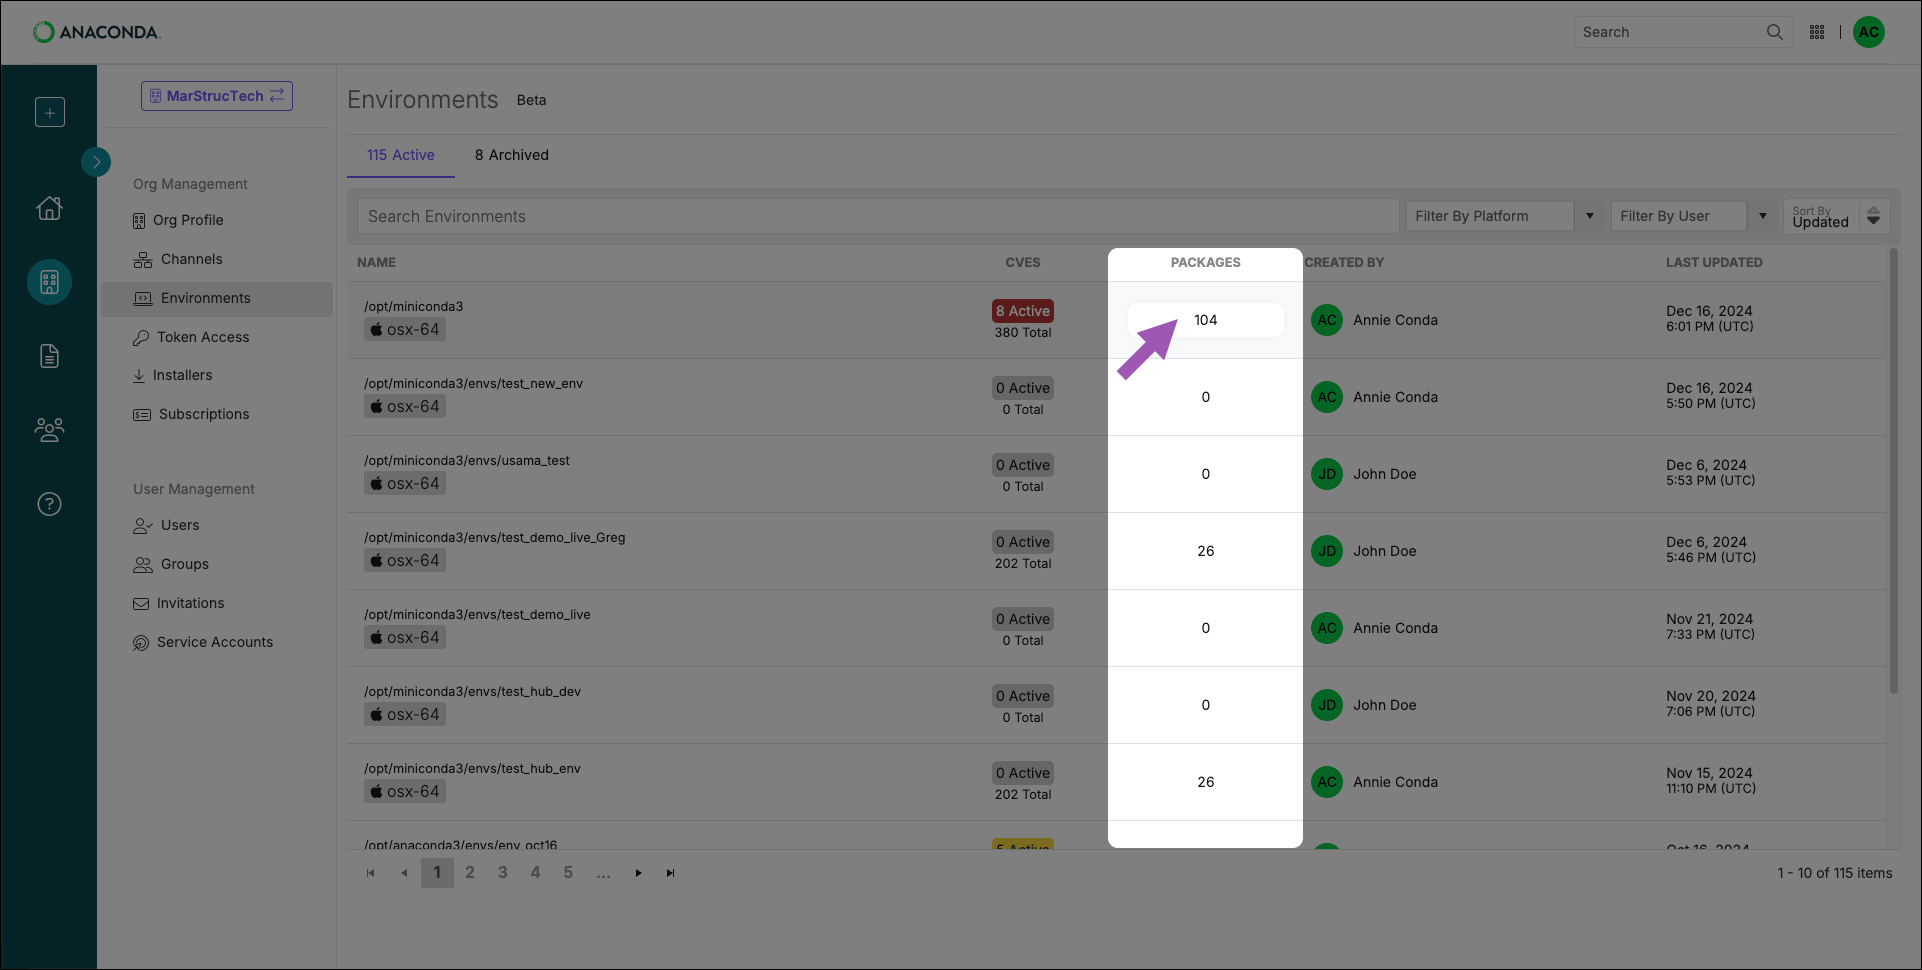 Use the navigation controls at the bottom to browse the environment’s packages.
Viewing environment CVEs
- Viewing environment CVEs
- Viewing package CVEs
The CVEs panel shows all of the CVEs associated with the environment by name and severity.
- Navigate to your Organizations page.
- Select your organization.
- Under Org Management, select Environments.
-
Select the CVE count displayed under the CVES column.
Use the filters at the top of the panel to locate critical CVEs efficiently.
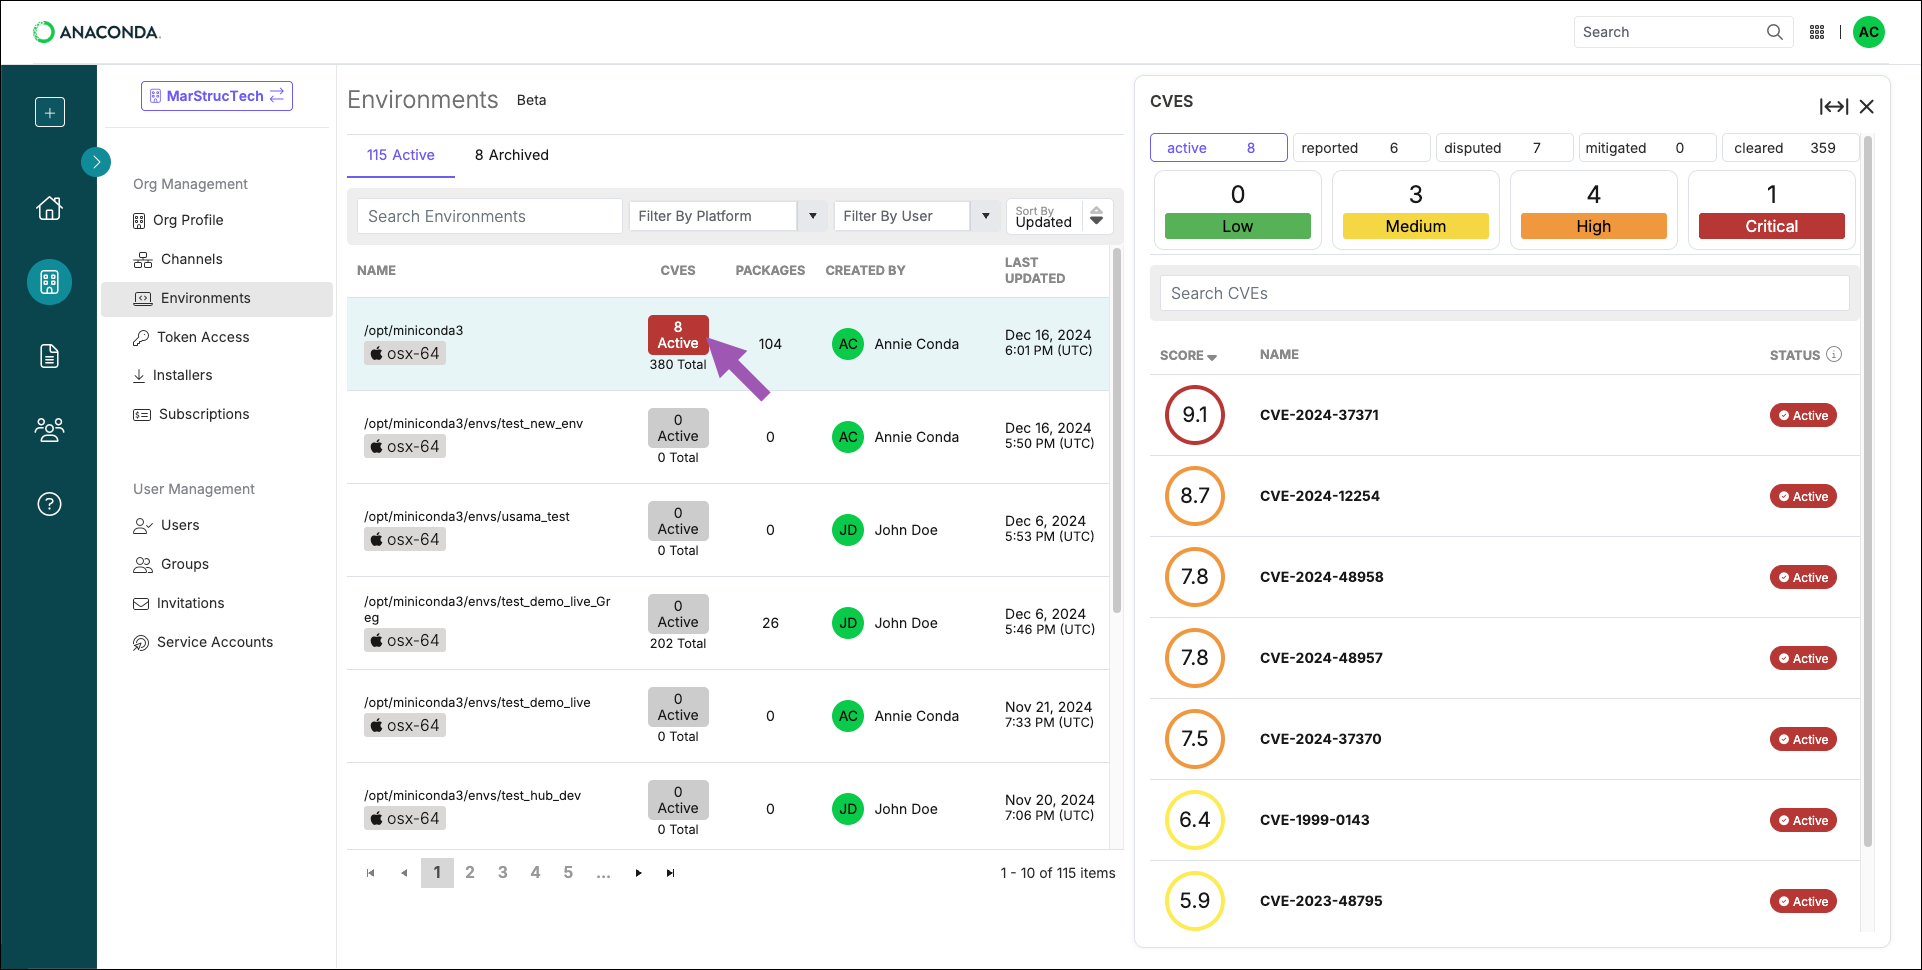
The active filter is automatically applied to the CVE panel’s displayed results.
For additional information about a CVE, search for it in a channel that has no policy applied.
For additional information about a CVE, search for it in a channel that has no policy applied.
Scanning environments
Scanning an environment checks the most recently saved conda environment log for CVEs associated with the packages it contains.Environments are automatically scanned when created, but not when they are logged or when the log updates. To ensure an accurate assessment of an environment’s current CVE state, perform a scan before you explore it in Anaconda.com. You can also scan environments locally to identify potential issues immediately.
- Scanning locally
- Scanning from your organization
Use To scan an environment for a specific CVE:
anaconda-audit to scan a local environment.To scan an environment, open Anaconda Prompt (Terminal on macOS/Linux) and run the following command:This command uses the default conda environment path prefix —
opt/anaconda3/envs/.If you have environments in non-default locations, you can use the --prefix flag to specify the path to the environment. For example:- Windows
- macOS/Linux
Open Anaconda Prompt and run the following command:
- Version number
- Build number
- Source channel
- CVE curation status
- CVSS score
- CVE status
