Creating an environment
- Log in to the console using the Administrator credentials configured after installation.
- Select Environments in the left menu.
-
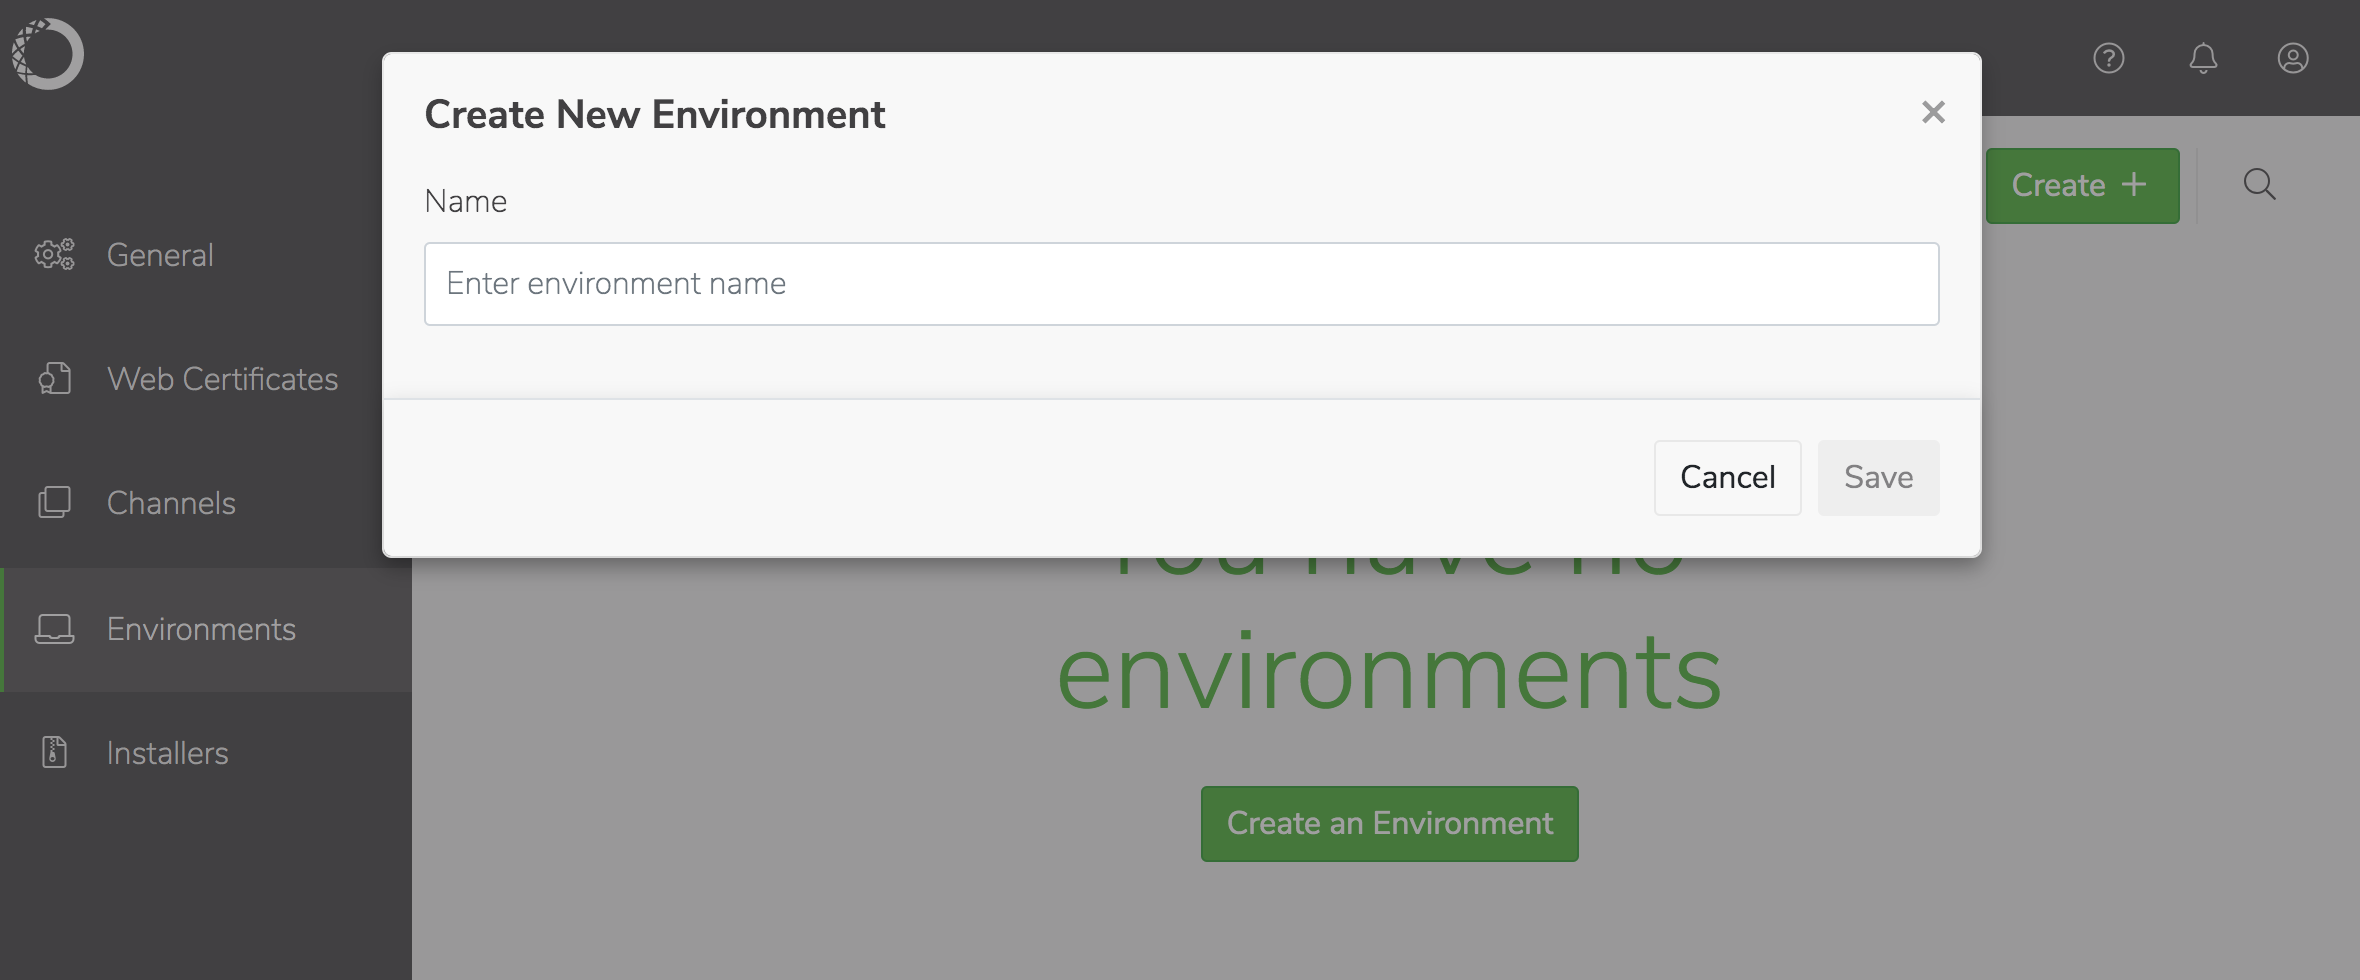
Click Create in the upper-right corner, give the environment a unique name and click Save.
Environment names can contain alphanumeric characters and underscores only.
-
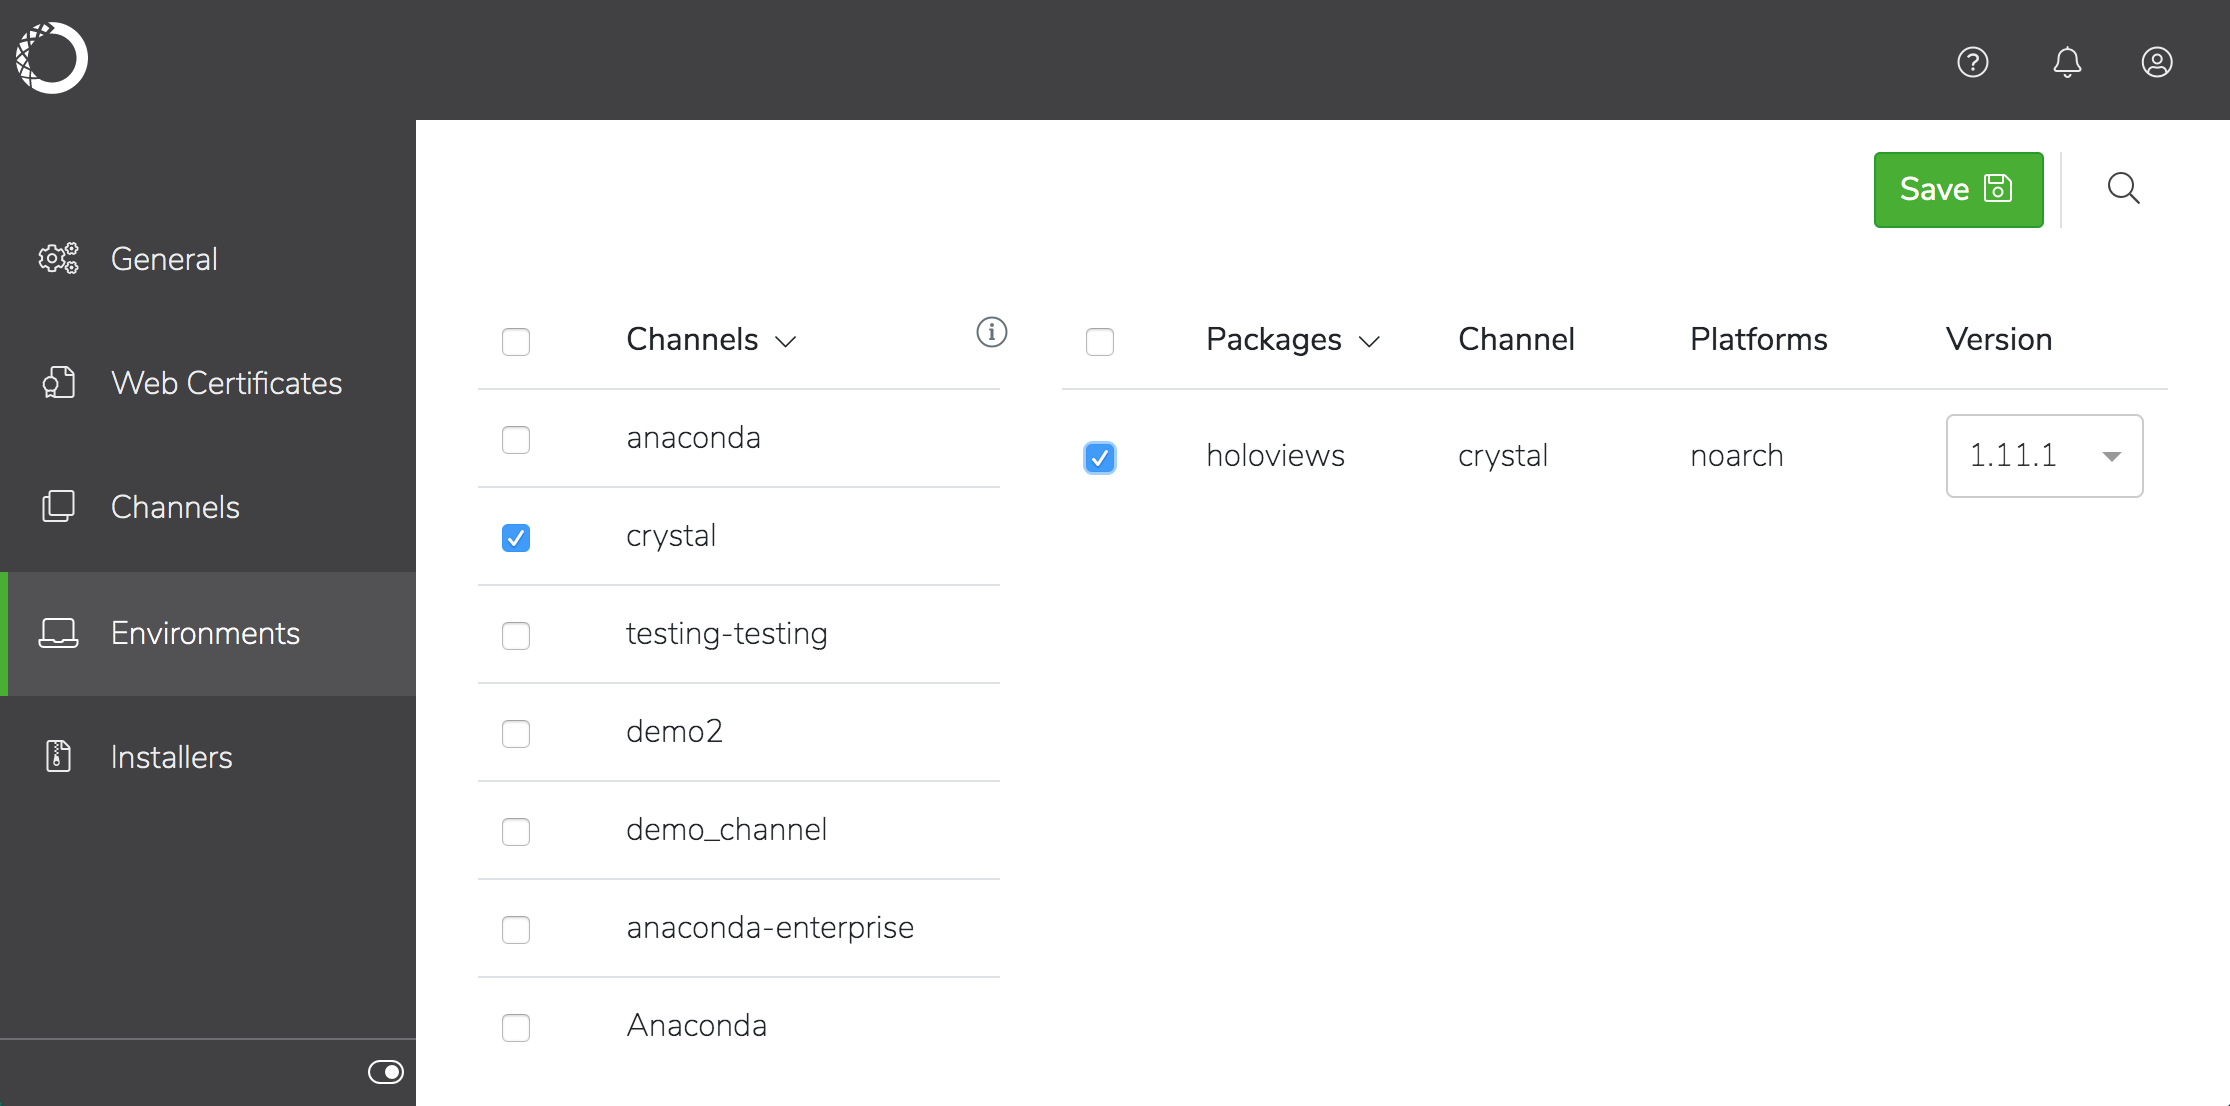
Check the channel you want to choose packages from, then select the specific packages—and version of each—you want to include in the installer.
-
Click Save in the window banner to create the environment.
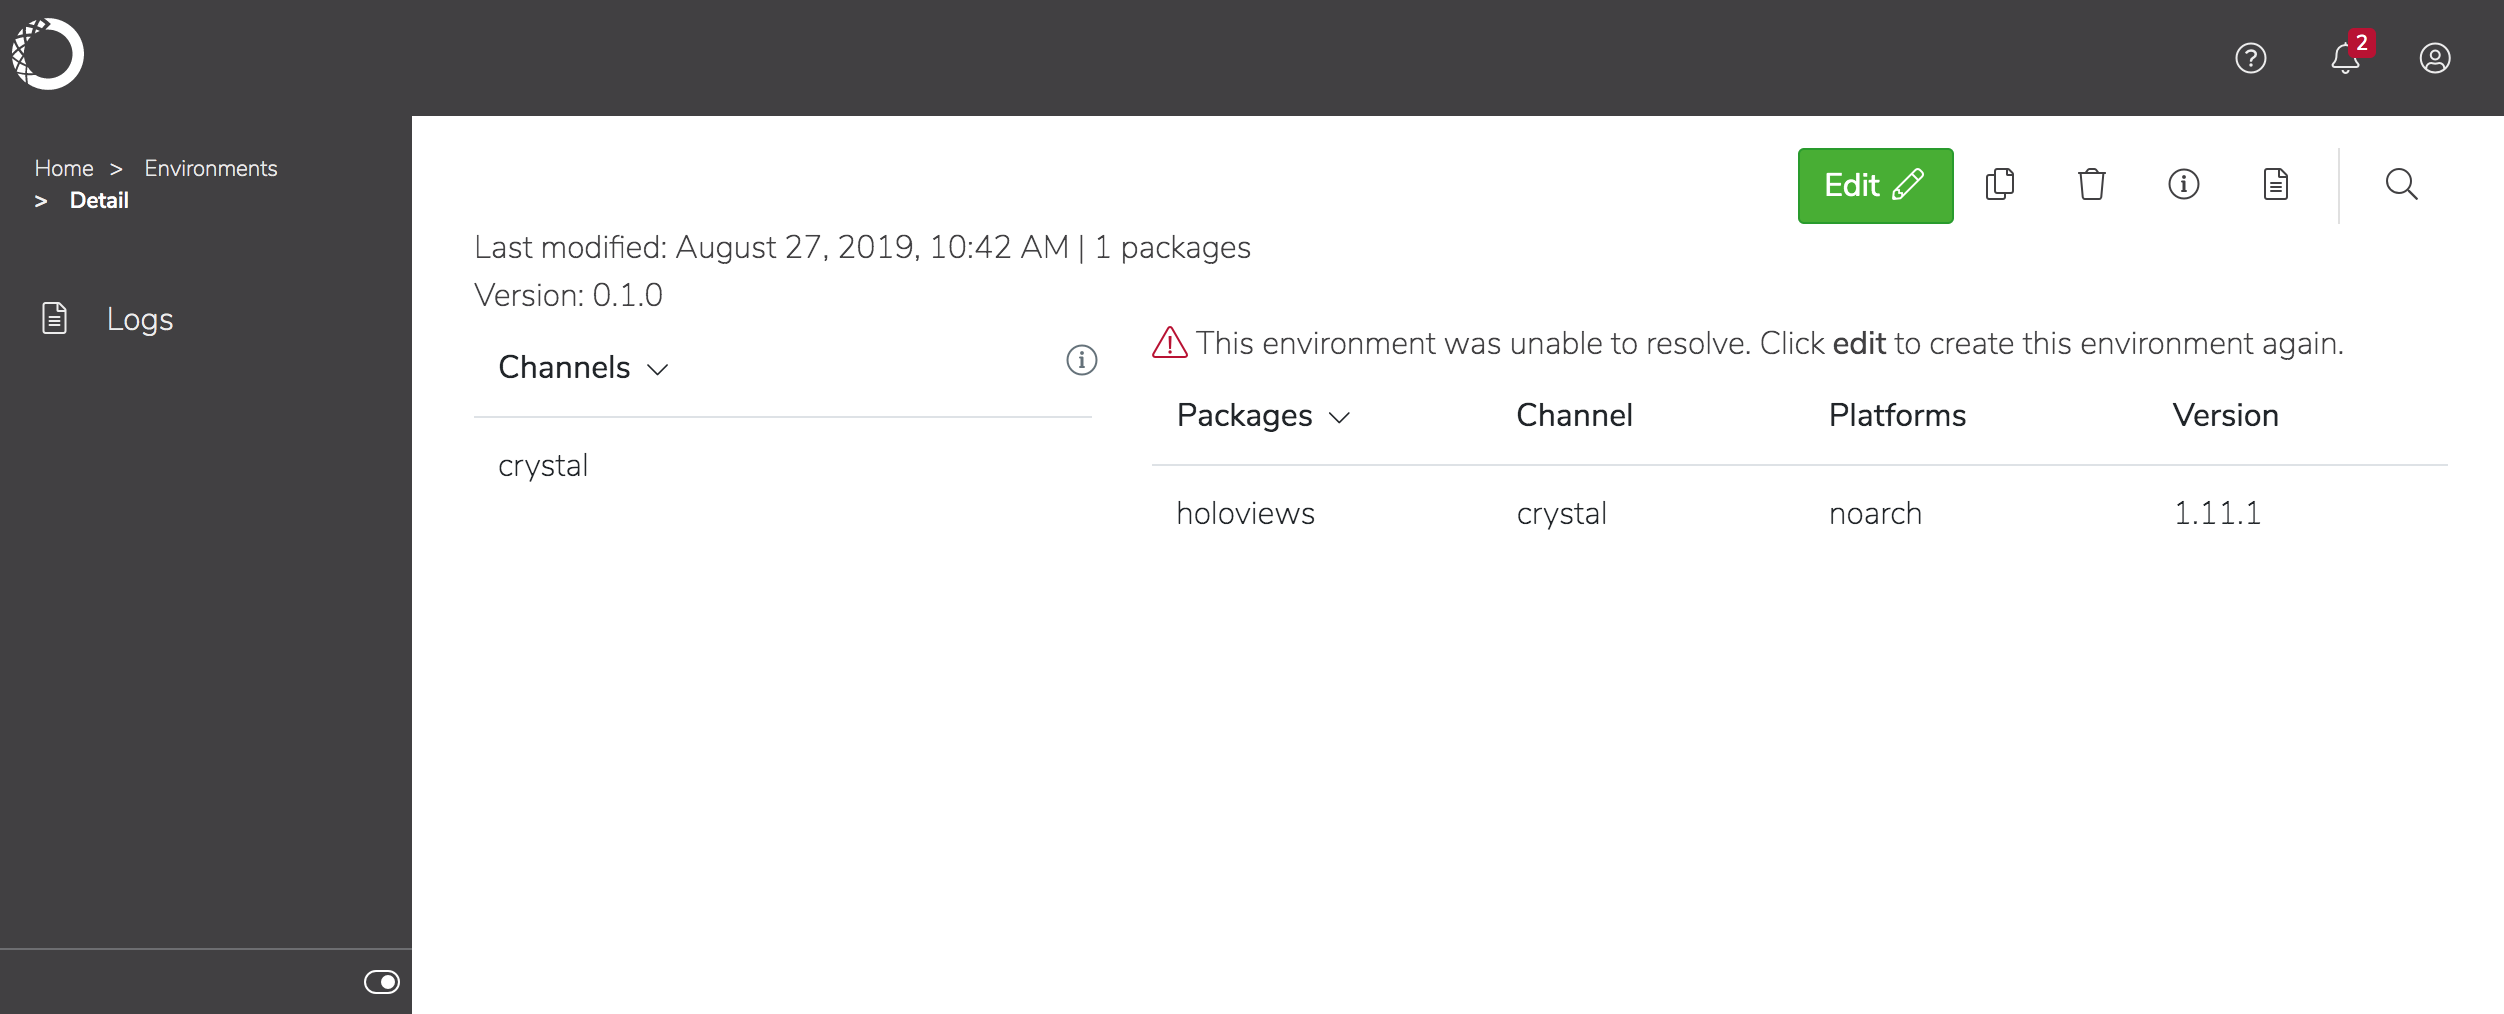
Workbench resolves all the package dependencies and displays the environment in the list. If there is an issue resolving the dependencies, you’ll be notified and prompted to edit the environment.
To edit an existing environment
- Click on an environment name to view details about the packages included in the environment, then click Edit.
- Change the channels and/or packages included in the environment, and enter a version number for the updated package before clicking Save. The new version is displayed in the list of environments.
To copy an environment
- Select the environment in the list and click the Duplicate Environment icon .
- Enter a unique name for the environment and click Save. The new environment is displayed in the list of environments.
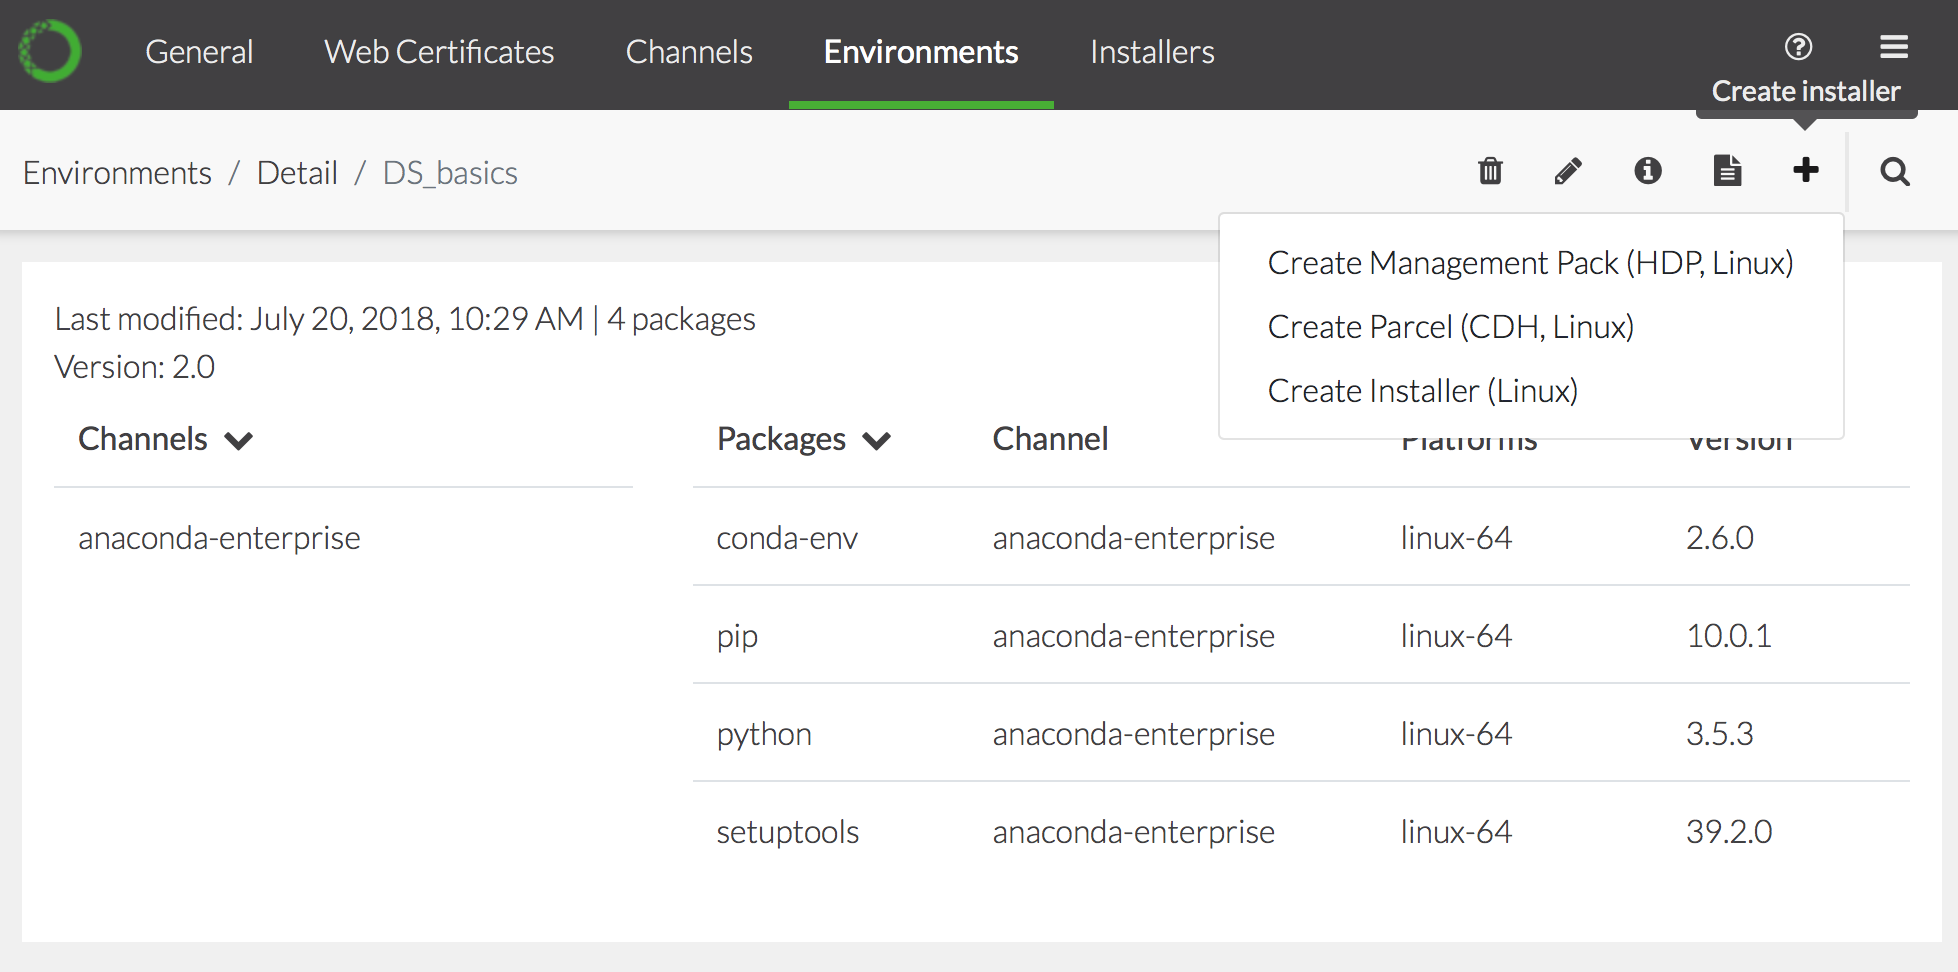
Creating a custom installer for an environment
-
Select the environment in the list, click the Create installer icon , and select the type of installer you want to create:
Workbench creates the installer and displays it in the Installers list:

- To view the relevant logs, download or delete the installer, click the icon and choose the appropriate command.