This feature is currently in beta.
Initializing Anaconda Code
Anaconda Code is included in the Anaconda Toolbox installation.
Understanding Anaconda Code
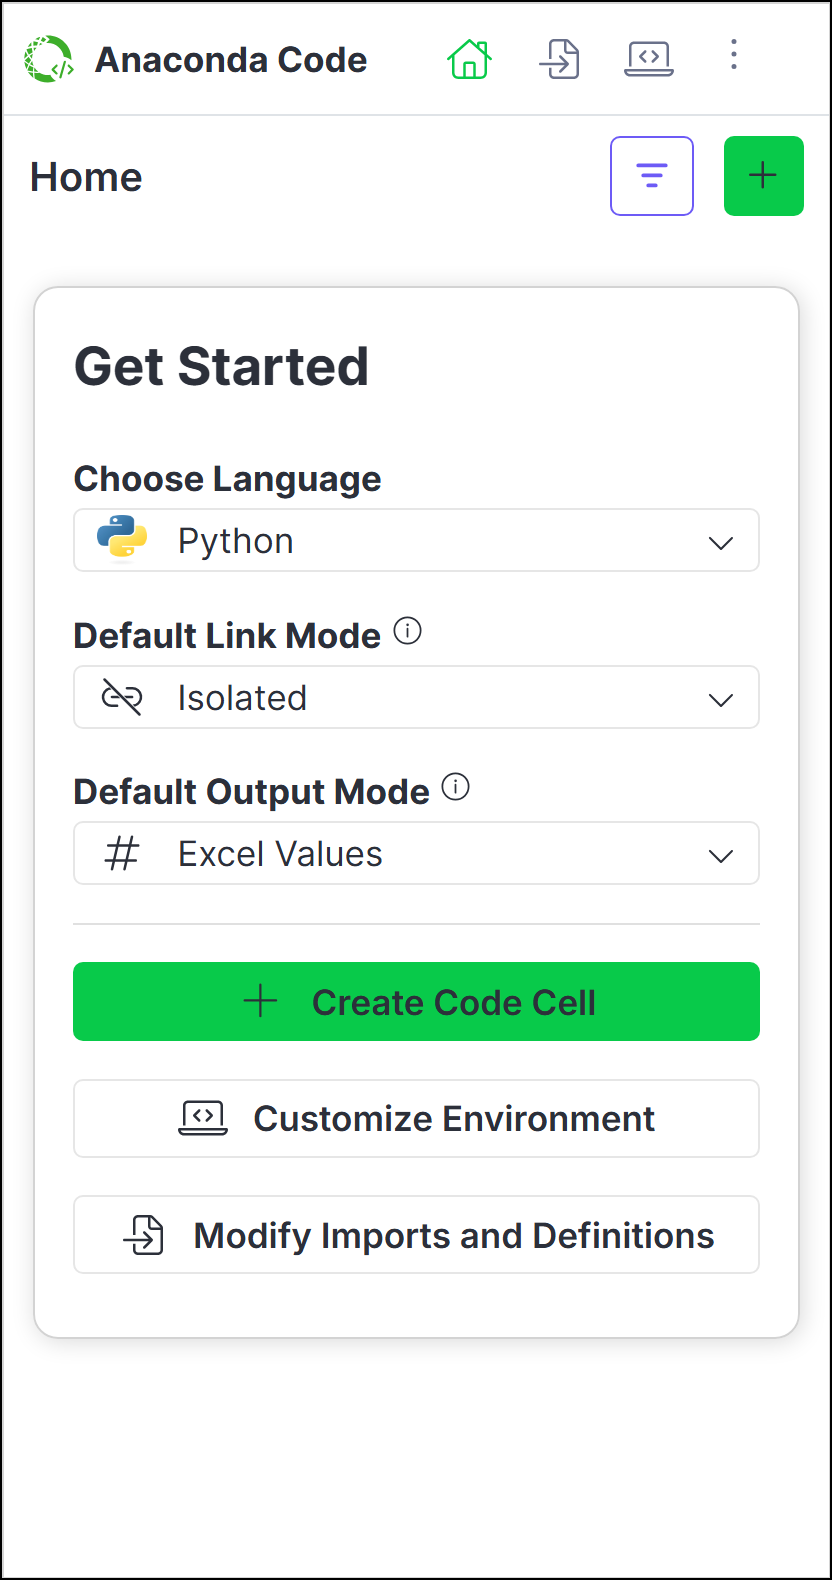
Let’s take a look at the different elements within Anaconda Code using the Home tab for reference: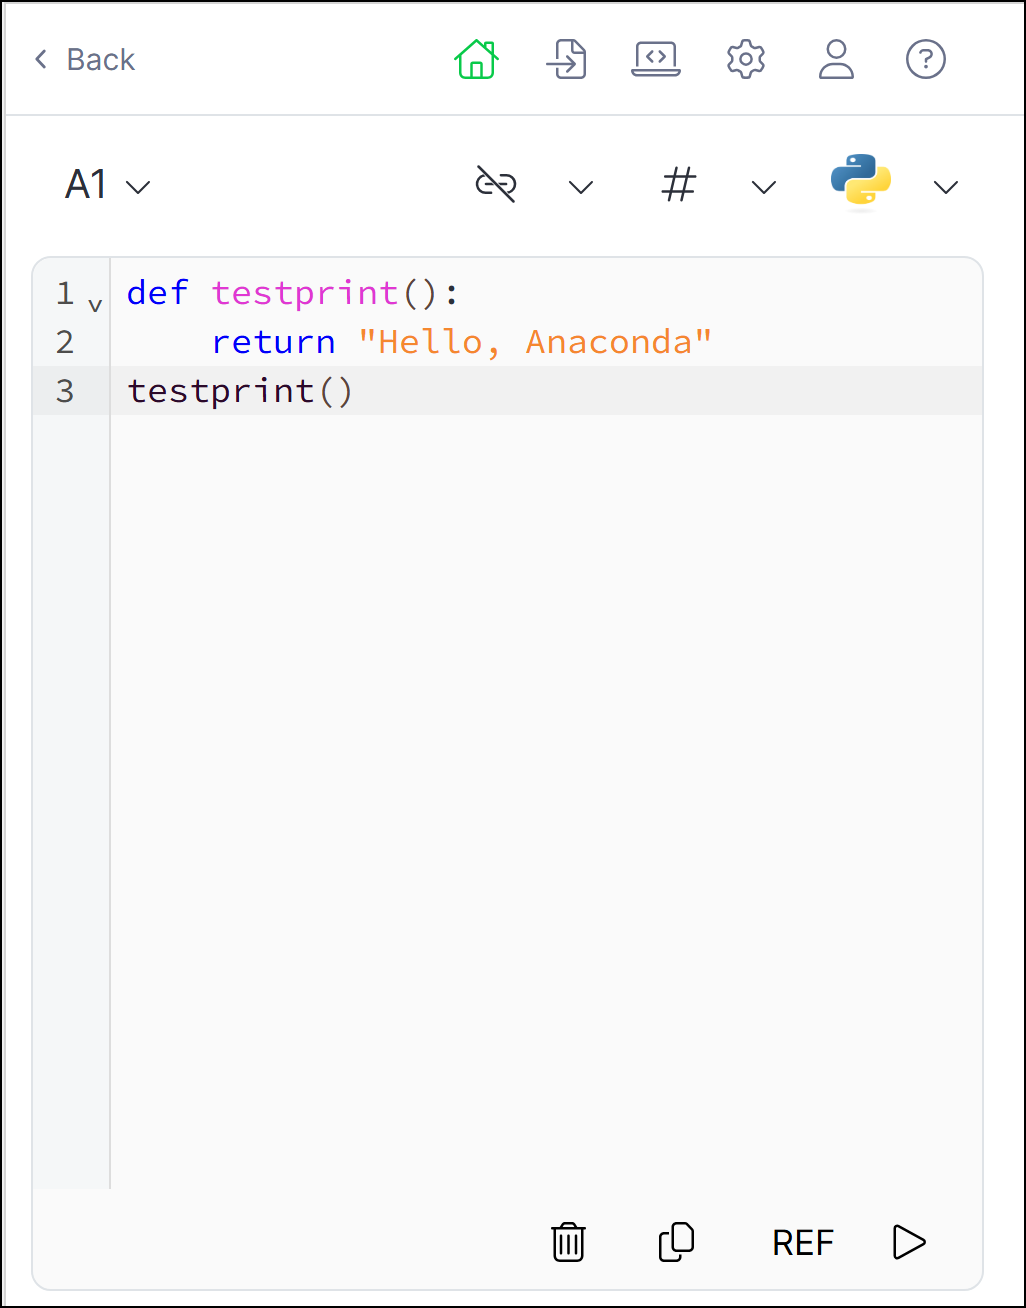
Imports and Definitions
Customize the code that affects all code
in your workbook and view script logs
Environment
Manage the packages and Pyodide or WebR version for your
coding environment
Settings
Modify the default settings for running code
Account
View profile, subscriptions, sign out, and app details
Help
Access bug reporting, documentation, community forums, and privacy policy links
Active Code Cell Reference
The active code cell where your code will run
Linking
Toggle cell linking between isolated and linked modes
Cell Output
Choose whether to output cell values as an Excel value or an Anaconda Code object
Language
Choose Python or R for the code cell
Delete
Delete the code cell
Copy
Copy the contents of the code editor
REF
Create a reference to data in the worksheet.
Run
Run the code in the active code cell
Running code
Create an Anaconda Code cell that can run Python or R code using the following steps:-
From Home, click , then select a cell where you want to insert your code.
Subsequent code cells will be in the same language as the previously created one. To change the language, first create a new code cell, then change the code cell’s language selection in the code editor.
- Set the cell linking and output options.
-
Choose Python or R as the code language for the cell.
If you change the language for the cell to a language you haven’t yet used, you might need to click Load Environment to load the new language’s environment for the first time.
- Enter your code in the code editor.
-
(Optional) If you want to reference a range of data from your spreadsheet or an Anaconda Code object in your code, click REF, then select the range of cells or Anaconda Code cell.
Using the REF function
When you use REF to select data cells or Anaconda Code cells, Anaconda Code creates aREFfunction in your code that returns a list of lists. The Imports and Definitions tab includes the following pre-defined functions to help convert the returned list of lists to different data structures.- Python
- R
You can change the behavior ofto_df(),to_array(), andto_list()from the Imports and Definitions tab. -
Click Run. The cell will display the return value of the last evaluated expression. Your changes are automatically saved whenever you re-run the code.
If you write code that doesn’t have a return value (for example, you define a function but don’t call the function) and click Run, the cell will display
</>NoneType.
Editing code
Do not edit your code in the cell itself; instead, modify and re-run your code directly in Anaconda Code.An Anaconda.com account is required for users to edit shared code.
- From the Home page, click more on the code you want to edit.
- Click Edit in full view to open the edit view.
- Adjust your code, then click Run.
Managing the environment
Anaconda Code hosts a single, self-contained environment, which manages the back-end software packages that enable you to run Python or R code within your Excel workbook. You can manage software packages within this environment to extend your code’s processing, visualization, and analytical capabilities, and even select the version of Pyodide (the WASM engine used by PyScript) or WebR (the WASM engine used by WebR) that you want to run.Choosing a Pyodide or WebR version
The latest version of Pyodide or WebR is used by default for all new spreadsheets. For existing spreadsheets, the Pyodide or WebR versions and packages necessary for your code are pinned to the environment. You can switch versions using the following steps:- From the Environment tab, click Edit.
- Select the Pyodide or WebR version.
- Click Save Changes.
Managing software packages
- From the Environment tab, click Edit.
- To add new packages, click Add.
- (Optional for Python) Click the down arrow to add from either PyPI, the PyScript app, or a direct download link to a Python wheel (
.whl). - Search for the package name, then click Add beside the package you want to add.
- Once you’ve added all the packages you want to include, click Add Packages.

Packages that contain compiled code might not be compatible with the PyScript or R WASM engine. For more information, visit PyScript.net or r-wasm.org.
Customizing code initialization
You can think of Anaconda Code’s Imports and Definitions as an initialization file for your code or like the first cell in a Jupyter Notebook. All code in this section is available to all cells, whether they are run isolated or linked.Imports
Imports
To customize your code’s imports:
-
On the Imports and Definitions tab, establish the connections to the packages you need to run your code by adding your import statements beneath the
# Add importscomment.You can onlyimportfrom the packages included in the standard Python or Web R installation and those listed in the Environment tab. - Click Apply.
Definitions
Definitions
To customize your code’s definitions:
-
From the Imports and Definitions tab, enter any classes or functions you’d like to define beneath the
# Definecomment.Anaconda Code comes with pre-defined functions for both Python and R. See Using the REF function to learn more about using these functions. - Click Apply.
Creating user-defined functions
User-defined functions (UDFs) allow you to write Python or R functions and call them directly from a spreadsheet cell.UDFs in Python
UDFs in Python
Creating and calling a UDFUsing range argumentsSpecifying a You can also add type hints for ranges. For example,
-
From the Imports and Definitions tab, decorate a function with
@UDF, as shown in the following example:Python UDF Example - Click Apply.
-
In an open cell, enter
=ANACONDA. If you added the example above to your definitions list, the option to callANACONDA.MY_CUSTOM_FUNCTIONappears in the dropdown.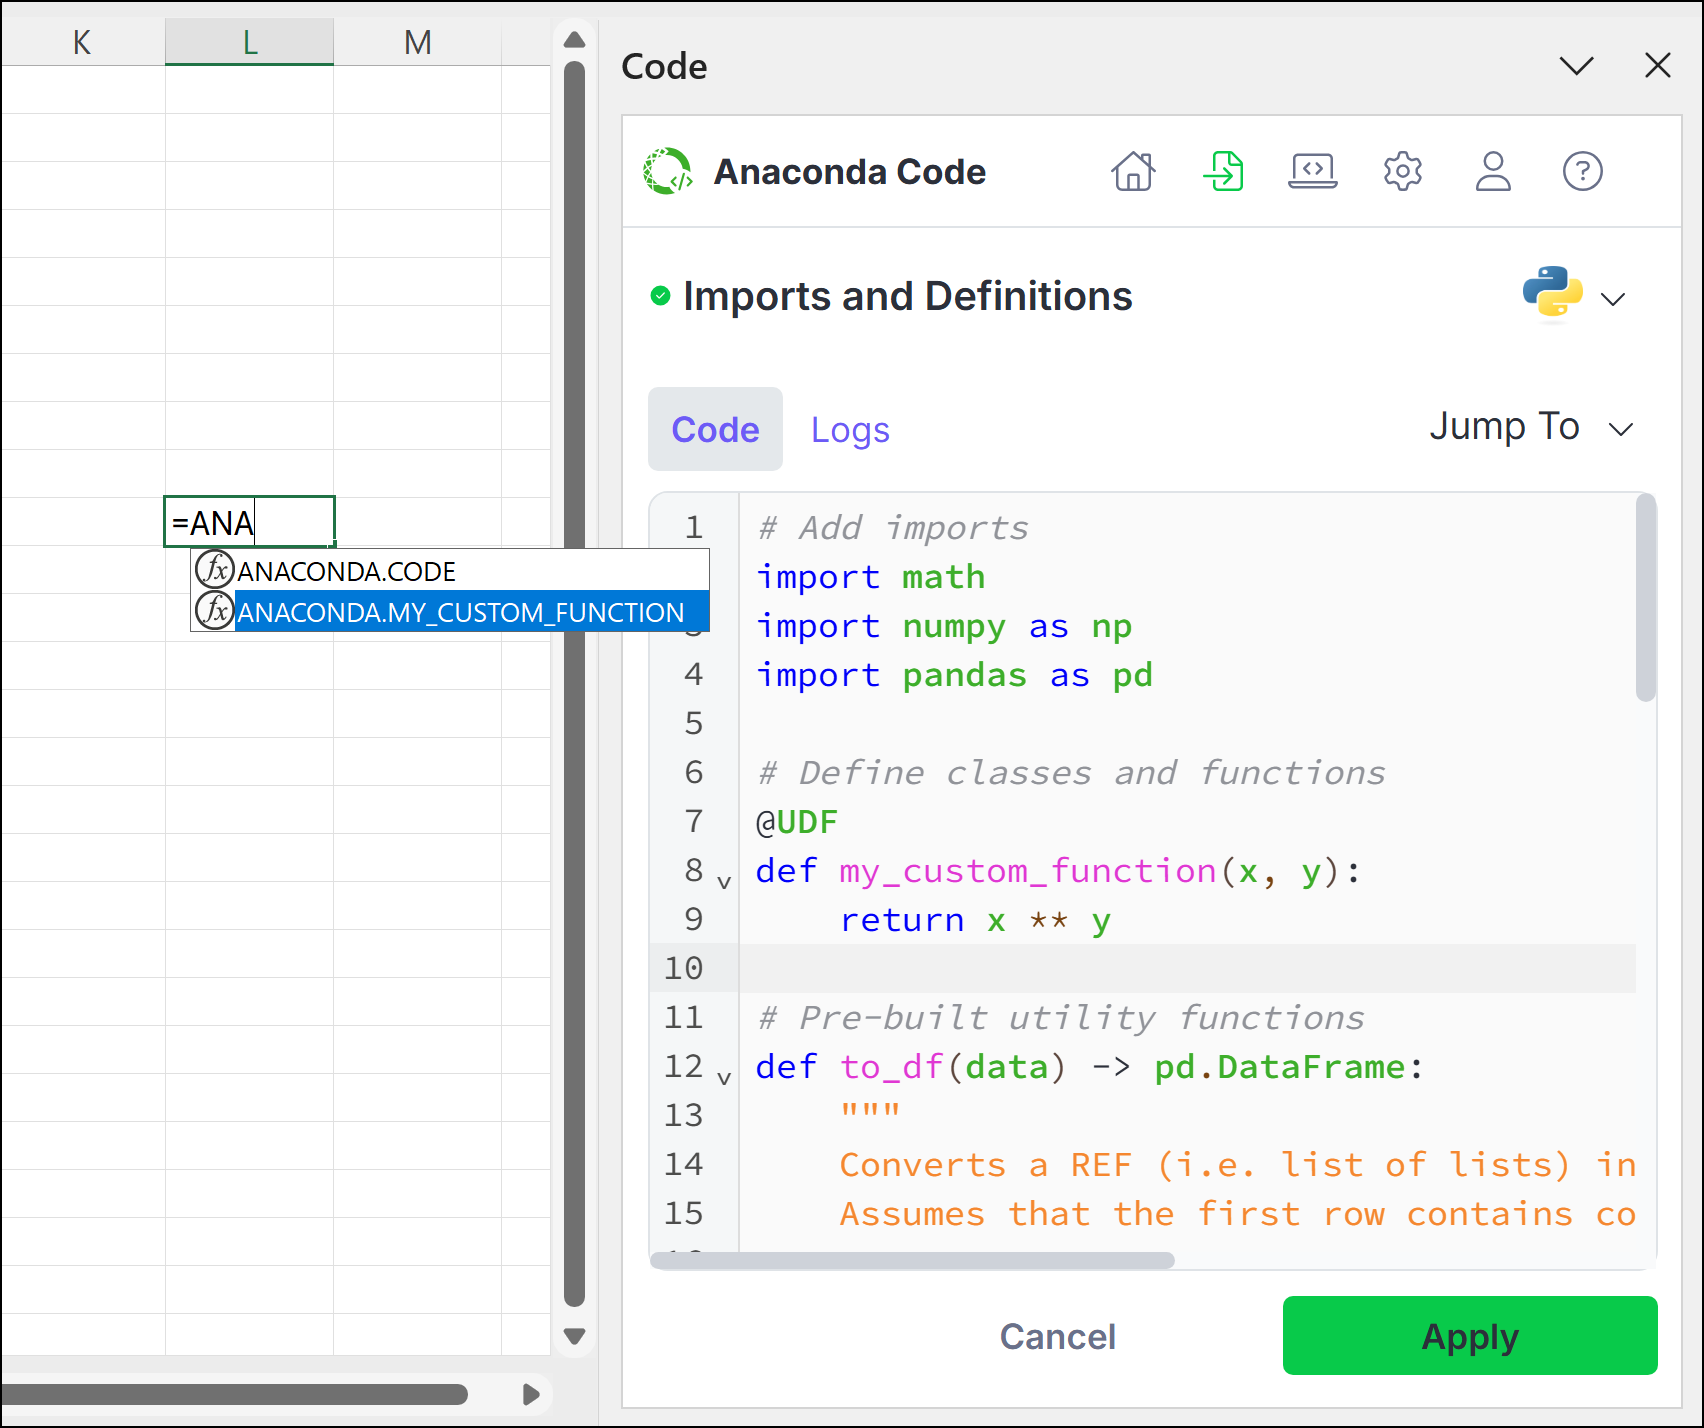
-
Arrow down to
ANACONDA.MY_CUSTOM_FUNCTION, press Tab, and then complete the function. - Use Ctrl+Enter (Windows)/Ctrl+Return (macOS) to run the code.
If you’d prefer the UDF uses a name other than the function name, use the 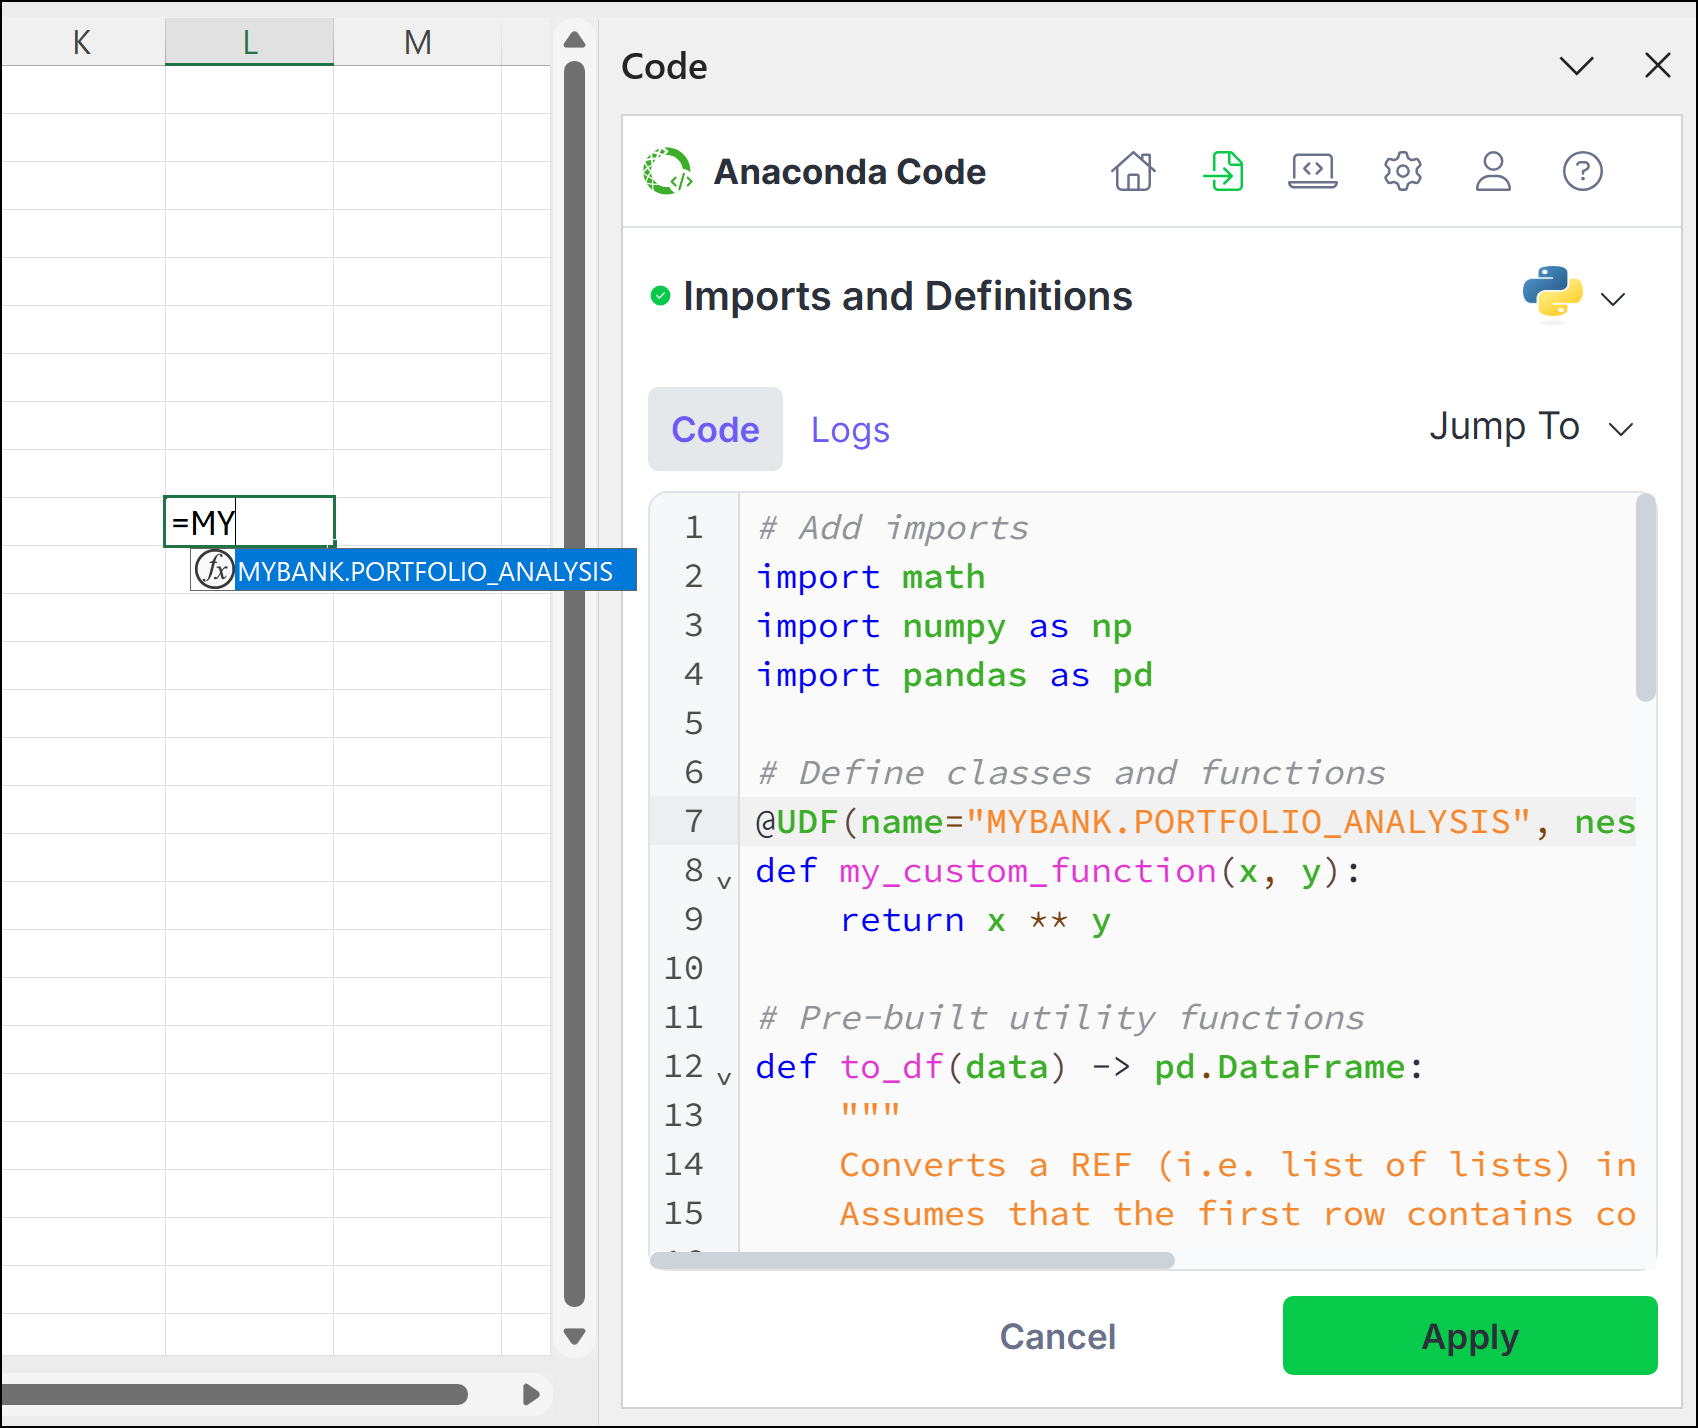
name argument to provide a unique name. Set nested to False to remove ANACONDA. from the name.Renaming Python UDF Example
UDF.Range argument tells Excel that the input of the function is a 2D range. Without specifying this, Excel will show a #CALC! Unliftable Array error if a 2D range is passed into the UDF. Parameters specified as UDF.Range will always be passed as a 2D array to the function, even if a single cell is passed in.Example usage of UDF.Range:Python Range Example
UDF.Range[str].UDFs in R
UDFs in R
Creating and calling a UDFUsing range argumentsSetting the Adding function documentationTo add documentation to your function, use the
-
From the Imports and Definitions tab, register the UDF with
UDF.register()and pass the function as an argument, as shown in the following example:The UDF must be registered after the function is defined.R UDF Example - Click Save and Apply.
-
In an open cell, enter
=ANACONDA. If you added the example above to your definitions list, the option to callANACONDA.MY_CUSTOM_R_FUNCTIONappears in the dropdown.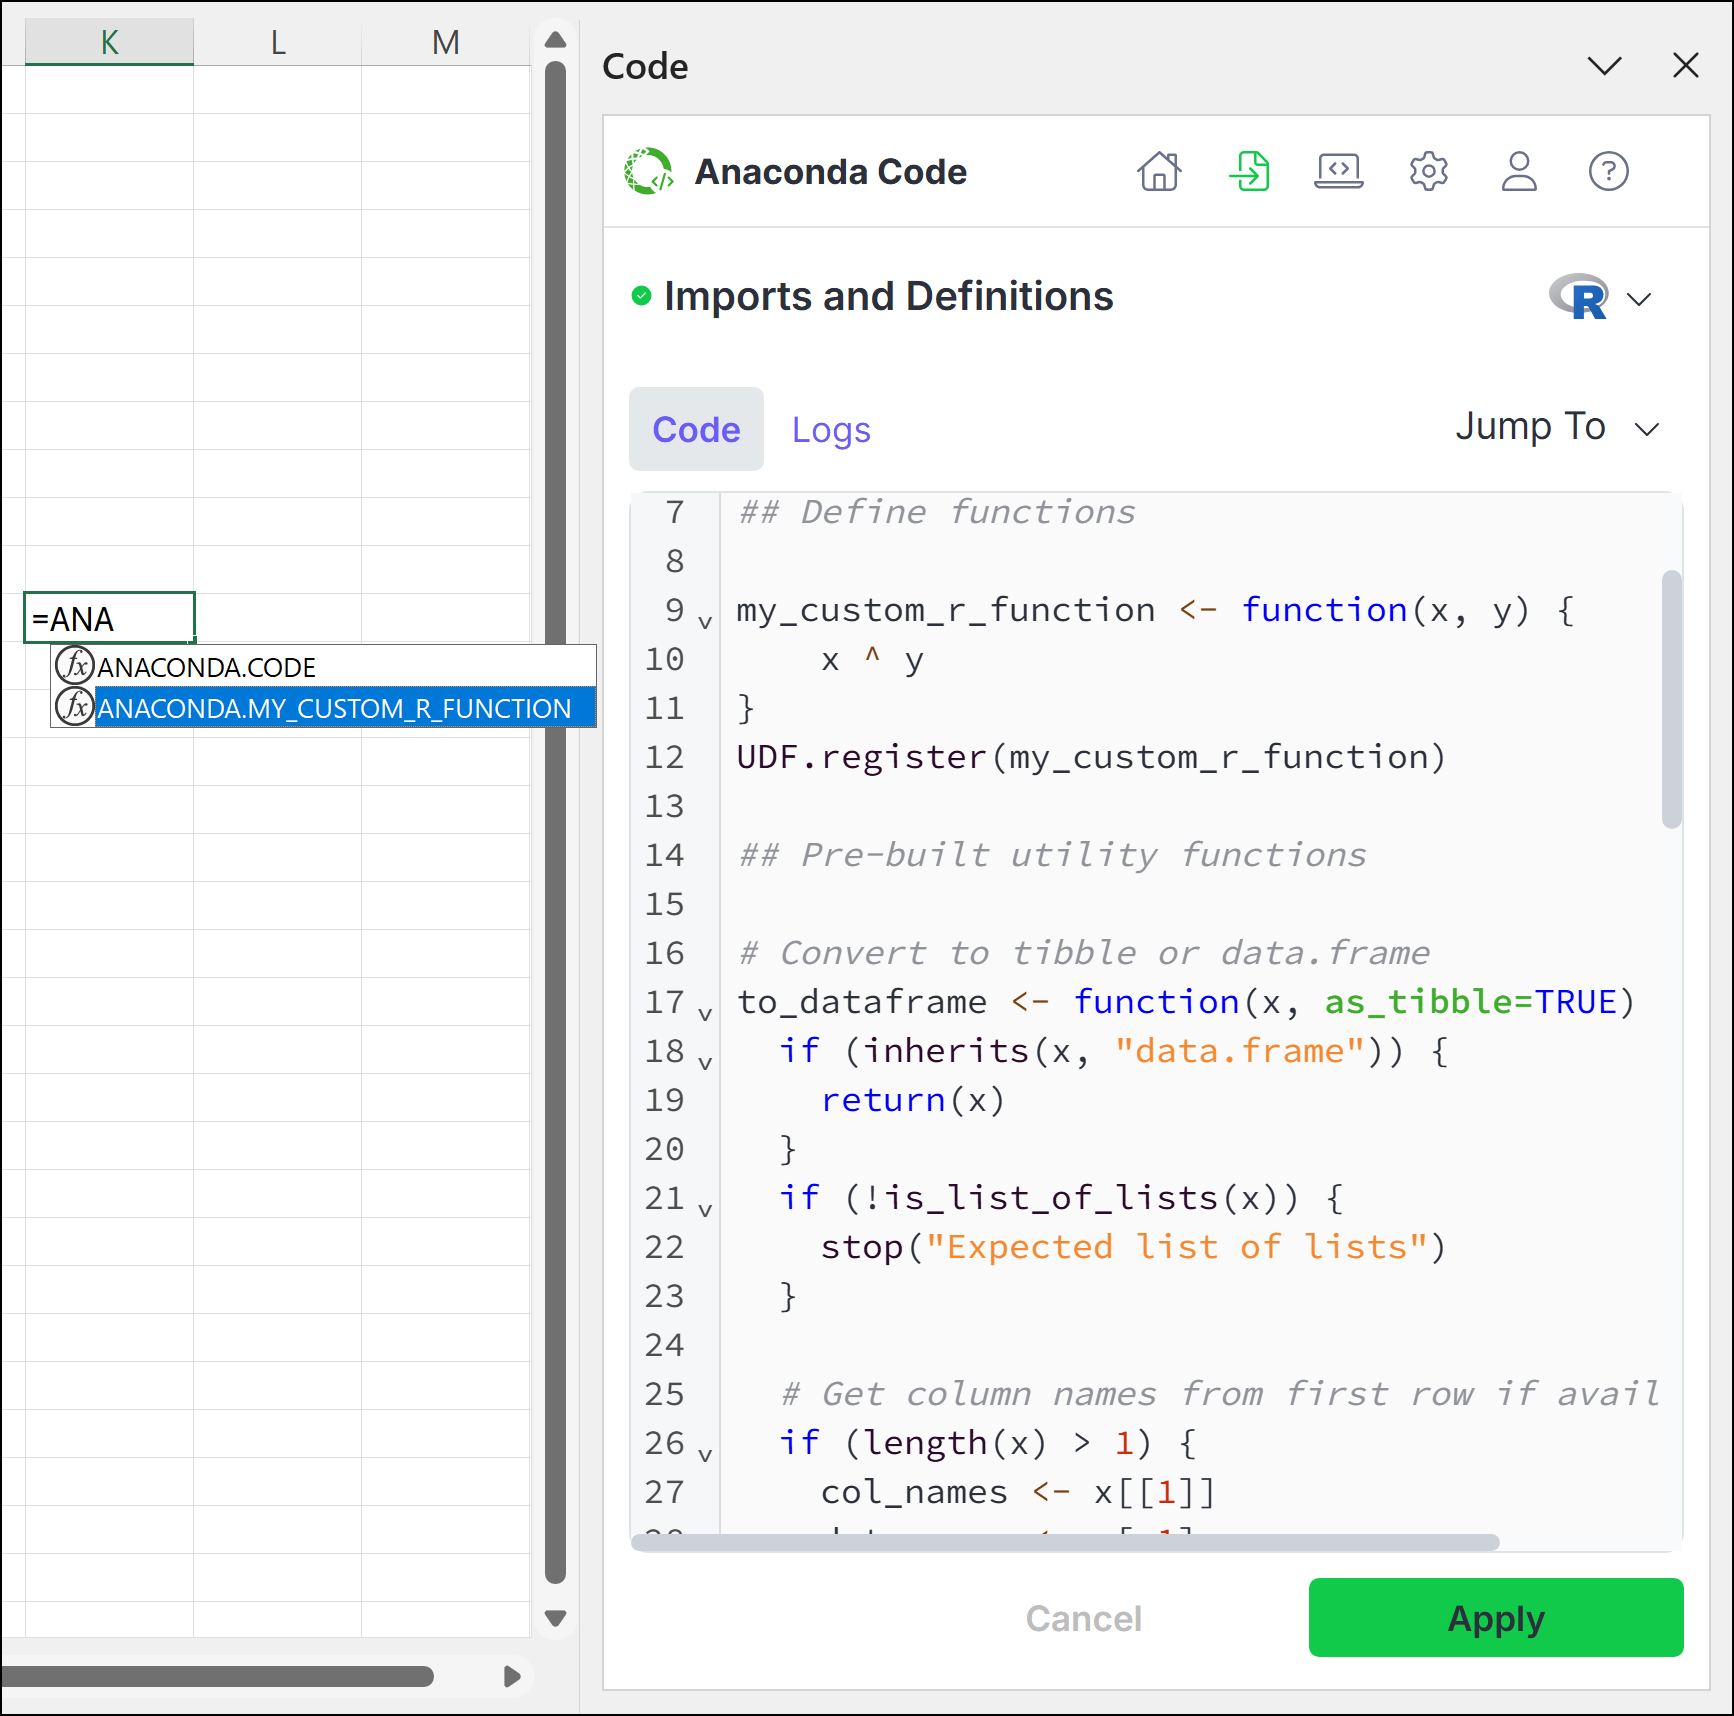
-
Arrow down to
ANACONDA.MY_CUSTOM_R_FUNCTION, press Tab, and then complete the function call. - Use Ctrl+Enter (Windows)/Ctrl+Return (macOS) to run the code.
If you’d prefer the UDF uses a name other than the function name, register the function with the UDF, then use the 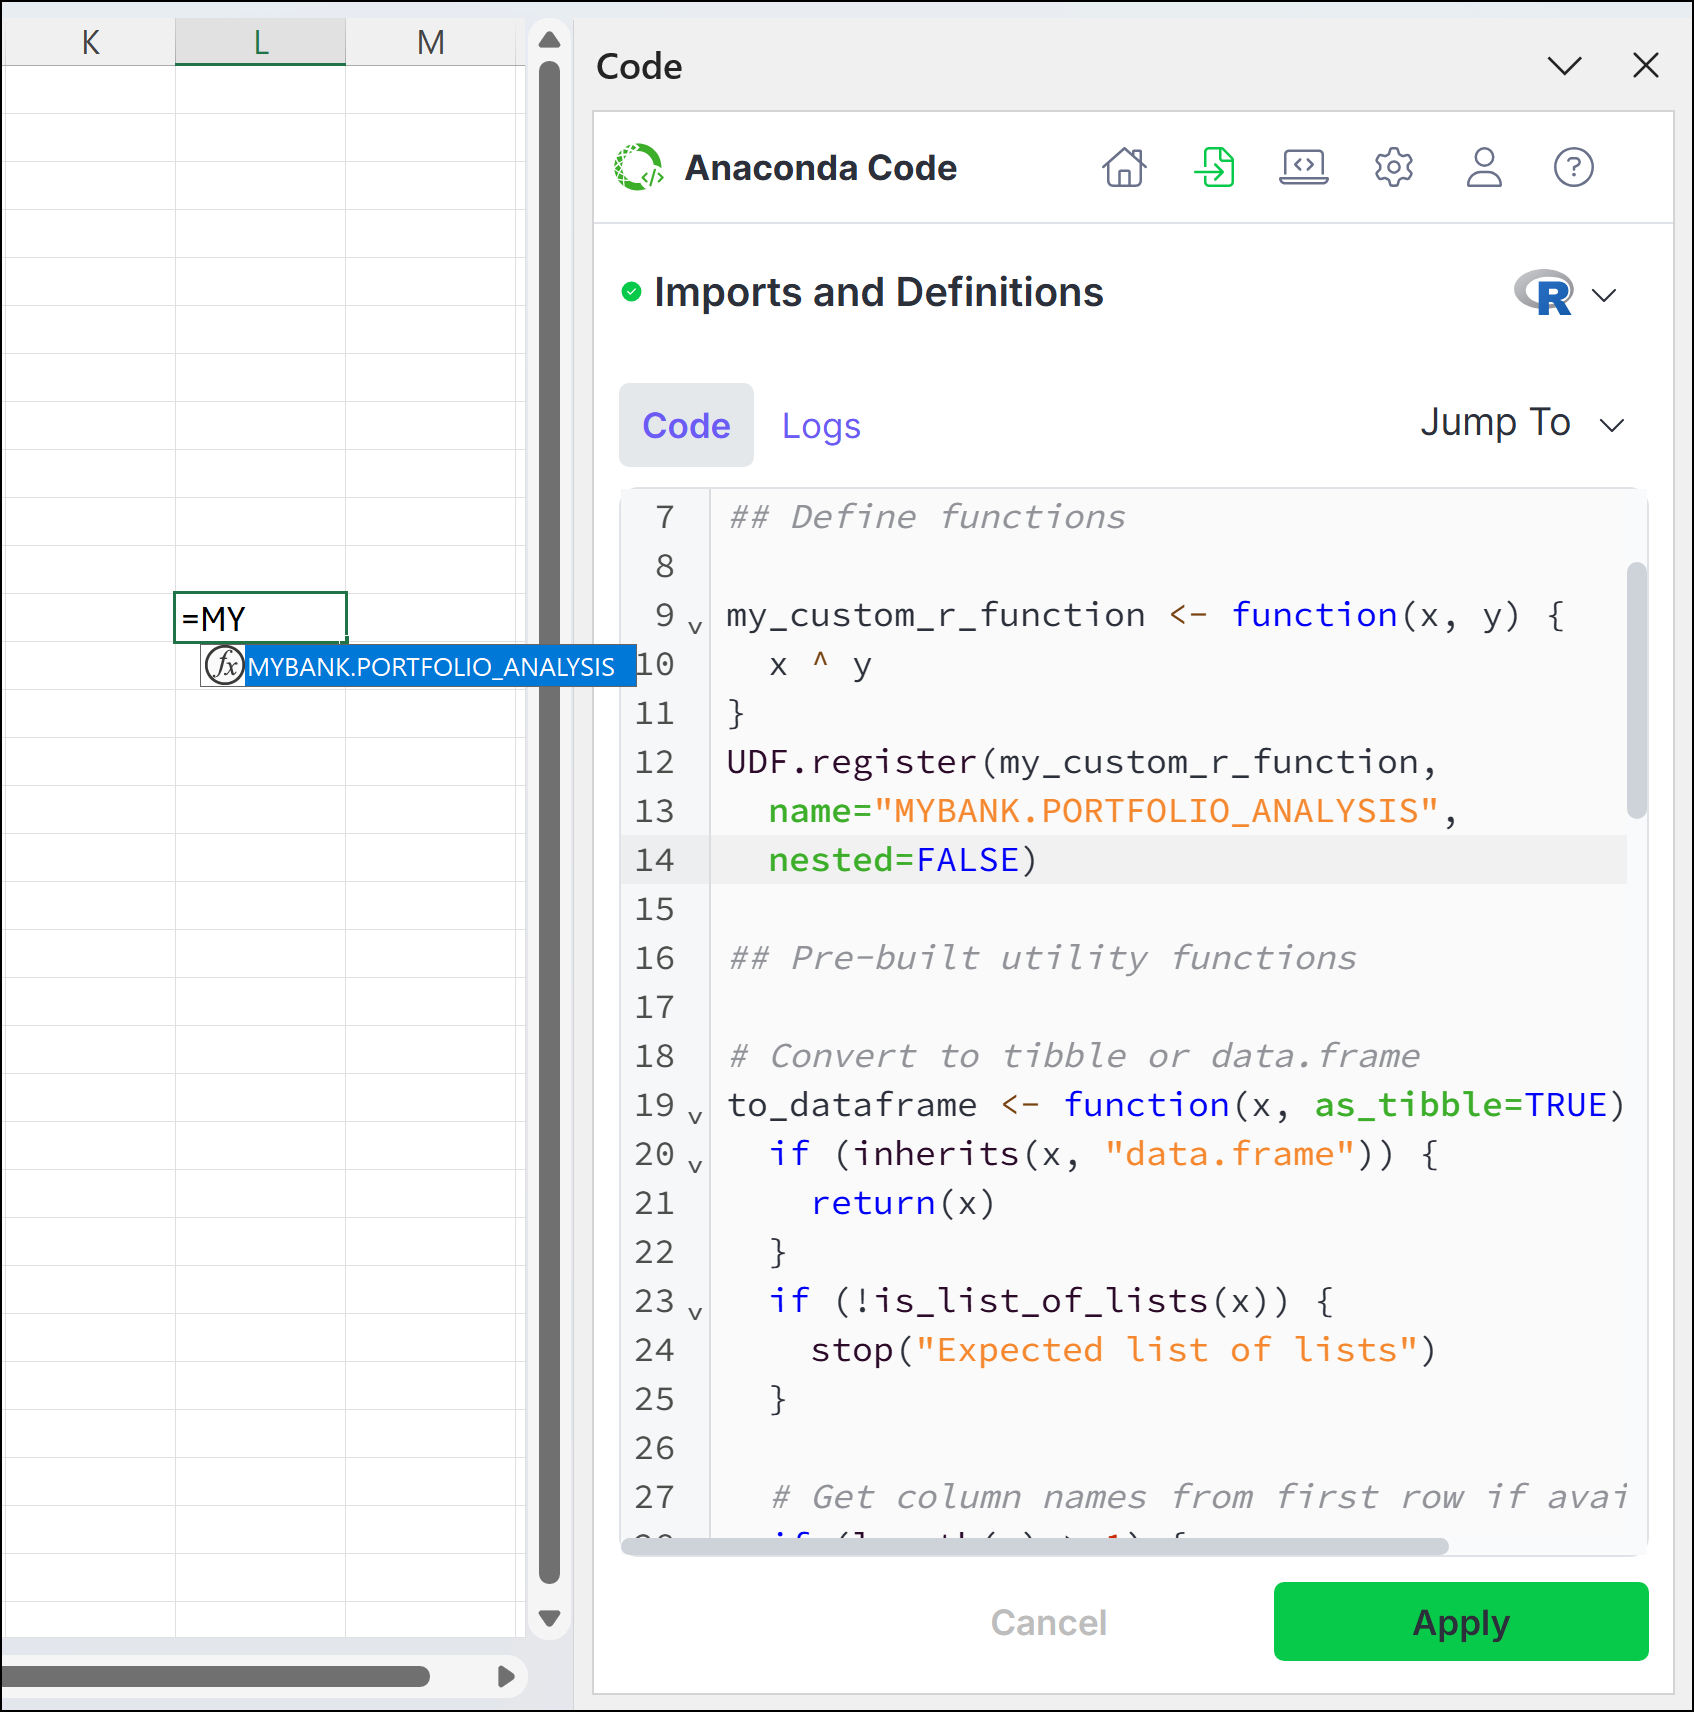
name argument to provide a unique name and set nested to False to remove ANACONDA. from the name.Renaming R UDF Example
range_args parameter tells Excel that the input of the function is a 2D range. Without specifying this, Excel will show a #CALC! Unliftable Array error if a 2D range is passed into the UDF. Parameters specified as range_args will always be passed as a 2D array to the function, even if a single cell is passed in.Example usage of range_args:R Range Example
doc parameter:R Documentation Example
Modifying workbook settings
While you can adjust the settings for running code in your workbook on a case-by-case basis when creating and editing code, you can also assign default settings from the Settings tab.Cell linking
Run Isolated
Run Isolated
When a code cell is run in isolated mode, its code runs independently of other cells. Variables defined within an isolated code cell can’t be referenced by other code cells, and variables in other code cells likewise can’t be referenced by the isolated code cell.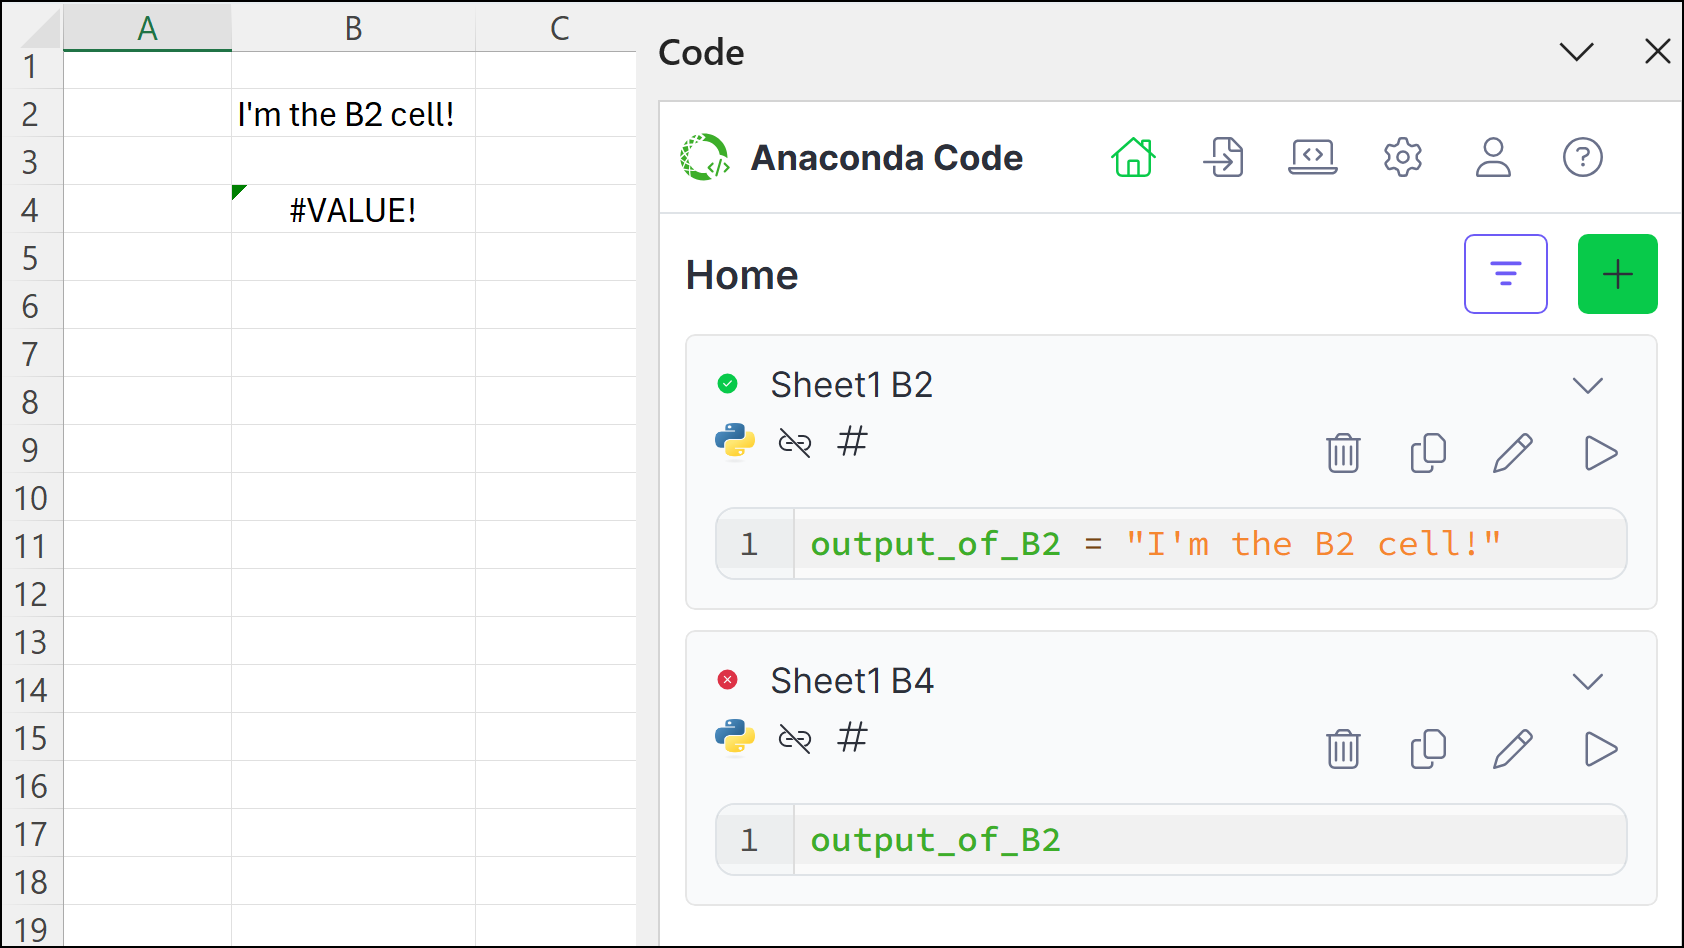
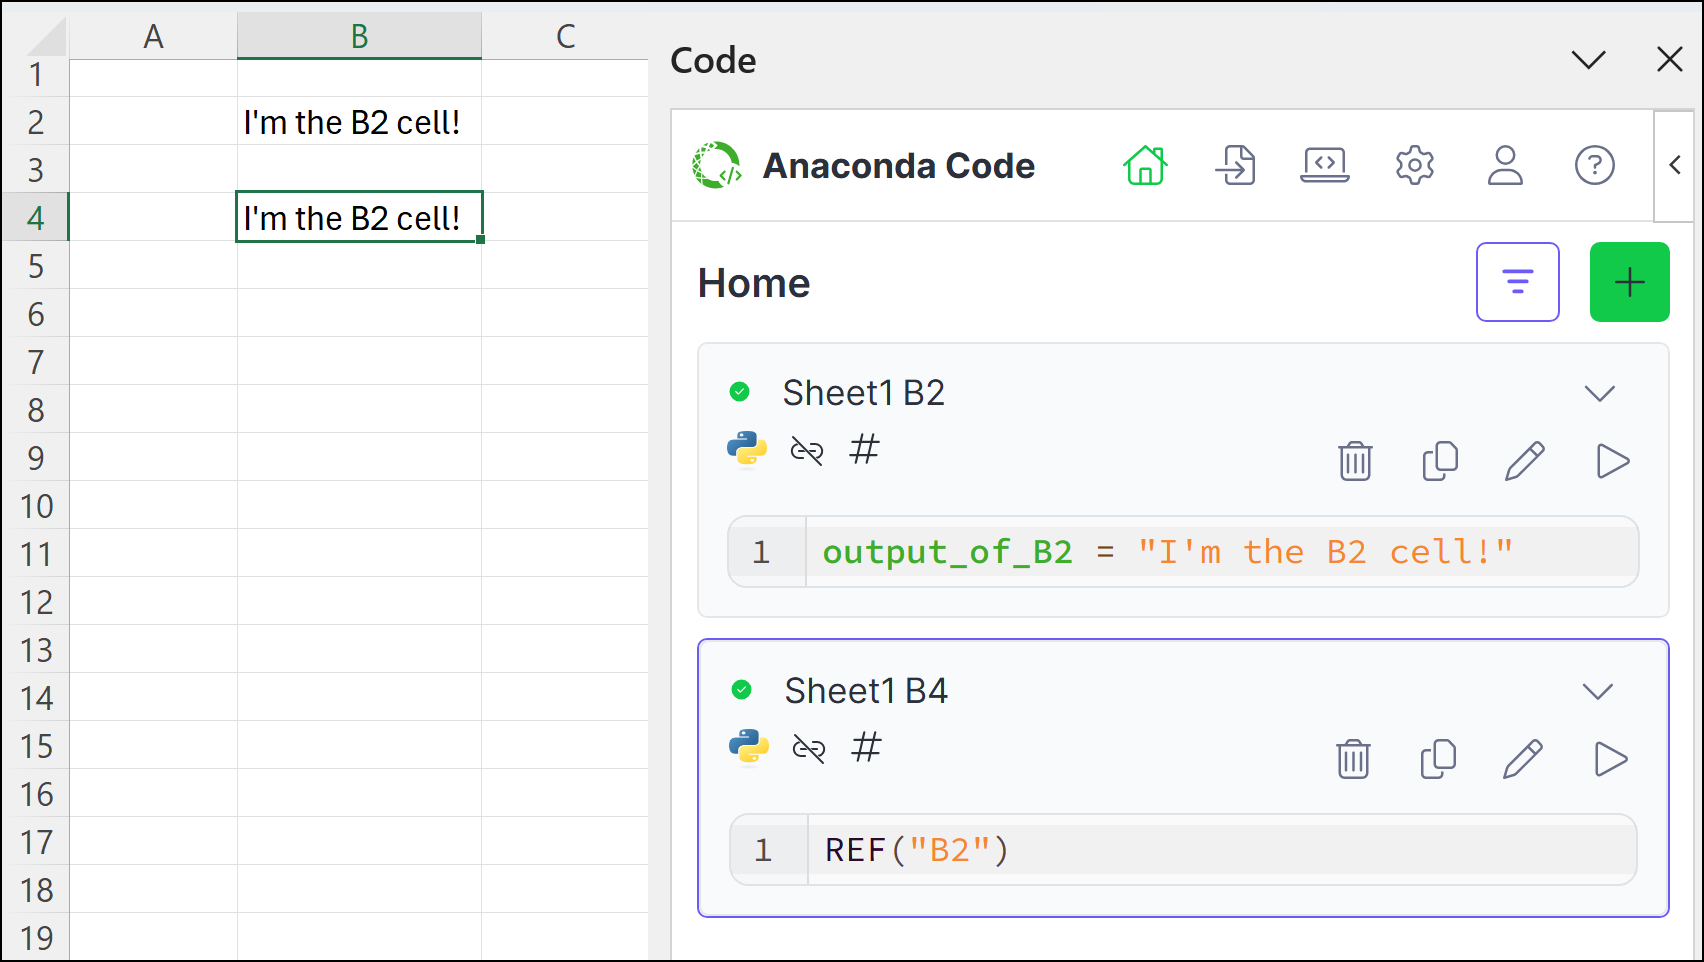
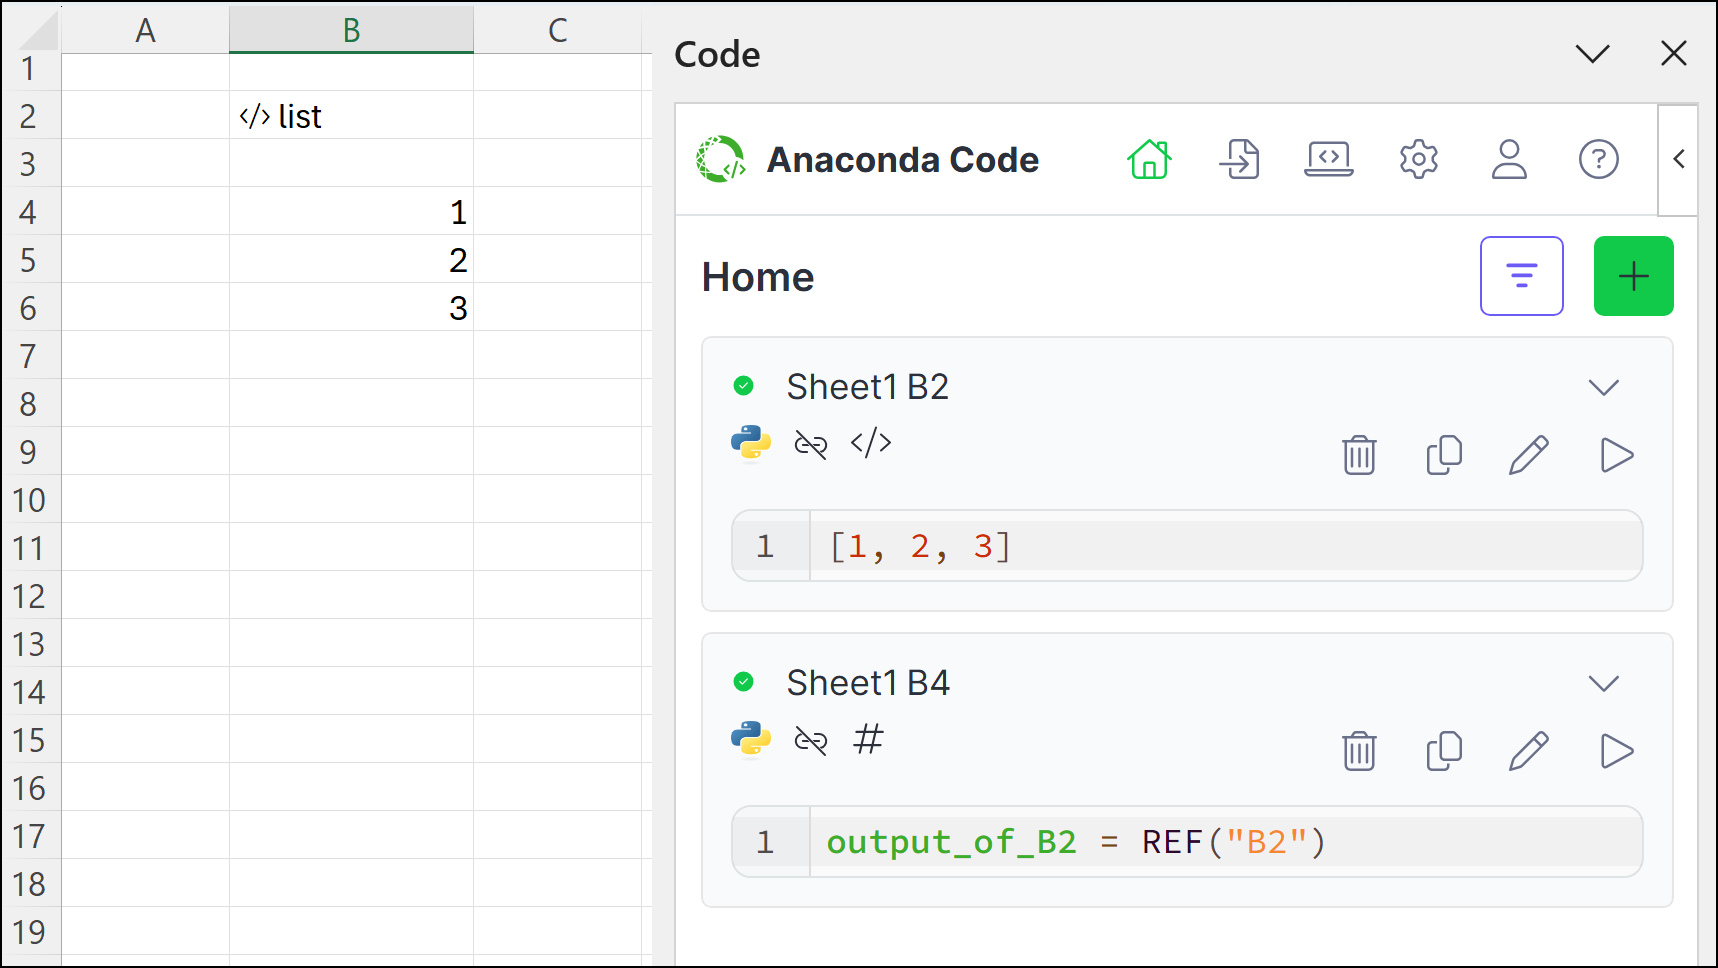
output_of_B2 variable is defined in cell B2 and assigned the string "I'm the B2 cell!". When this code is run in the B2 code cell, the B2 cell displays "I'm the B2 cell!". However, since both cells are running in isolated mode, when output_of_B2 is referenced in the B4 code cell, the B4 cell displays a #VALUE! error because B4 cannot access the variable in B2.Using the REF functionYou can bypass isolation rules as needed using the REF function to create a reference from one isolated code cell to another.REF("B2"). When the B4 code cell is run, it returns the value of B2, "I'm the B2 cell!". Changes to the B4 cell don’t cause the B2 cell to recalculate, but changes to the B2 cell will cause the B4 cell to recalculate. Code cells can include multiple REF function references, and changes to any referenced cells (in this example, B2) will cause the referencing cells to recalculate (in this example, B4).Working with code objectsIf you reference a cell that’s set to output a code object, the REF function will return an instance of that object in the referencing cell.</> list in B2. In the B4 code cell, we define a variable called output_of_B2 and assign a REF function that references cell B2. The output mode for the B4 code cell is set to “Excel Values”, so the list spills across multiple cells in the spreadsheet.Benefits of isolated modeThe benefit of using the isolated mode is that referenced cells are not recalculated when changes are made to referencing cells. For complex processes, this allows you to:- separate code that doesn’t change frequently from code you modify often.
- reduce unnecessary recalculations of computationally intensive operations.
- create a more modular approach to your data analysis.
- improve performance when working with larger datasets.
Run Linked
Run Linked
When a code cell is run in linked mode, variables defined within it can be accessed by any other code cell also running in linked mode. When any linked mode cell is recalculated, all linked mode cells are recalculated. Linked cells run left-to-right, top-to-bottom, and can access objects defined in previously linked cells.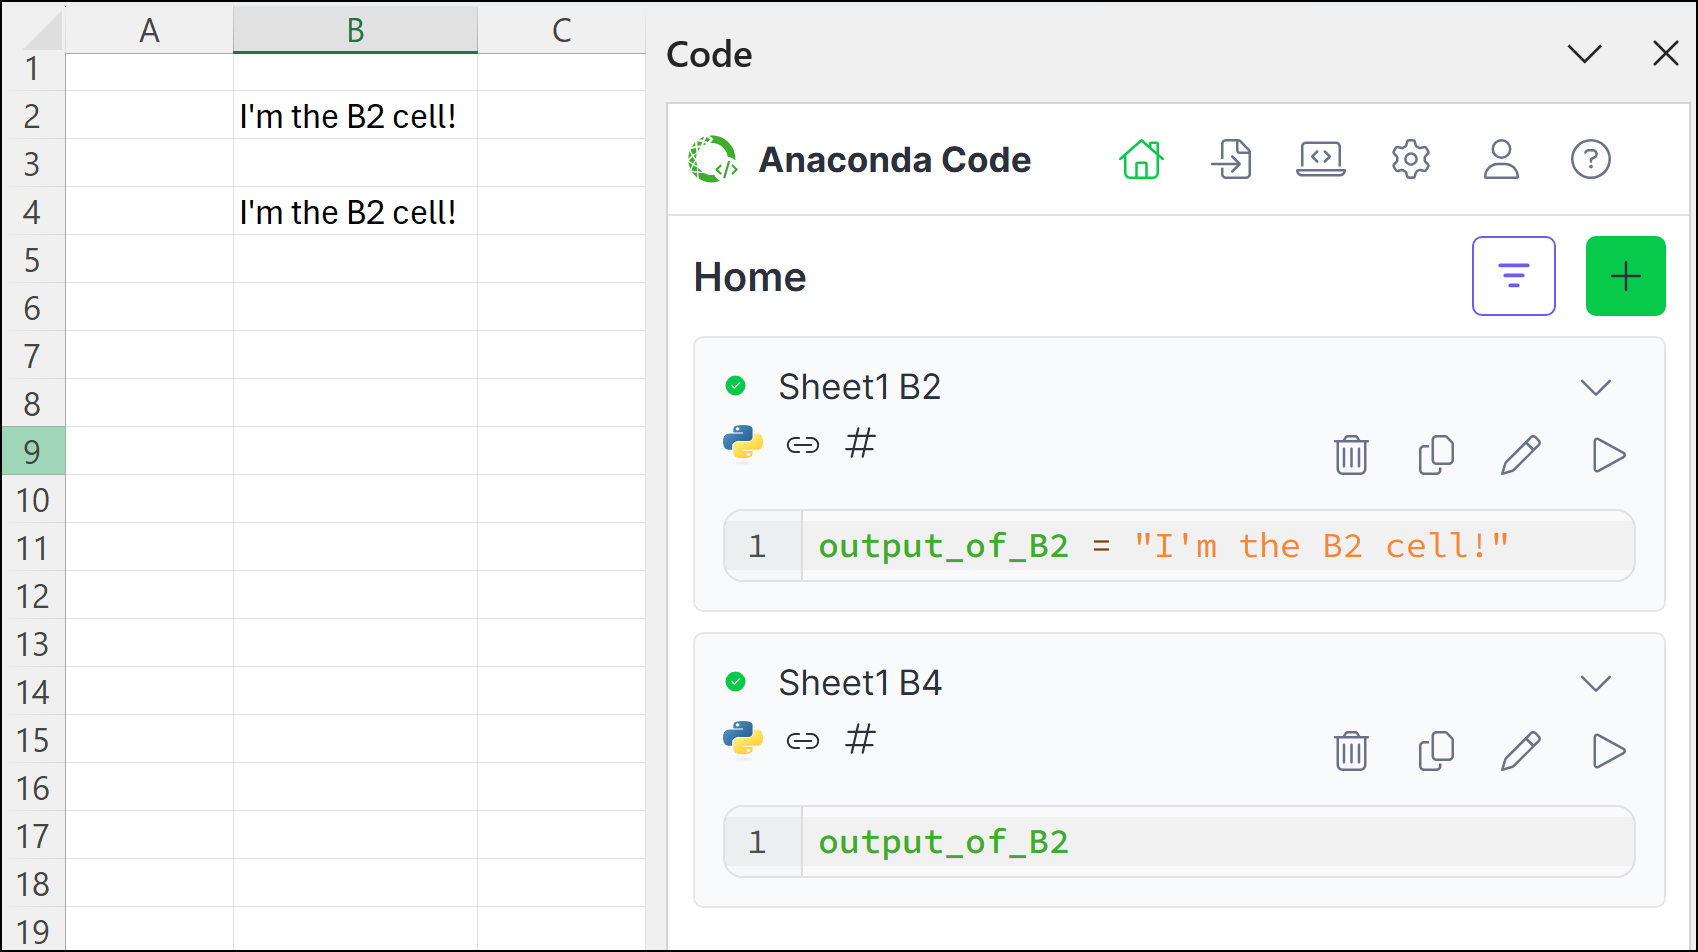
output_of_B2 variable is defined in cell B2 and assigned the string "I'm the B2 cell!". When this code is run in the B2 code cell, the B2 cell displays "I'm the B2 cell!". The output_of_B2 variable is then referenced in the B4 code cell, causing the B4 cell to also display "I'm the B2 cell!".Benefits of linked modeLinked mode is useful when:- you want to create a continuous workflow across multiple cells.
- you need to share variables and objects between different parts of your analysis.
- your code follows a linear execution path.