Exploring models
Anaconda hosts a of open-source and partner models that you can explore and use to test and develop your applications, accessible from the Models tab in the Catalog.Use the search function to locate models by name.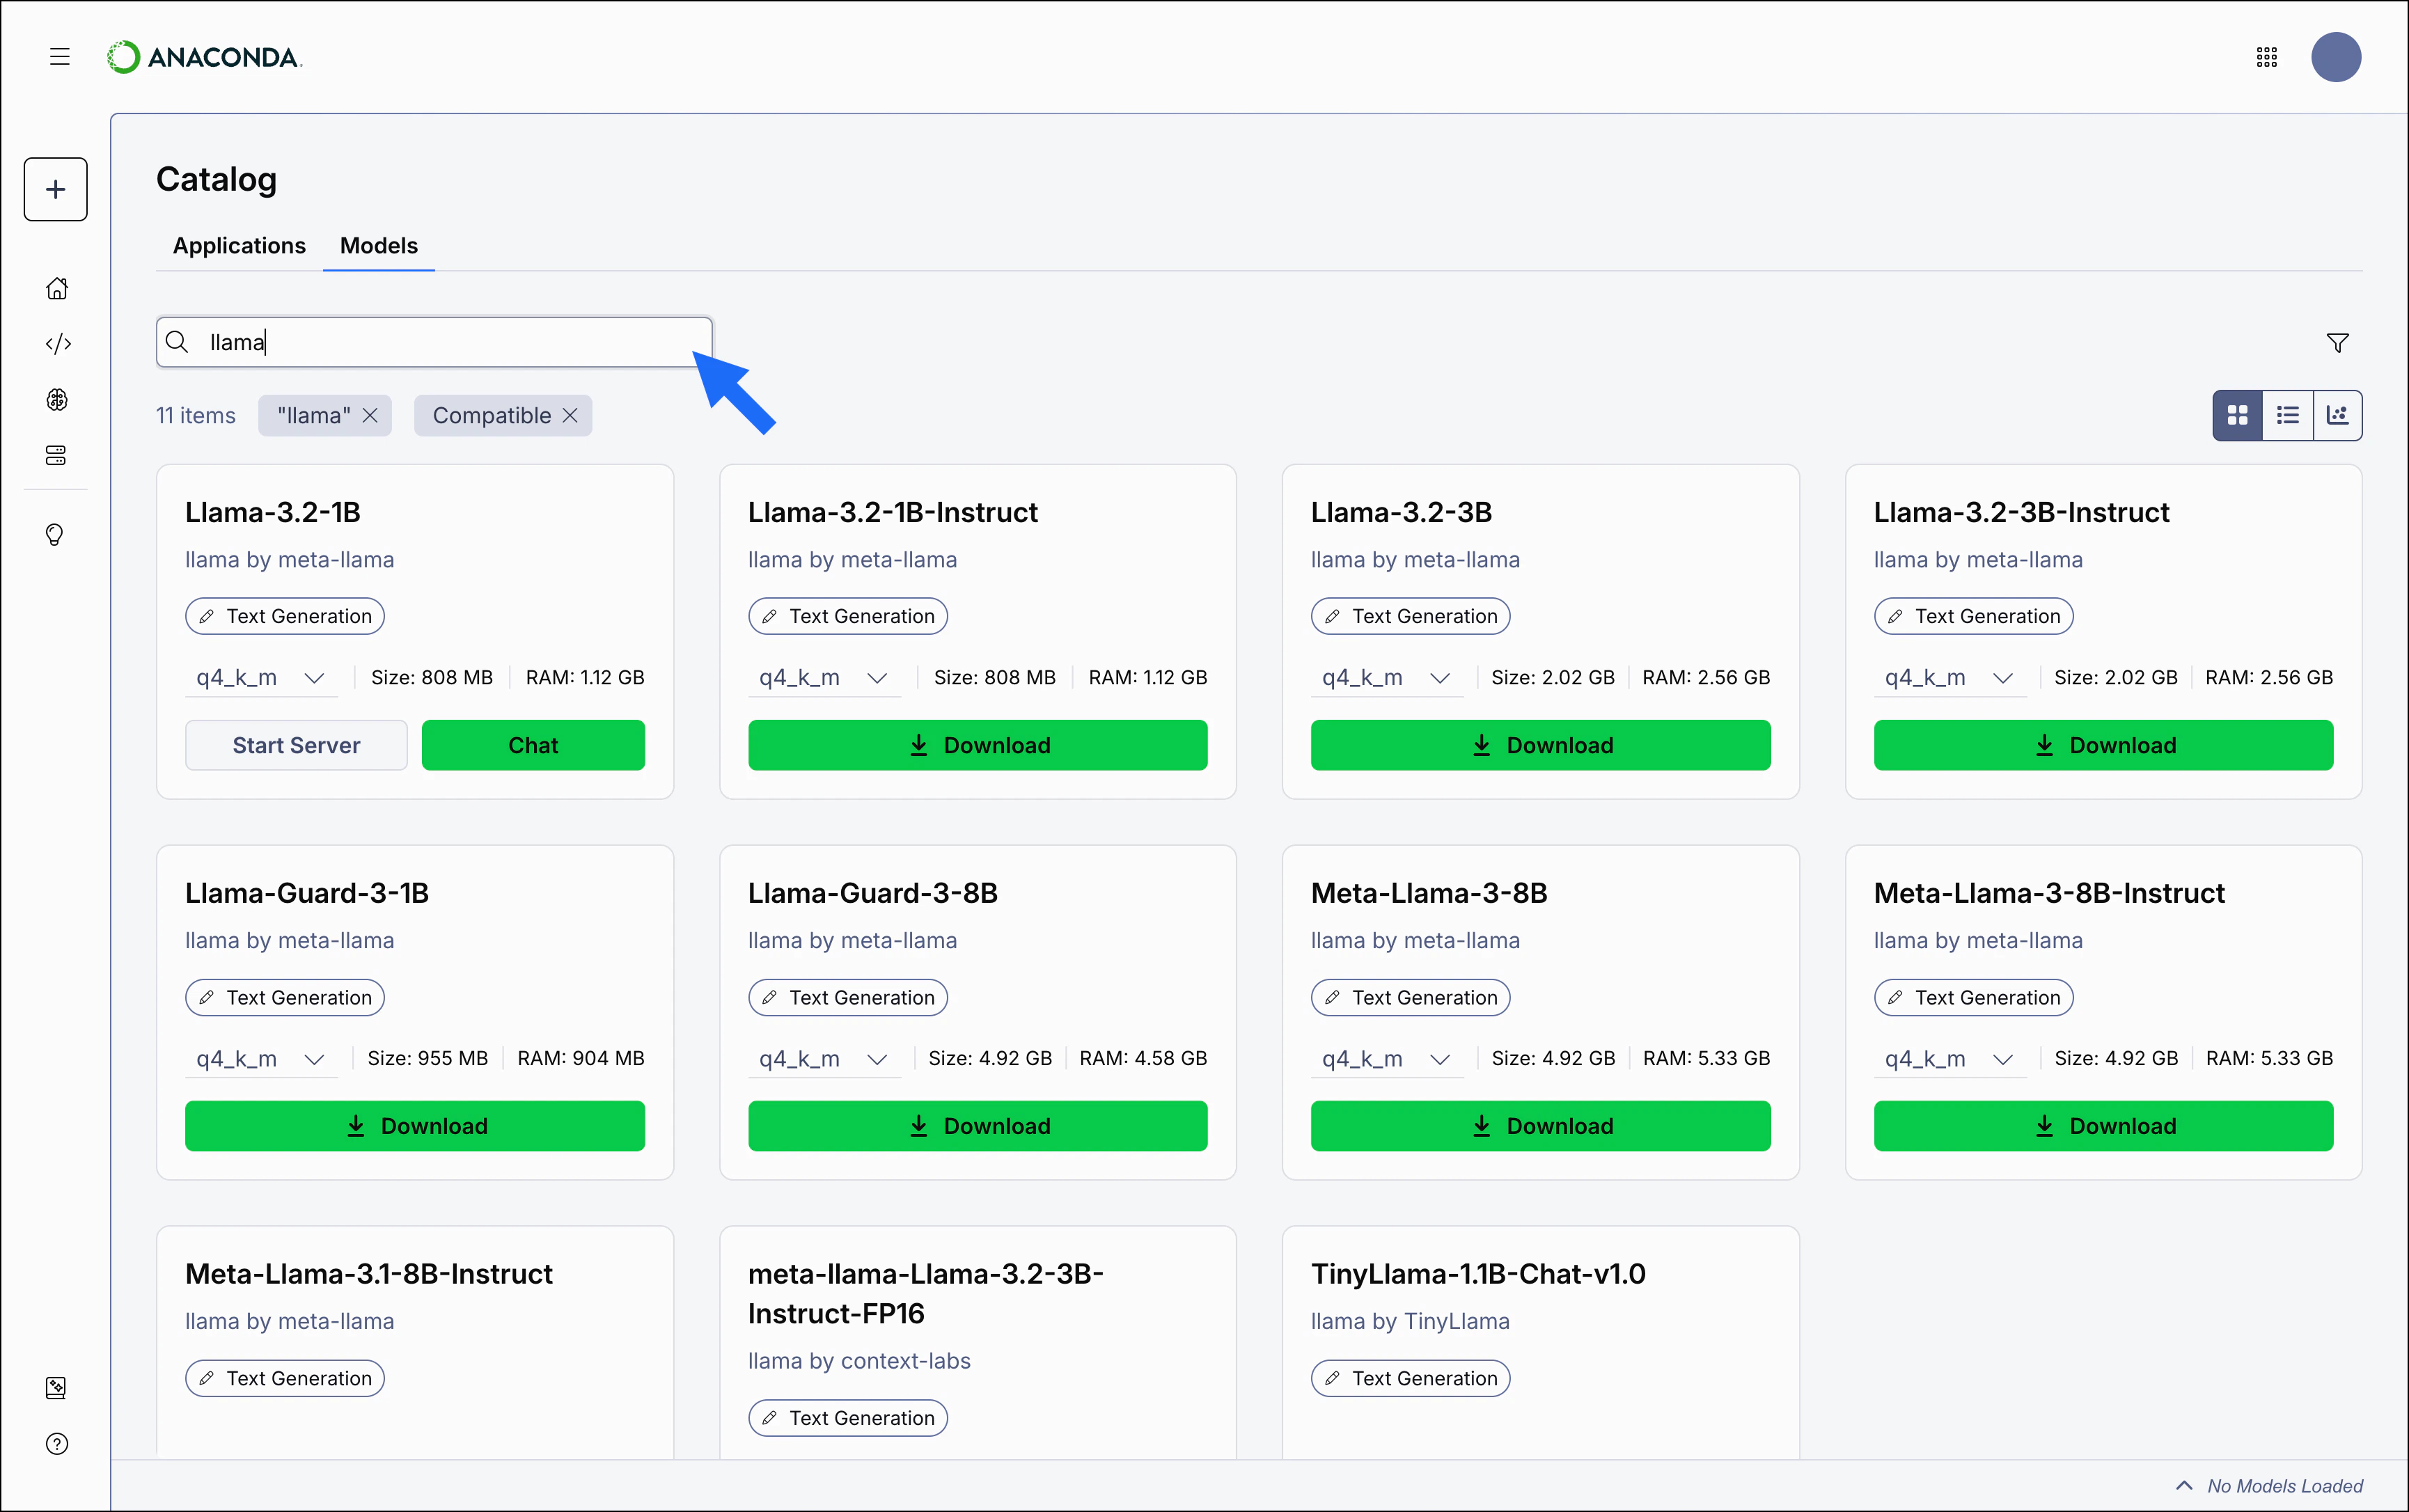
Models with a lock icon beside their name have been restricted from use by your administrator.
Model catalog views
The model catalog can be displayed as a tile grid, a table, or as a comparative chart. Use the icons in the upper-right of the Model Catalog page to switch between views.- Tile
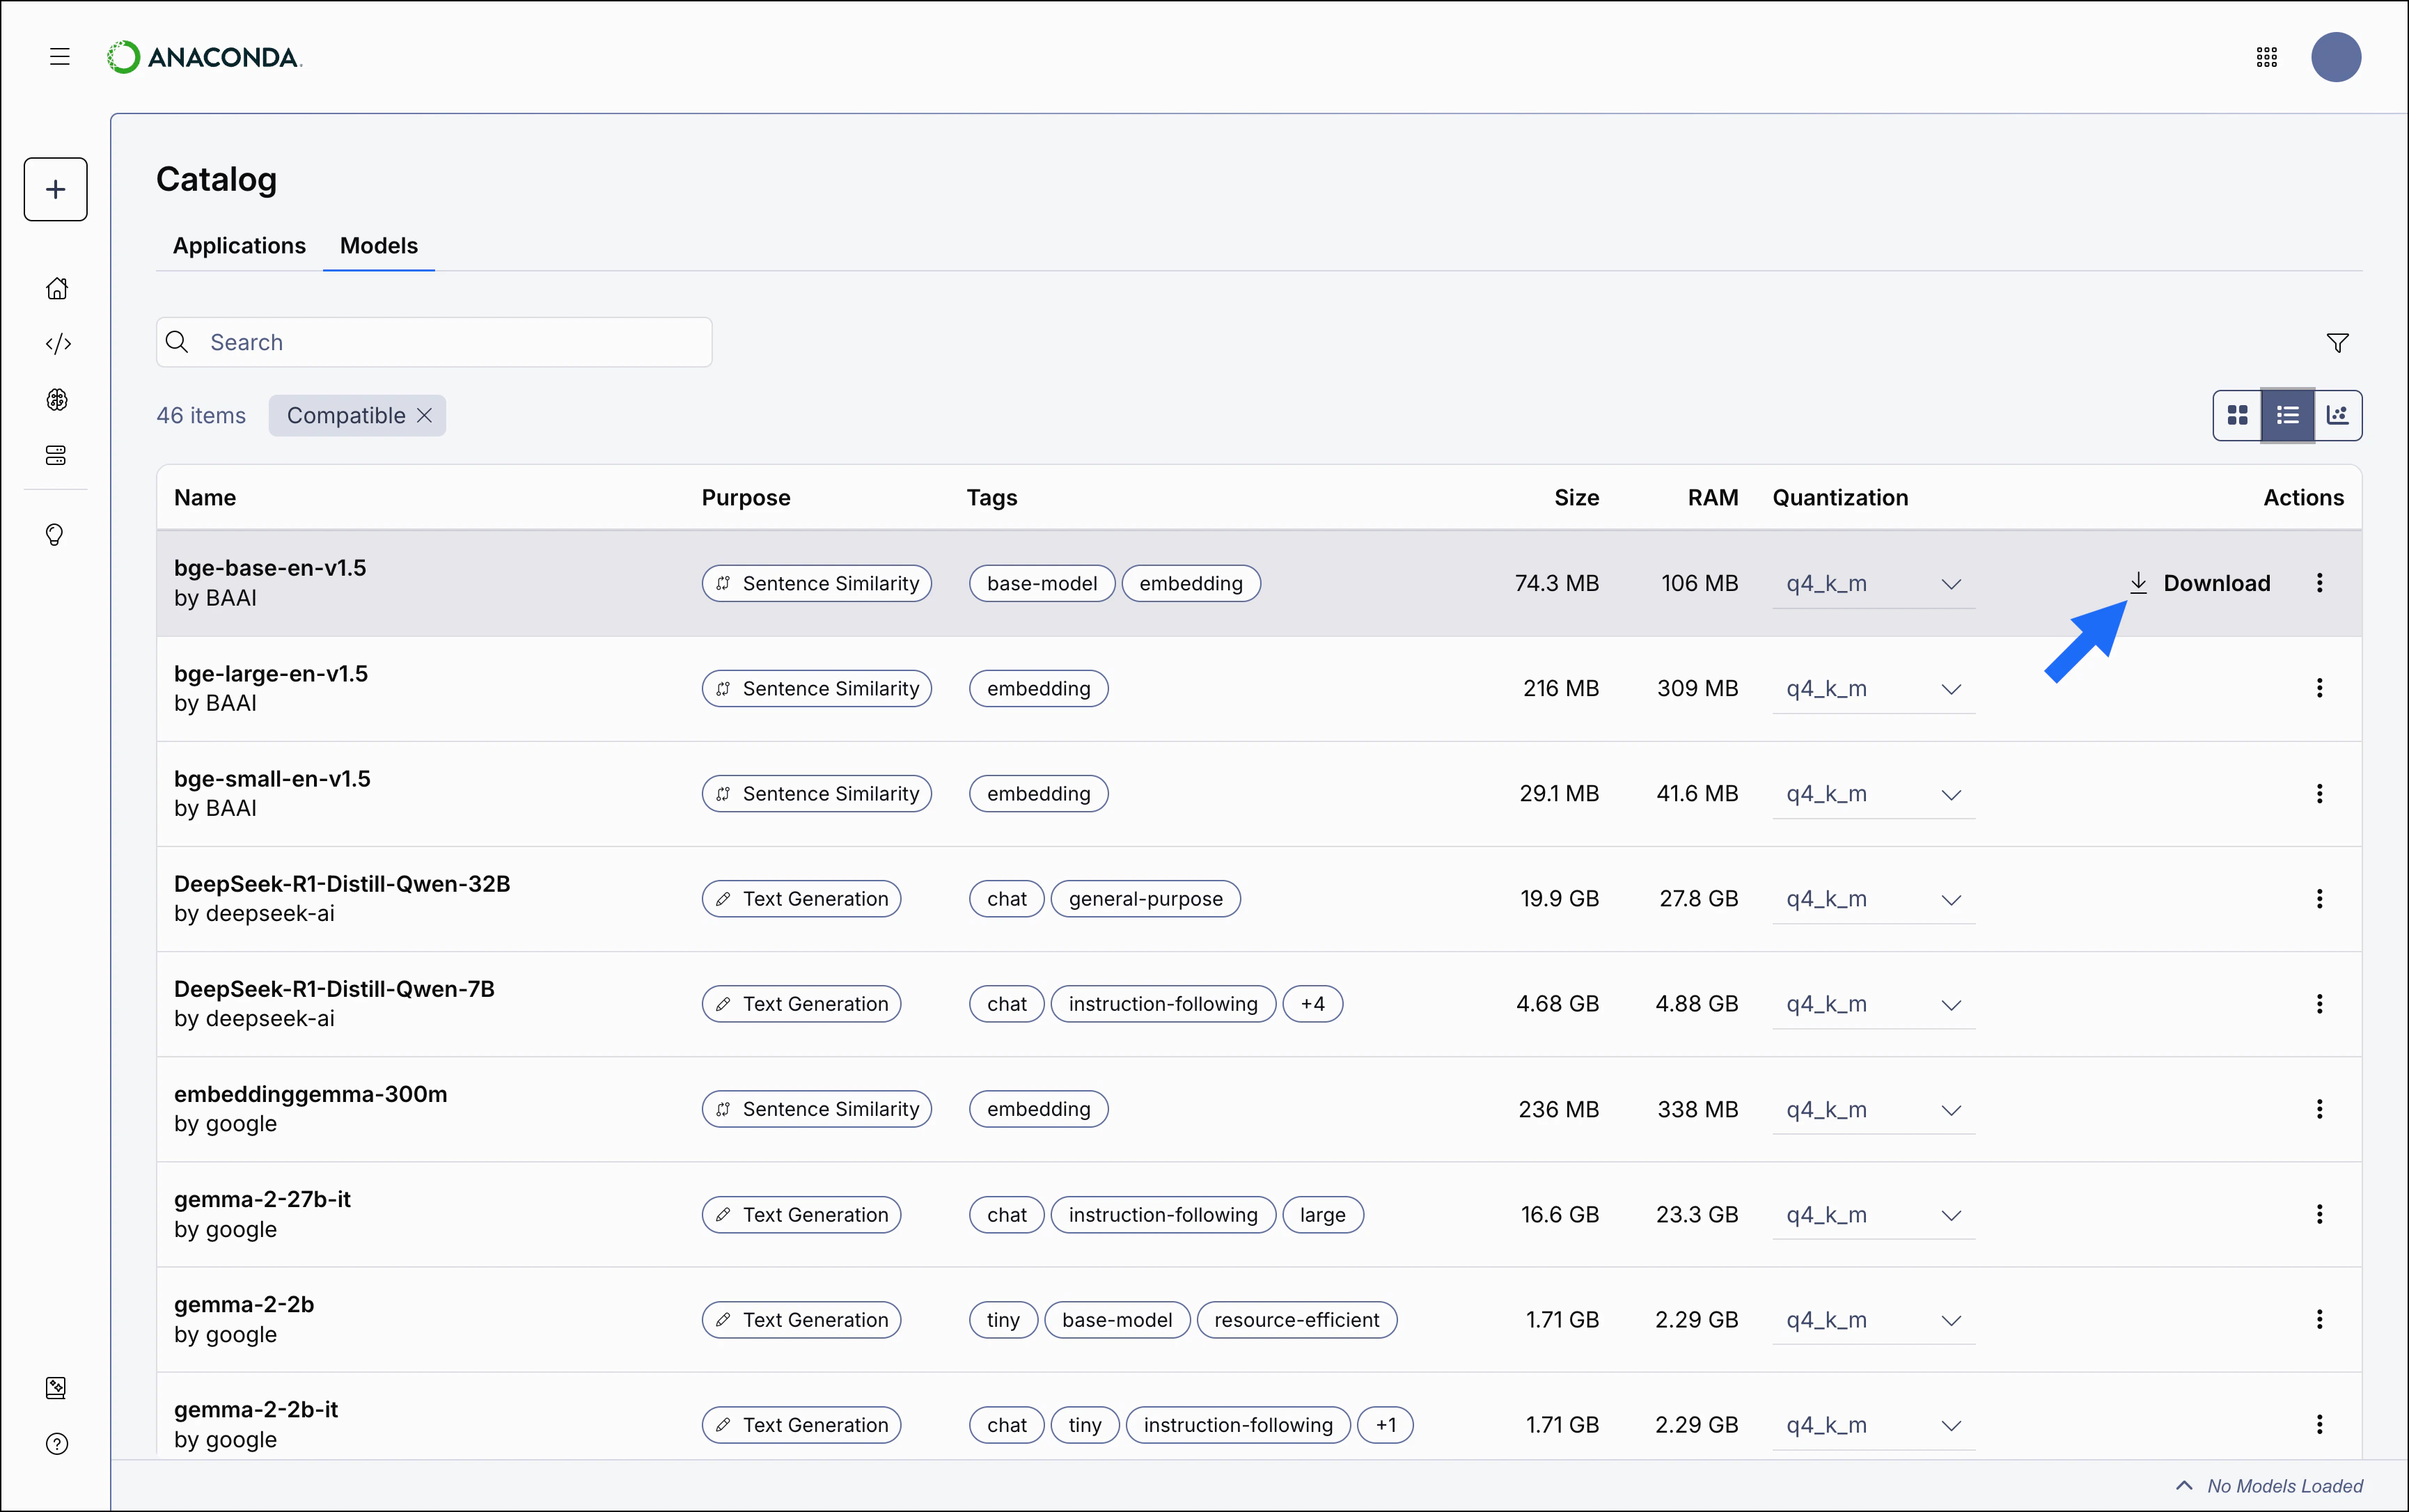
- Table
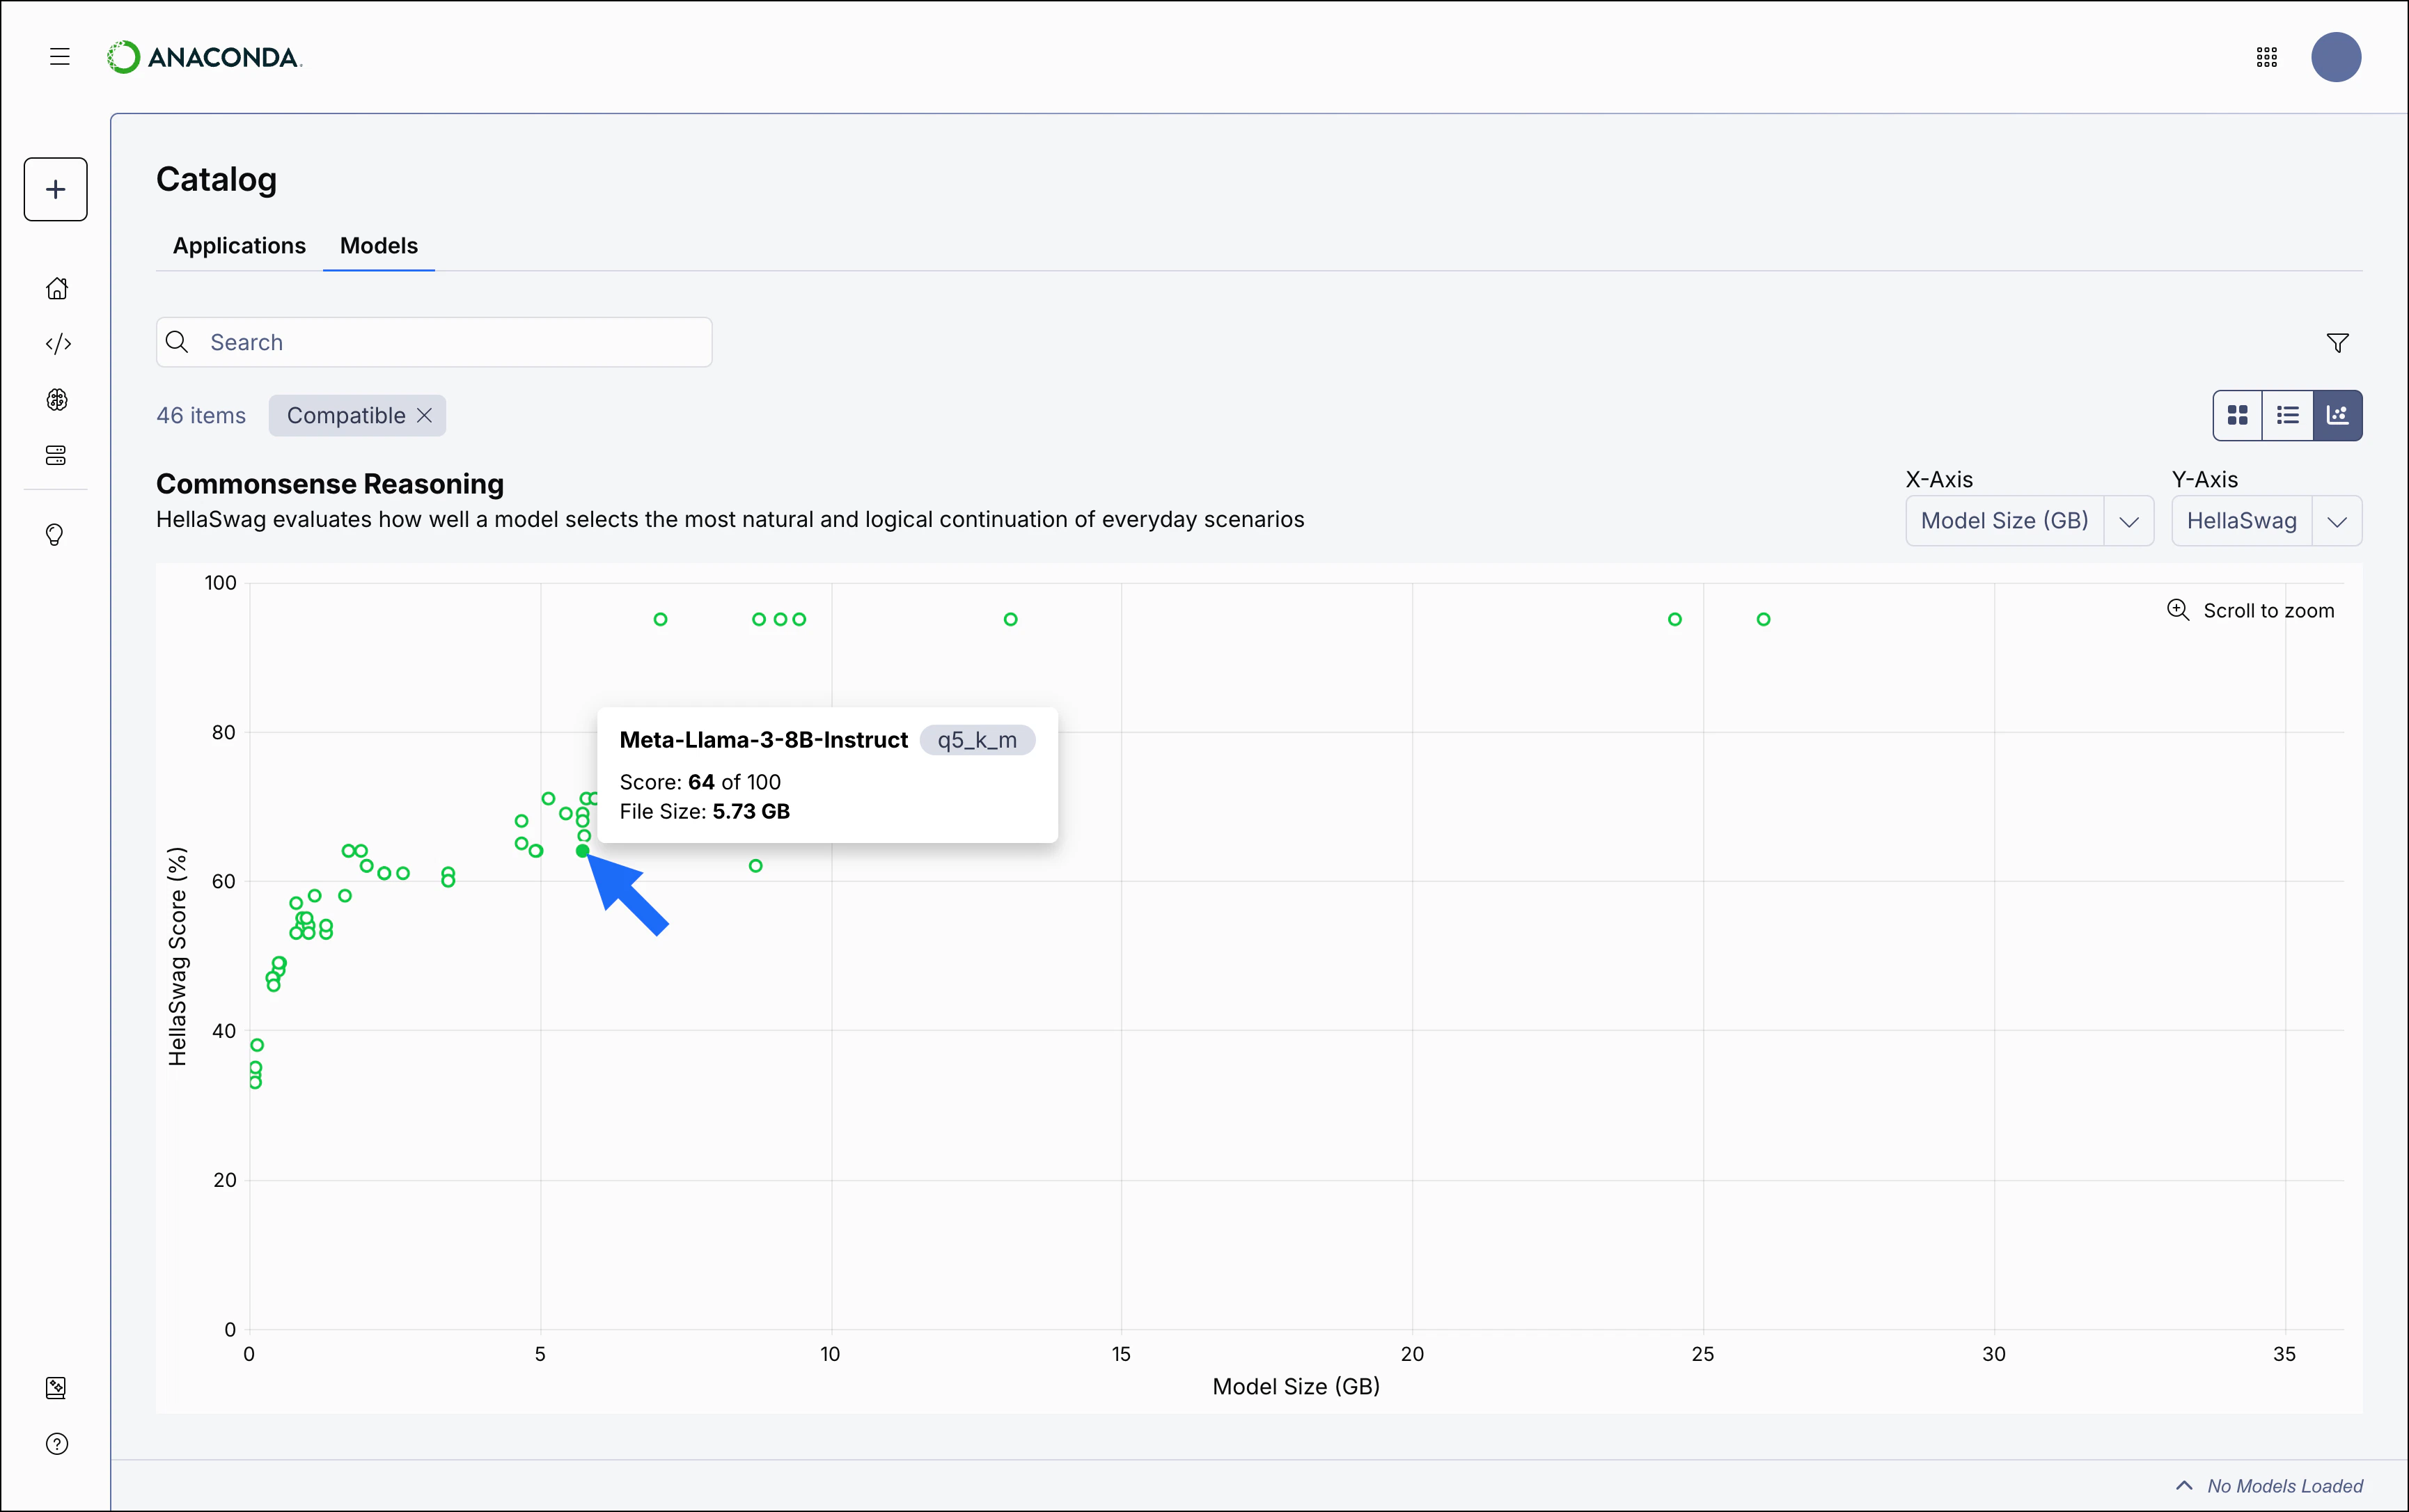
- Chart
The Tile view displays a list of models in a grid, listed alphabetically. Each tile displays the model’s name, publisher, model type, a dropdown, and the model’s resource requirements. Select any tile to view the model’s details.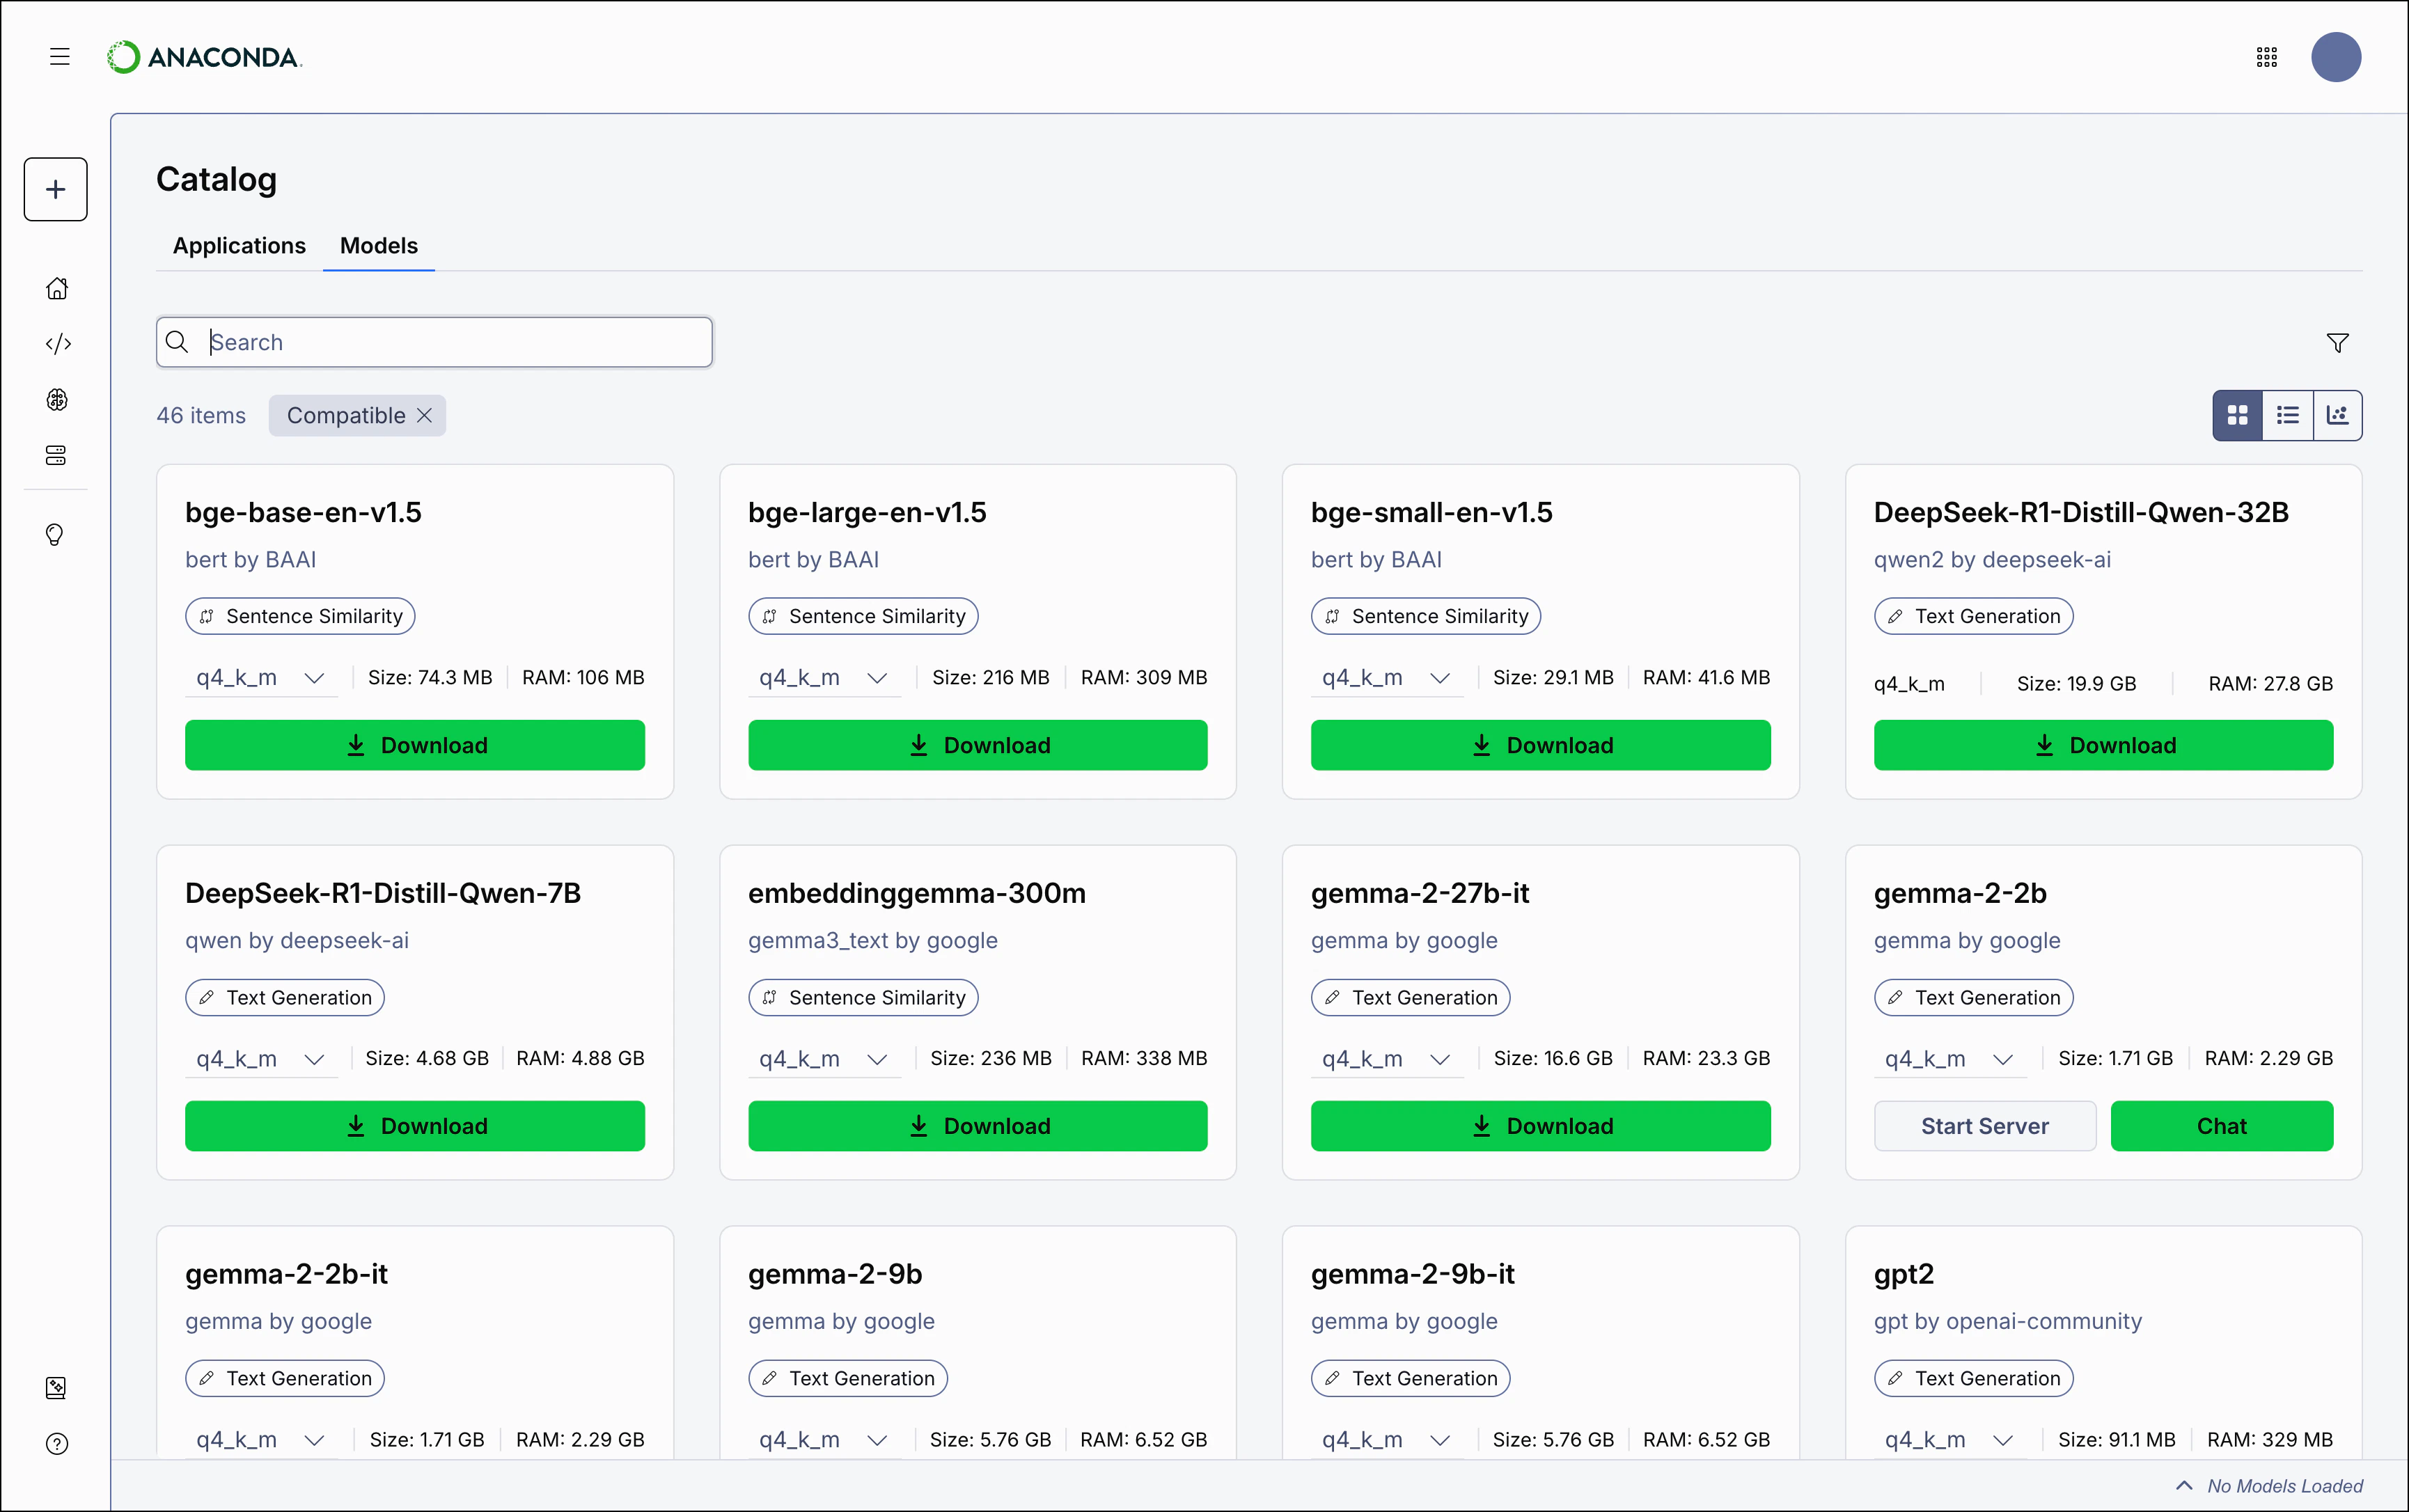
Model types and tags
A model’s type reflects its training objective and architecture. Anaconda Desktop currently supports the following model types: Tags reflect what a model can do beyond its primary purpose. For example, aText Generation model might also support code generation. Notable tags include:
- Embedding: The model can generate vector representations of text for use in semantic search, RAG pipelines, and similarity comparisons.
- Tool Calling: The model can invoke external tools or APIs to retrieve information or perform actions during inference.
- Code Generation: The model can produce, complete, or transform source code across one or more programming languages.
- Guardrail: The model is designed to evaluate or filter content, typically used to enforce safety or policy constraints in AI pipelines.
- Base Model: The model has not been fine-tuned for a specific task and is intended as a foundation for further training or customization.
- Instruction Following: The model has been trained to respond reliably to structured instructions or prompts.
Understanding quantizations
From the model catalog, you can select which quantization to use for a model. Each quantization is a separate, pre-built version of a model stored as a GGUF (.gguf) file. Quantization reduces the precision of a model’s weights, converting them from high-precision floating point values to lower bit depths like 8-bit or 4-bit integers. This shrinks file size and RAM requirements at the cost of some output quality.
Reading quantization names
Anaconda models use a naming convention that encodes the bit depth and quantization method. For example,q4_k_m means a 4-bit quantization using the medium-variant K-quant method.
Choosing a quantization
Select a quantization based on your hardware and accuracy needs:- Lower bit depth (
q2–q4): Smaller files, lower RAM usage, and faster inference, but noticeably reduced output quality. Best suited for resource-constrained hardware. - Mid-range (
q5–q6): A practical balance between size and quality that works well on most hardware. - Higher bit depth (
q8,f16): Near full-precision output quality, but requires significantly more RAM and disk space.
Filtering models
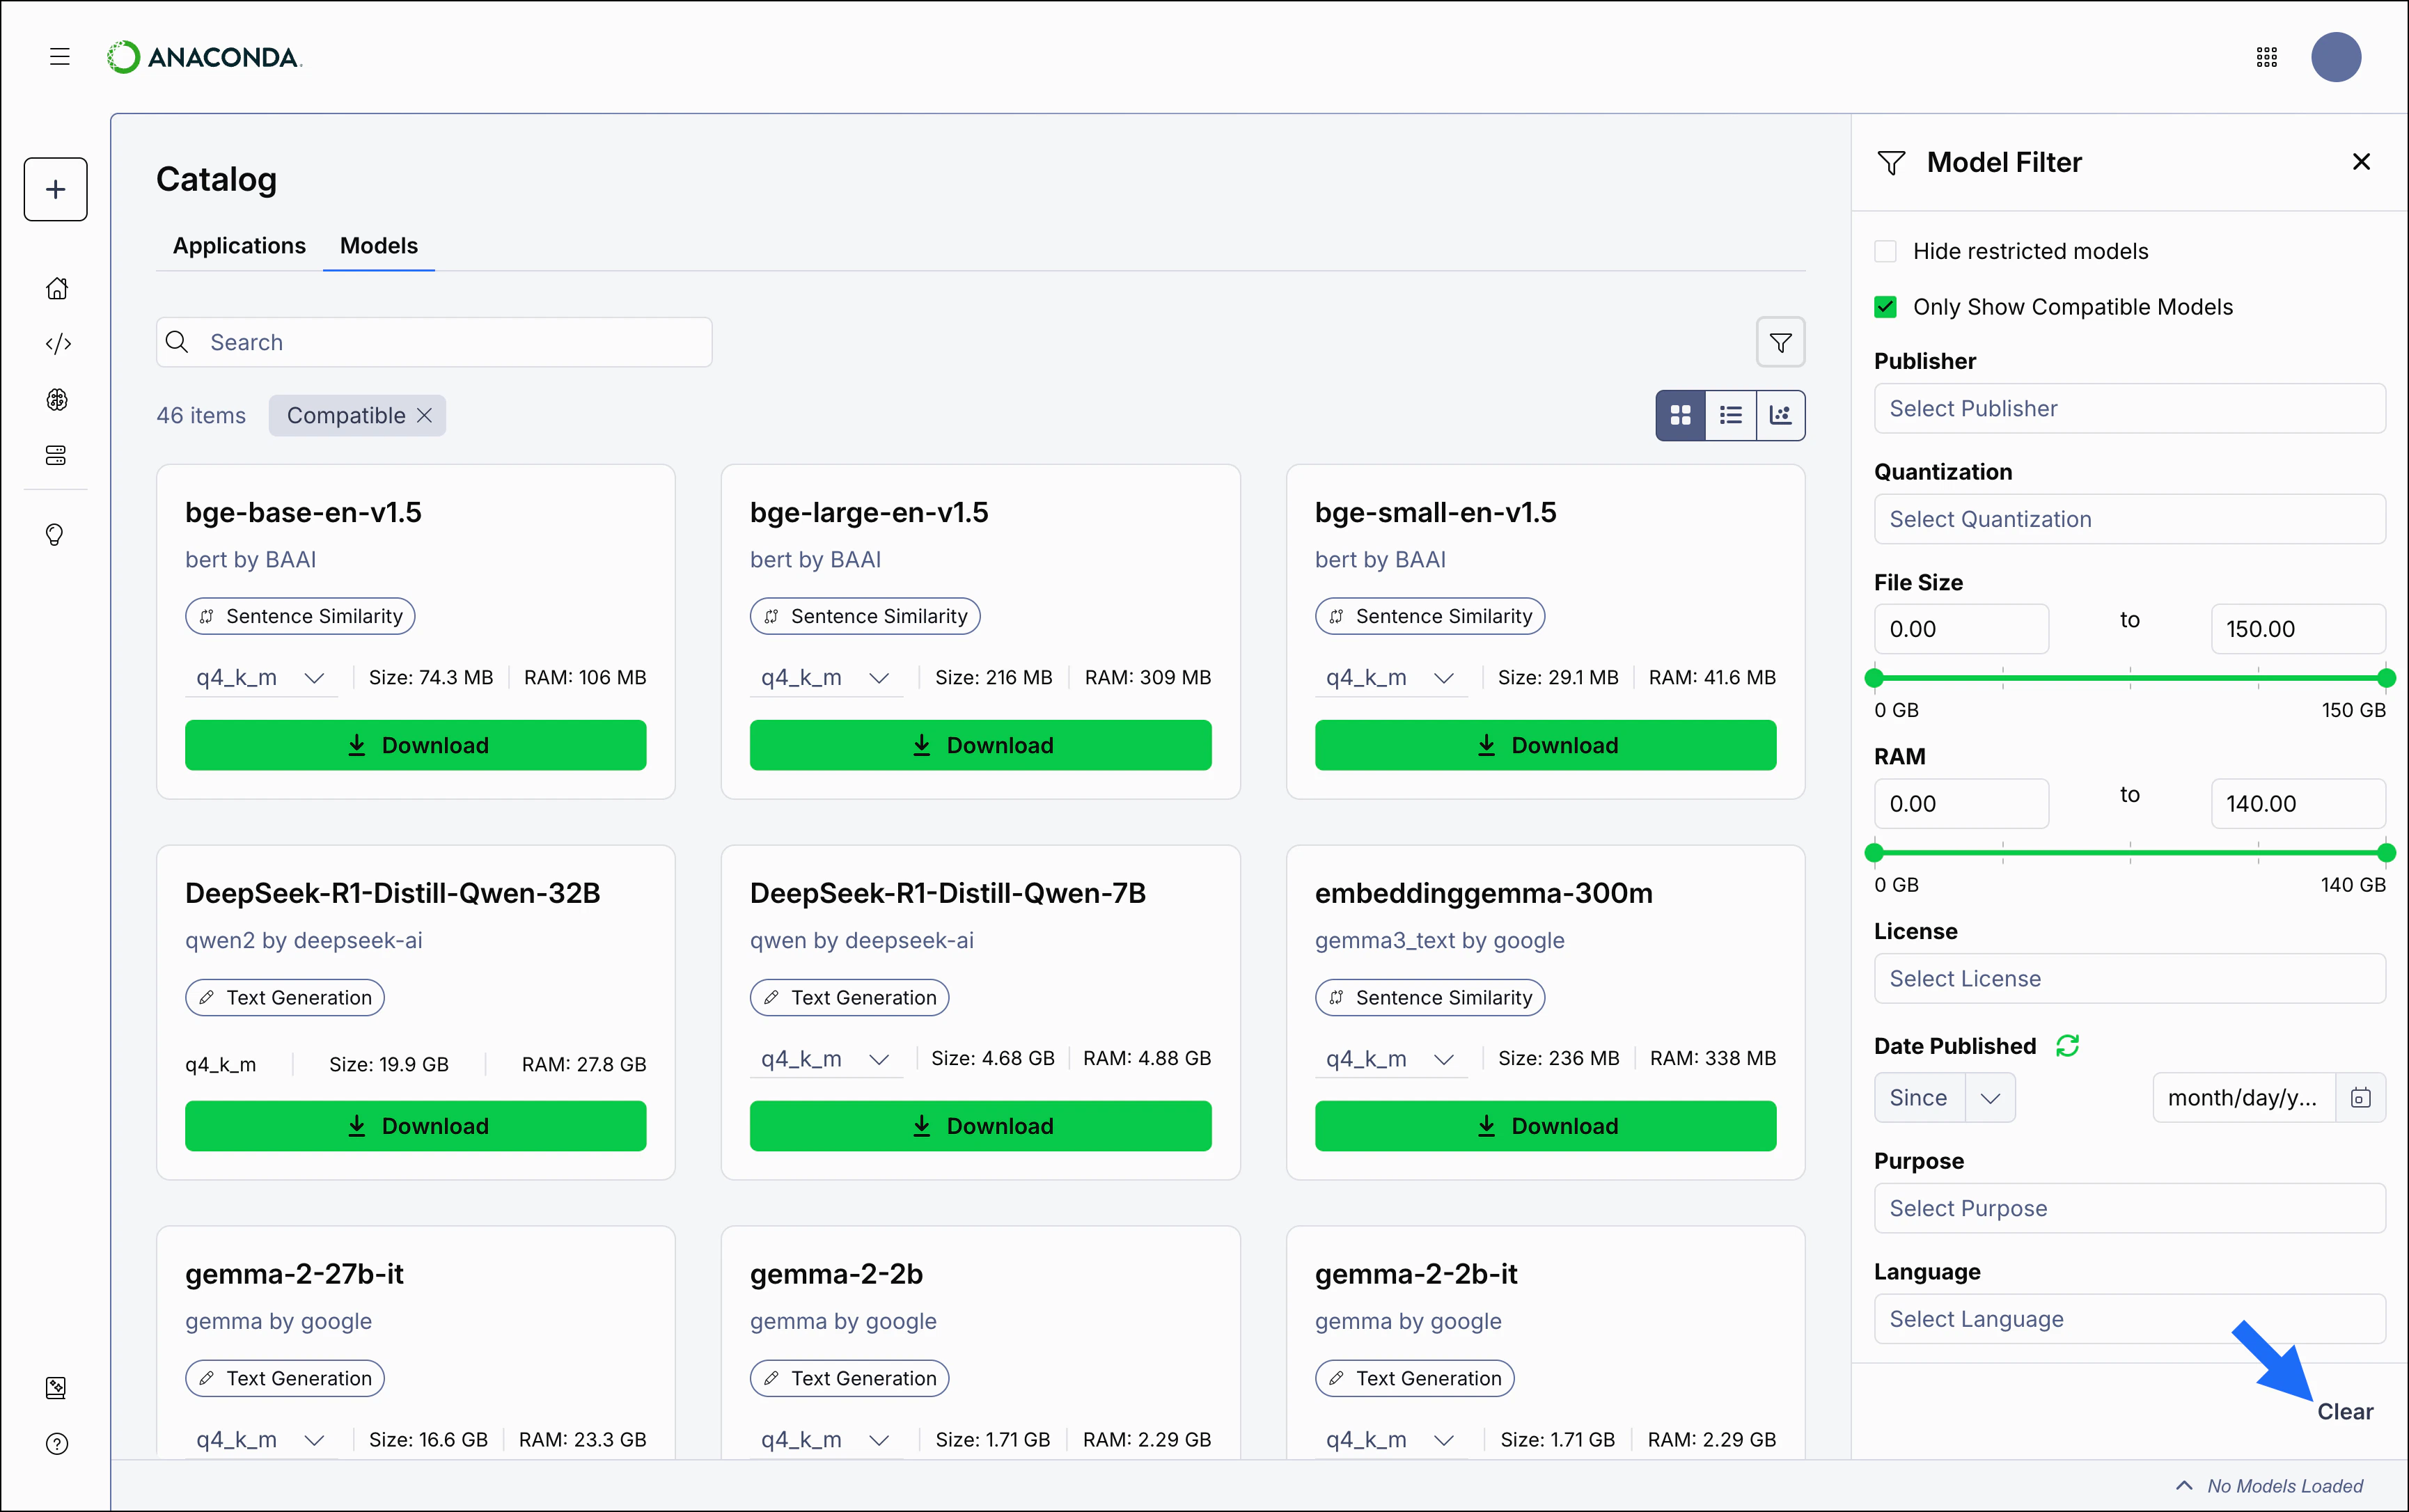
Apply filters to help you find the models that you want to use. To apply a filter:- From the Model Catalog page, click Filter.
- Add or adjust a filter to narrow down the list of models.
- Repeat as necessary to list only the models you want.
Model filters
- Hide restricted models: Filters out models that have been restricted from use by your administrator.
- Only Show Compatible Models: Filters out models that require more memory than your system’s RAM+VRAM can provide. Enabled by default.
- Publisher: Filter models by the organization that built them.
- Quantization: Filter models by the quantization method used to build them.
- File Size: Adjust the slider to filter models by the amount of disk space they require.
- RAM: Adjust the slider to filter models by the amount of RAM they require.
- License: Filter models based on their usage, modification, and distribution terms.
- Date Published: Filter models based on the date they were published to Desktop. Click Refresh to reset the currently applied date filter.
- Purpose: Filter models based on their associated model type.
- Language: Filter models by which spoken languages they can understand.
Click the icon beside any filter to remove it, or click Clear in the All Filters panel to clear all filters at once.
Range filters (File Size and RAM) can be reset by dragging the slider to fill the entire range.
Range filters (File Size and RAM) can be reset by dragging the slider to fill the entire range.
Viewing model details
Select a model to view its details. From here, you can read a brief description of the model and see important information about it, such as its file size at each quantization level, count, the quality you can expect from the model’s output, how much resource usage can be expected by the model, and its intended purpose (for use in either development or production).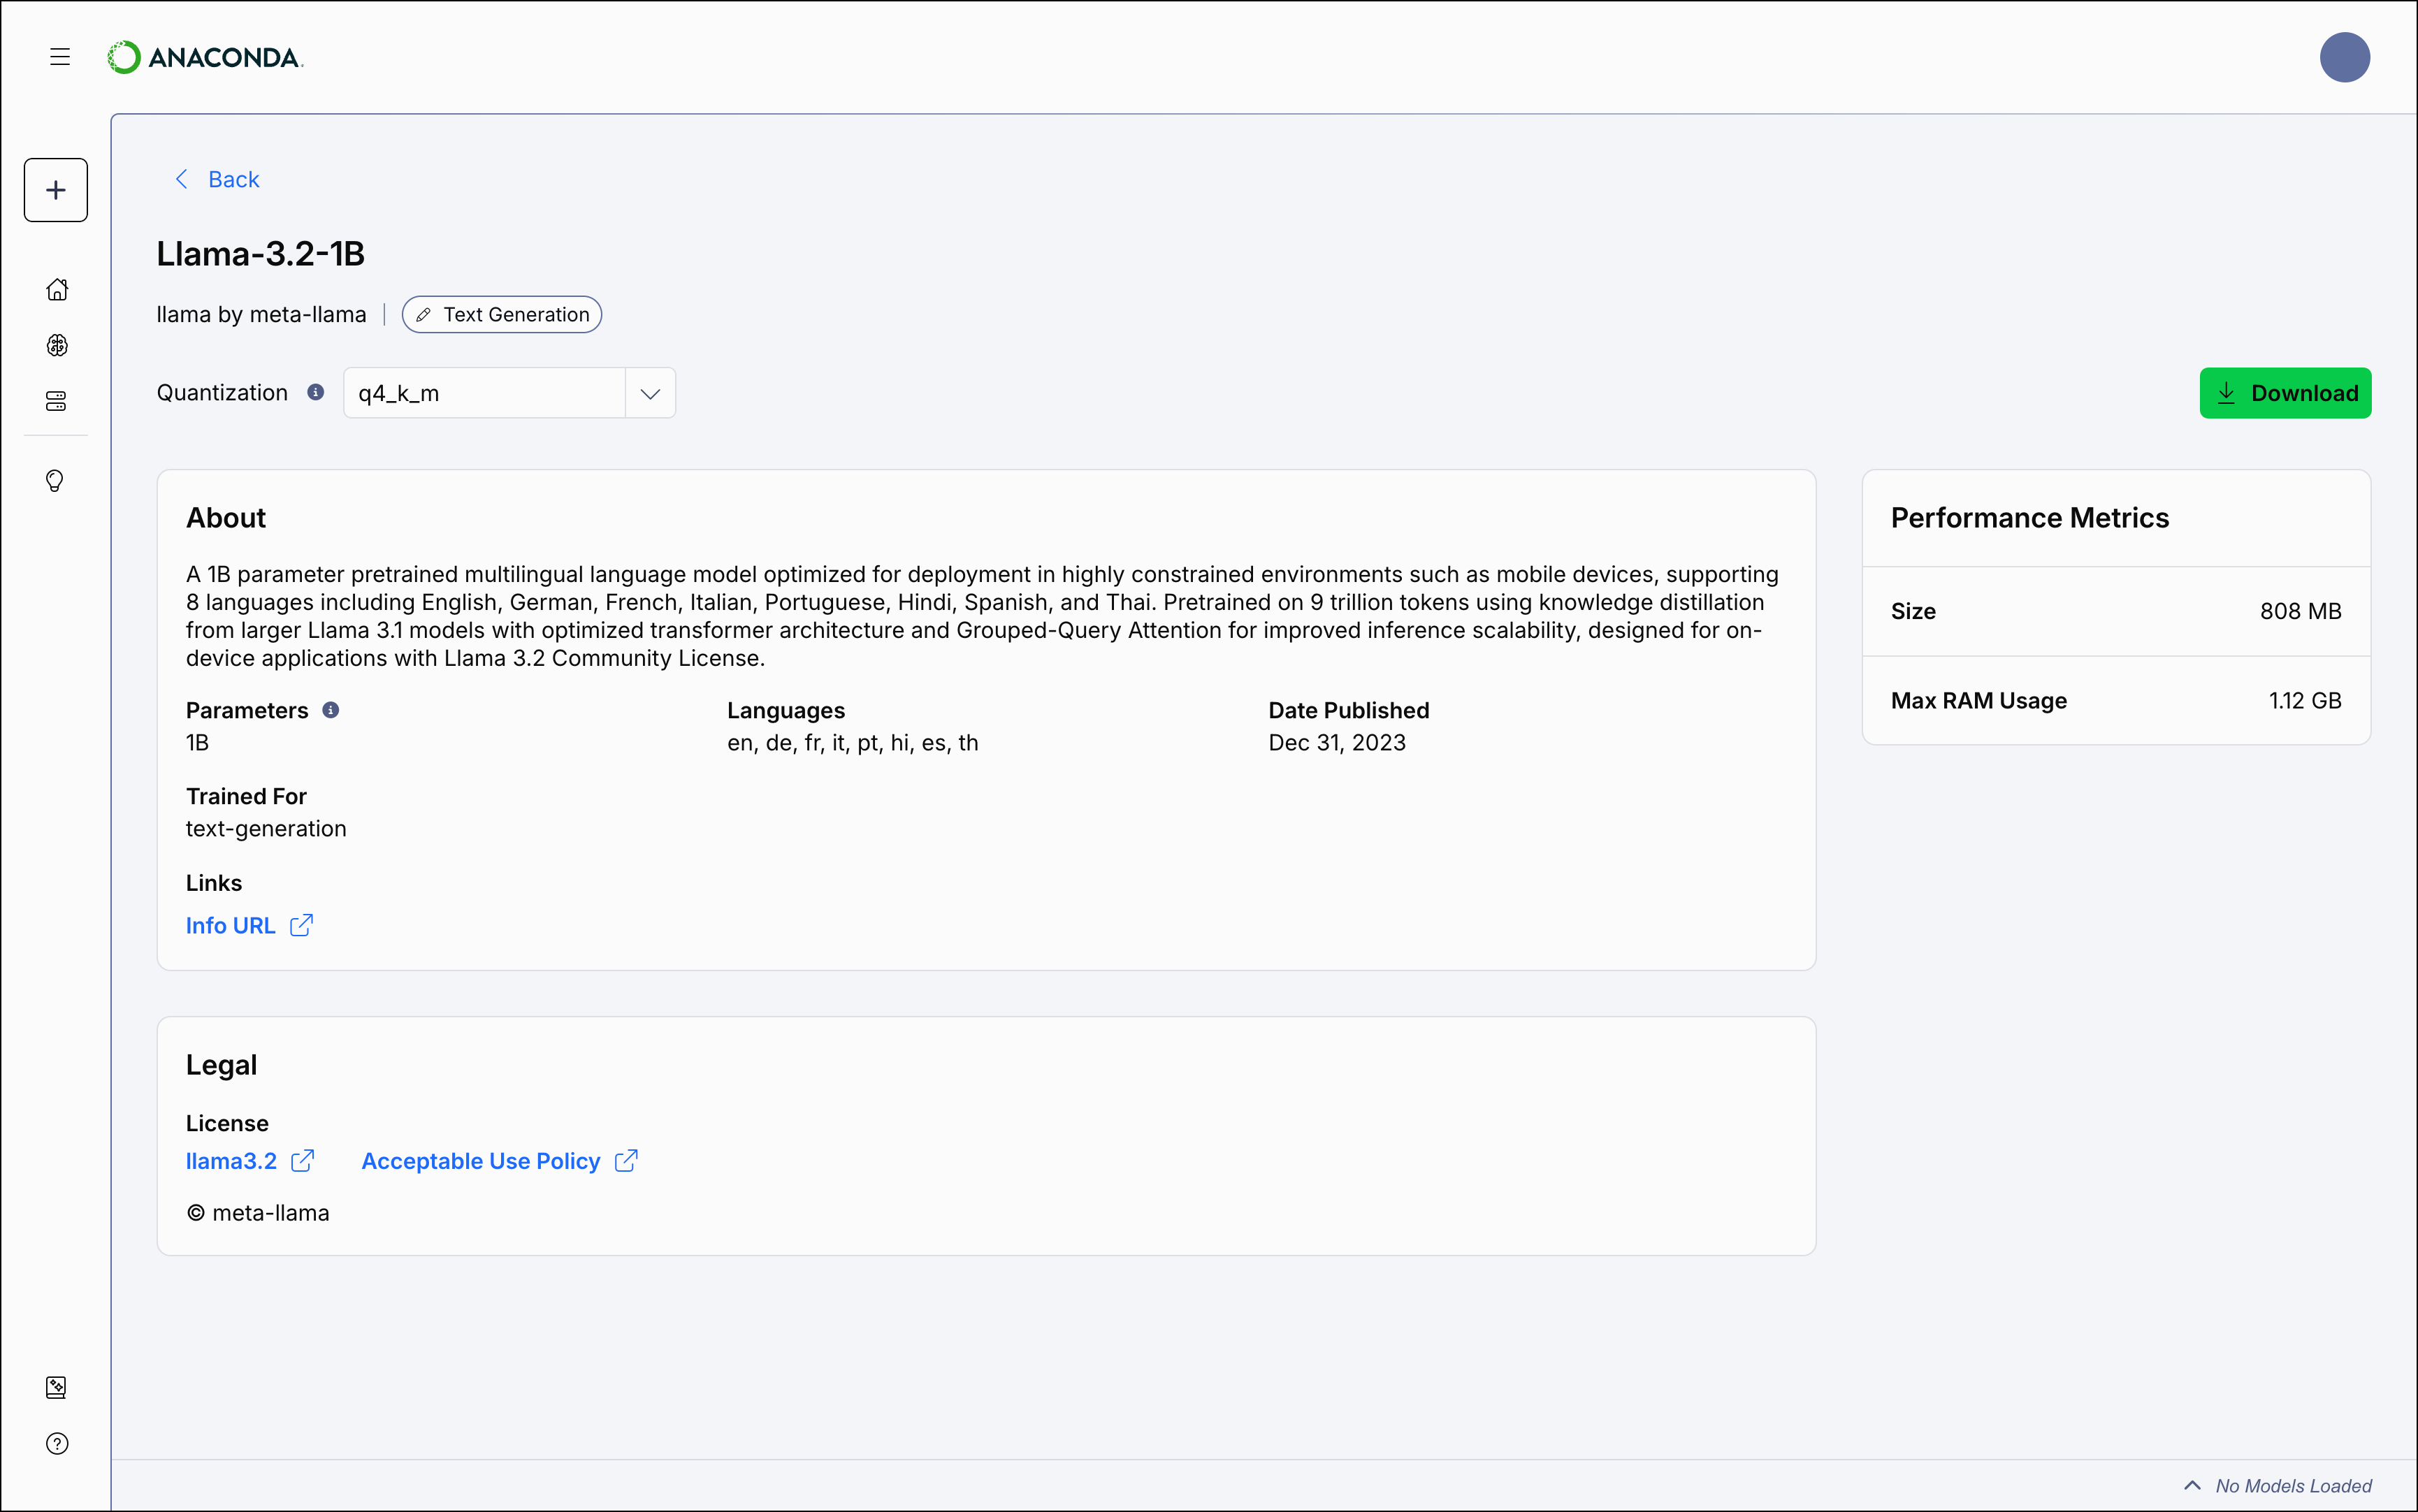
Downloading models
Anaconda provides a variety of LLM models for you to work with, constructed at various levels of quantization. To download a model:- Select Model Catalog from the left-hand navigation.
- Locate a model you want to download.
-
Open the Quantization Method dropdown and select a file quantization level, then click Download to download the model locally.
 Models that show a Start Server or Chat button on their tile indicate that you have downloaded that quantization level.
models folder in the Anaconda Desktop directory. To change the download location:
- Select the user dropdown menu in the upper-right corner.
- Select Settings.
- Navigate to the Models section, then click Change Location.
- Use the file explorer to select where you’d like to download your models.
Managing downloads
Manage your downloads using the pause, play, or cancel buttons beside the progress bar at the bottom of the model’s tile.Deleting models
To delete models that you have downloaded, navigate to the AI Models page, click Actions beside the model, then select Delete.Models cannot be deleted while they’re loaded into the API server. On the Model Servers page, click Stop Server to unload a model.