

Creating a server
Model servers are the core component of Anaconda Desktop that enable you to interact with your locally downloaded LLMs through API calls. Follow these steps to create and configure your servers:1
Open Model Servers
Select Model Servers from the left-hand navigation.
2
Create a server
Click Create Server in the top-right corner.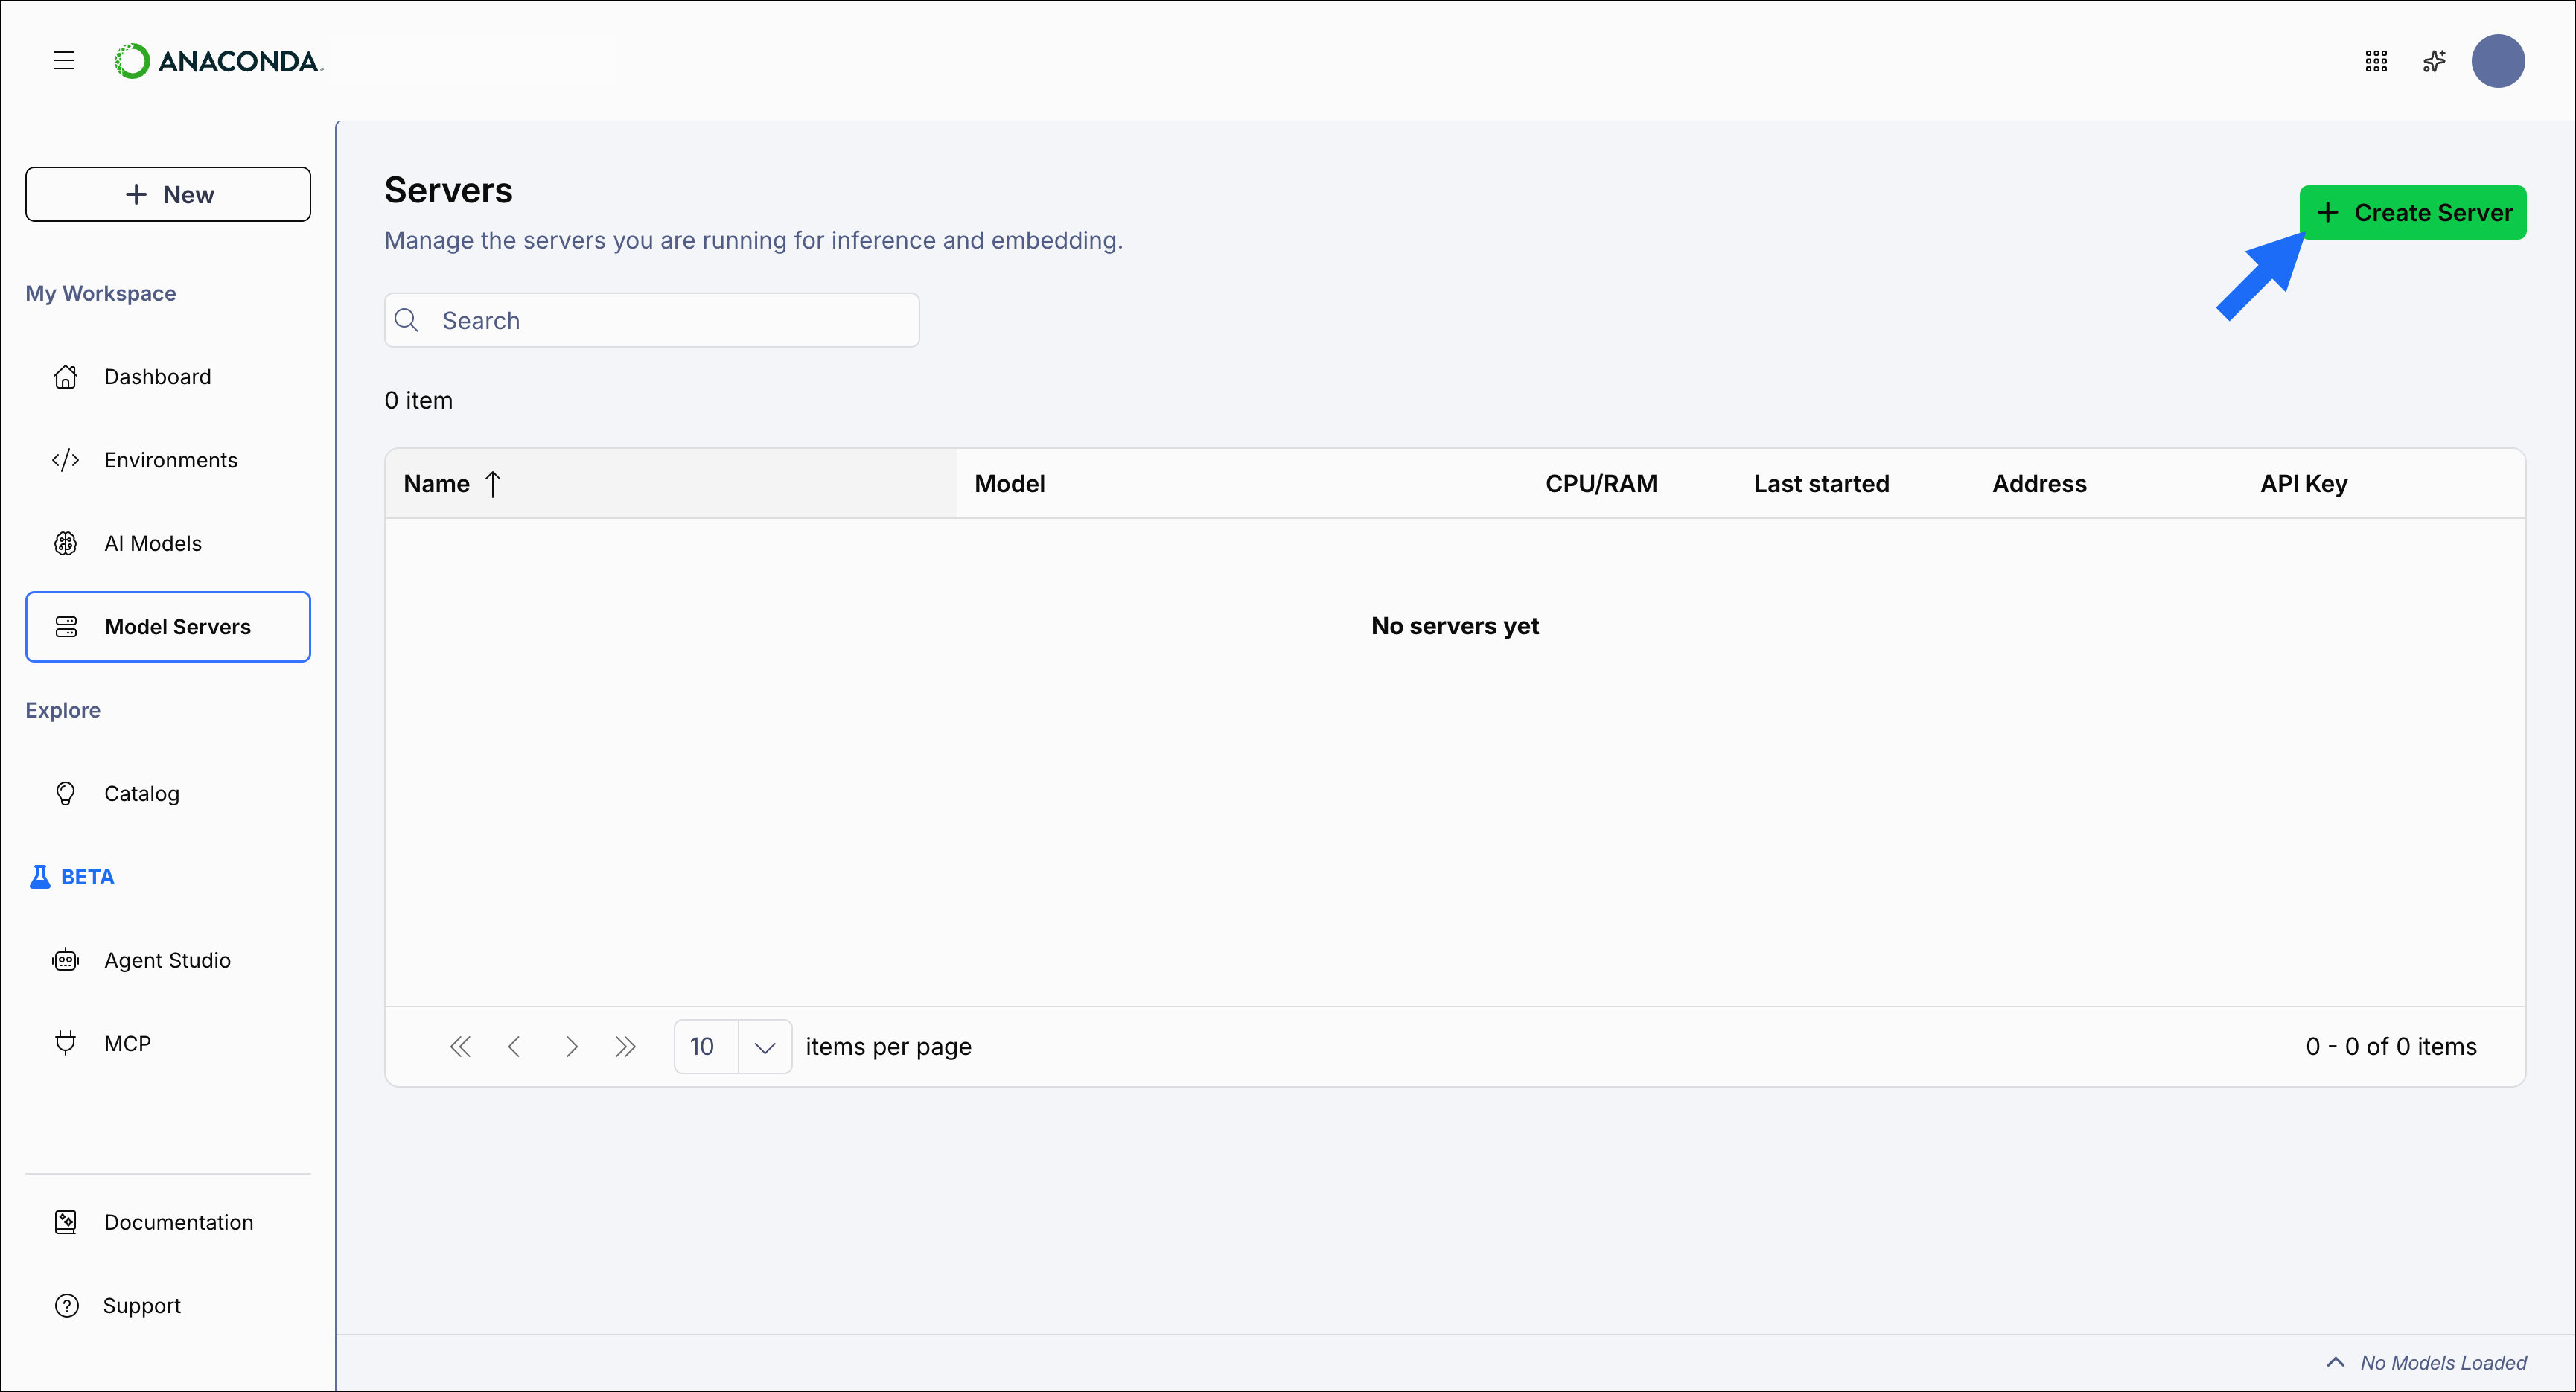
3
Configure the server
Fill in the fields in the Create Server dialog: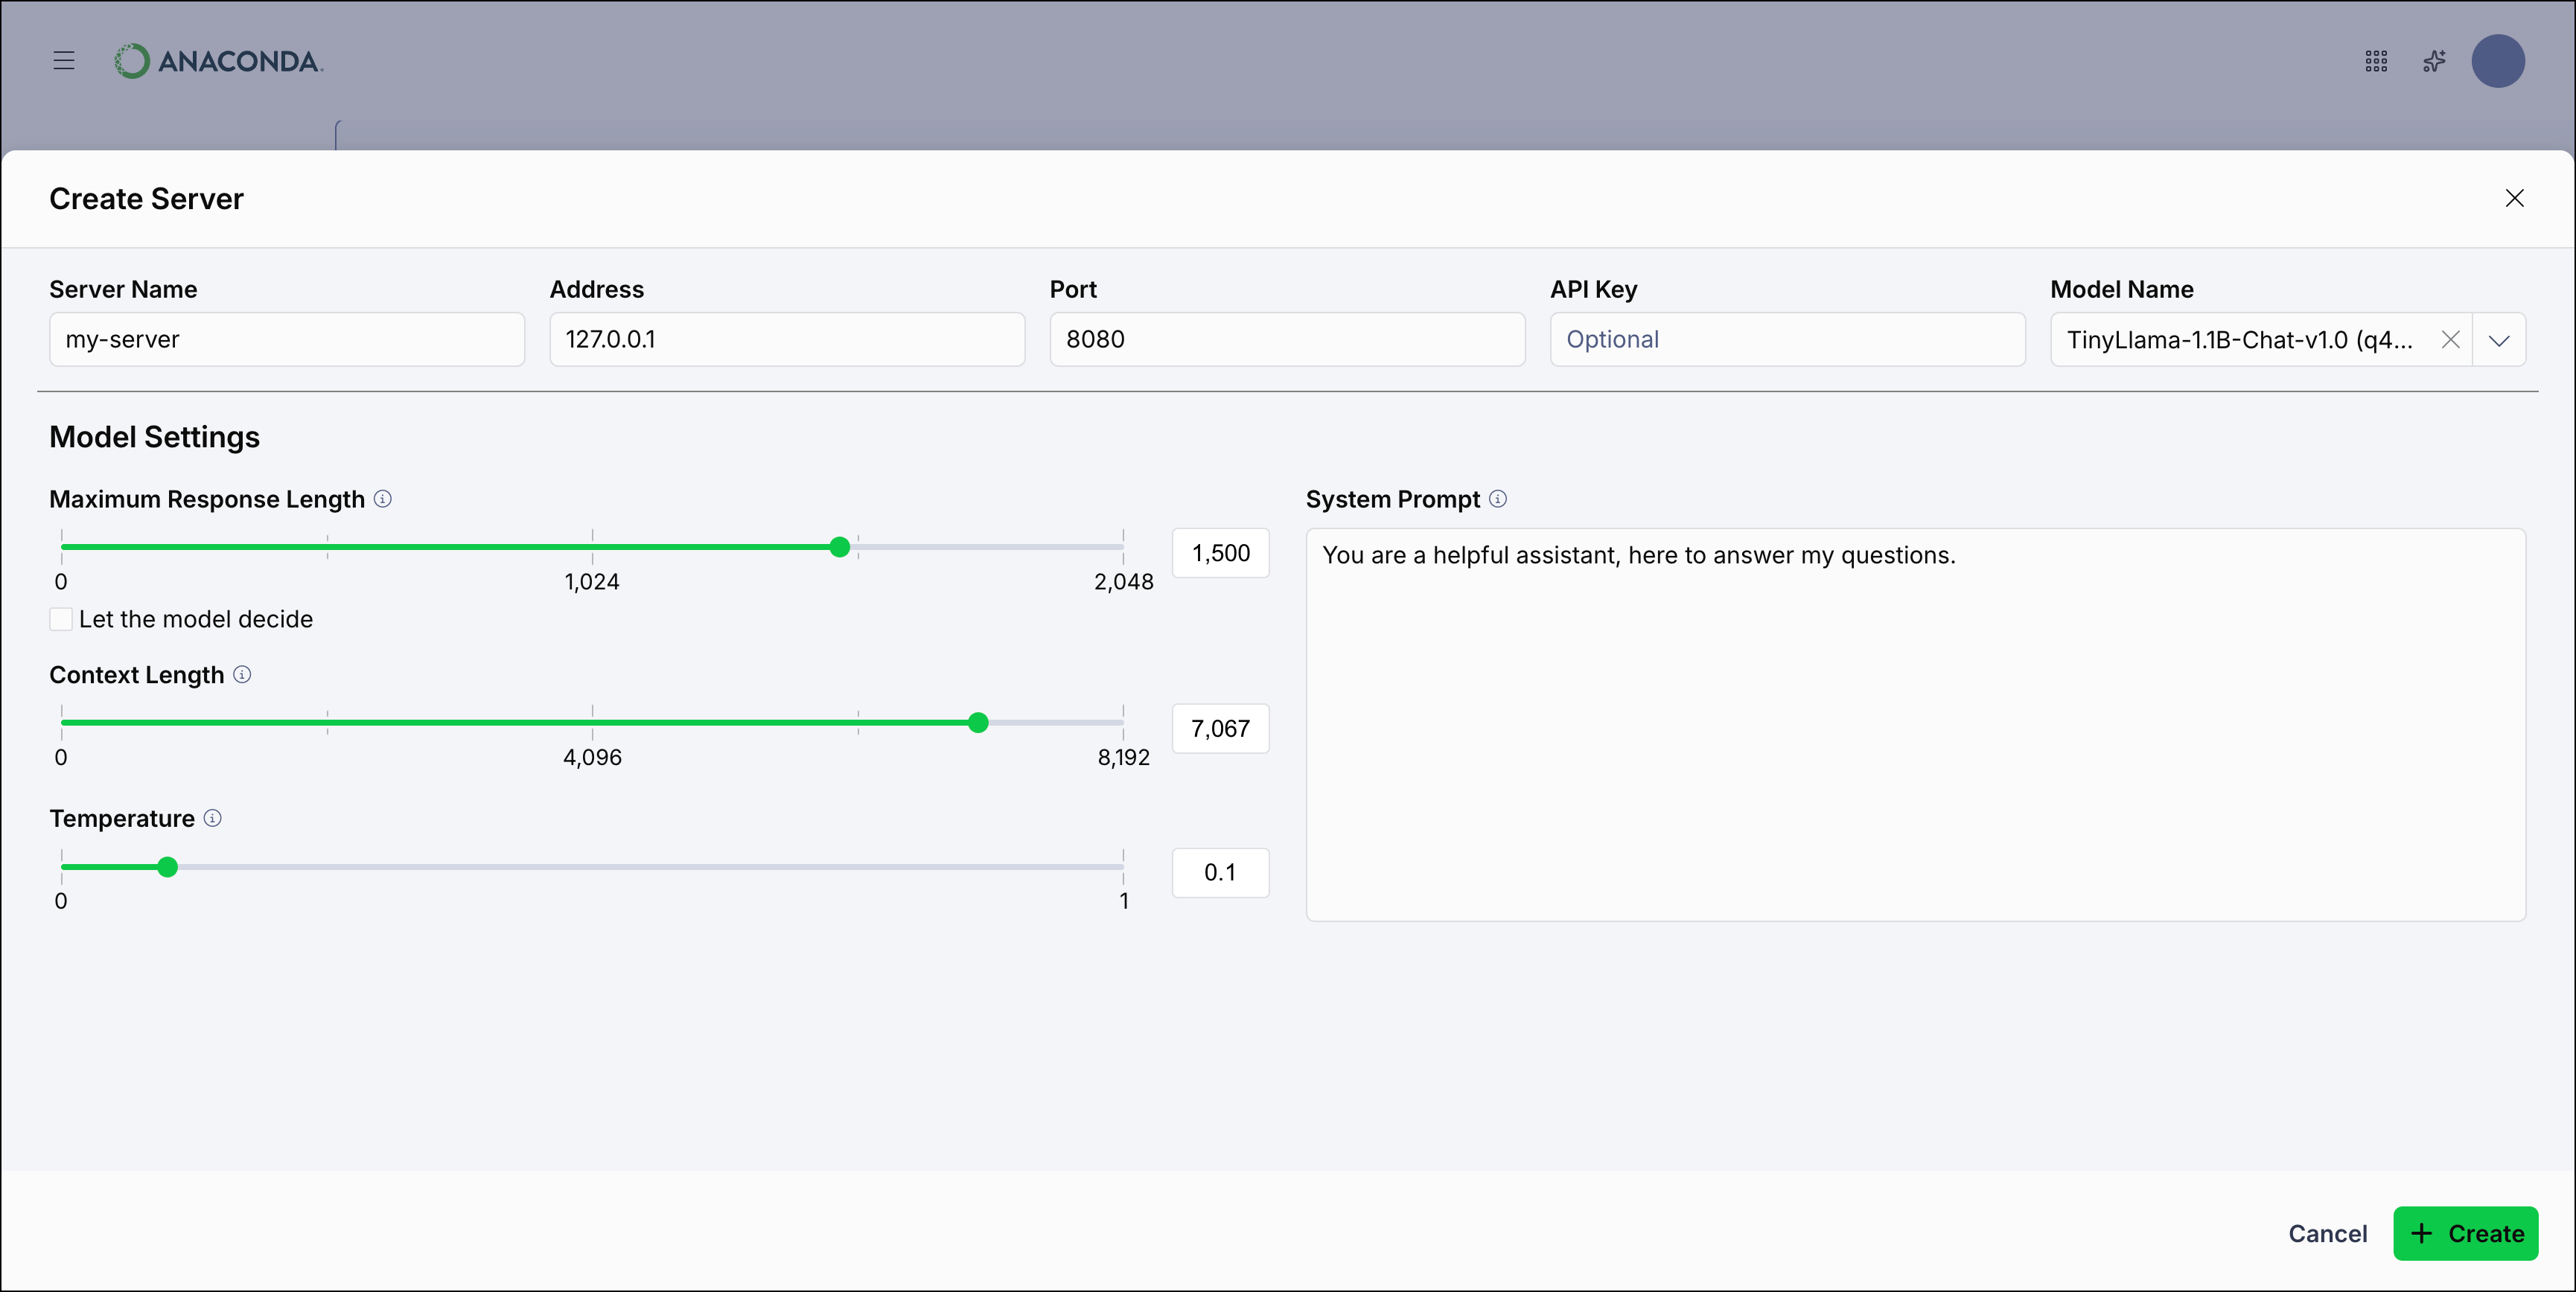
- Server Name: A unique name to identify this server.
- Address: The network address to bind to (default:
127.0.0.1). - Port: The port to listen on (default:
8080). - API Key (optional): A string used to authenticate requests. See API key for details.
- Model Name: Select the model and quantization level to load.
- Maximum Response Length: The maximum number of tokens the model generates in a single response (0–2,048). Check Let the model decide to let the model determine when it has fulfilled the request.
- Context Length: The maximum number of tokens the model can hold in memory at once, including the conversation history and the response being generated (0–8,192).
- Temperature: Controls the randomness of the model’s output (0–1). Lower values produce more deterministic responses; higher values produce more varied output.
- System Prompt: Instructions that shape the model’s behavior for every request.
- Enable vision (multimodal): Appears only when an
image-text-to-textmodel is selected. When checked, the server starts with the downloaded multimodal projector (the model’s vision component), enabling vision capabilities. When unchecked, the model runs in text-only mode.
4
Create the server
Click Create. The server appears in the Servers table.
Starting and stopping a server
To start a server, click the actions menu on the server’s row and select Start.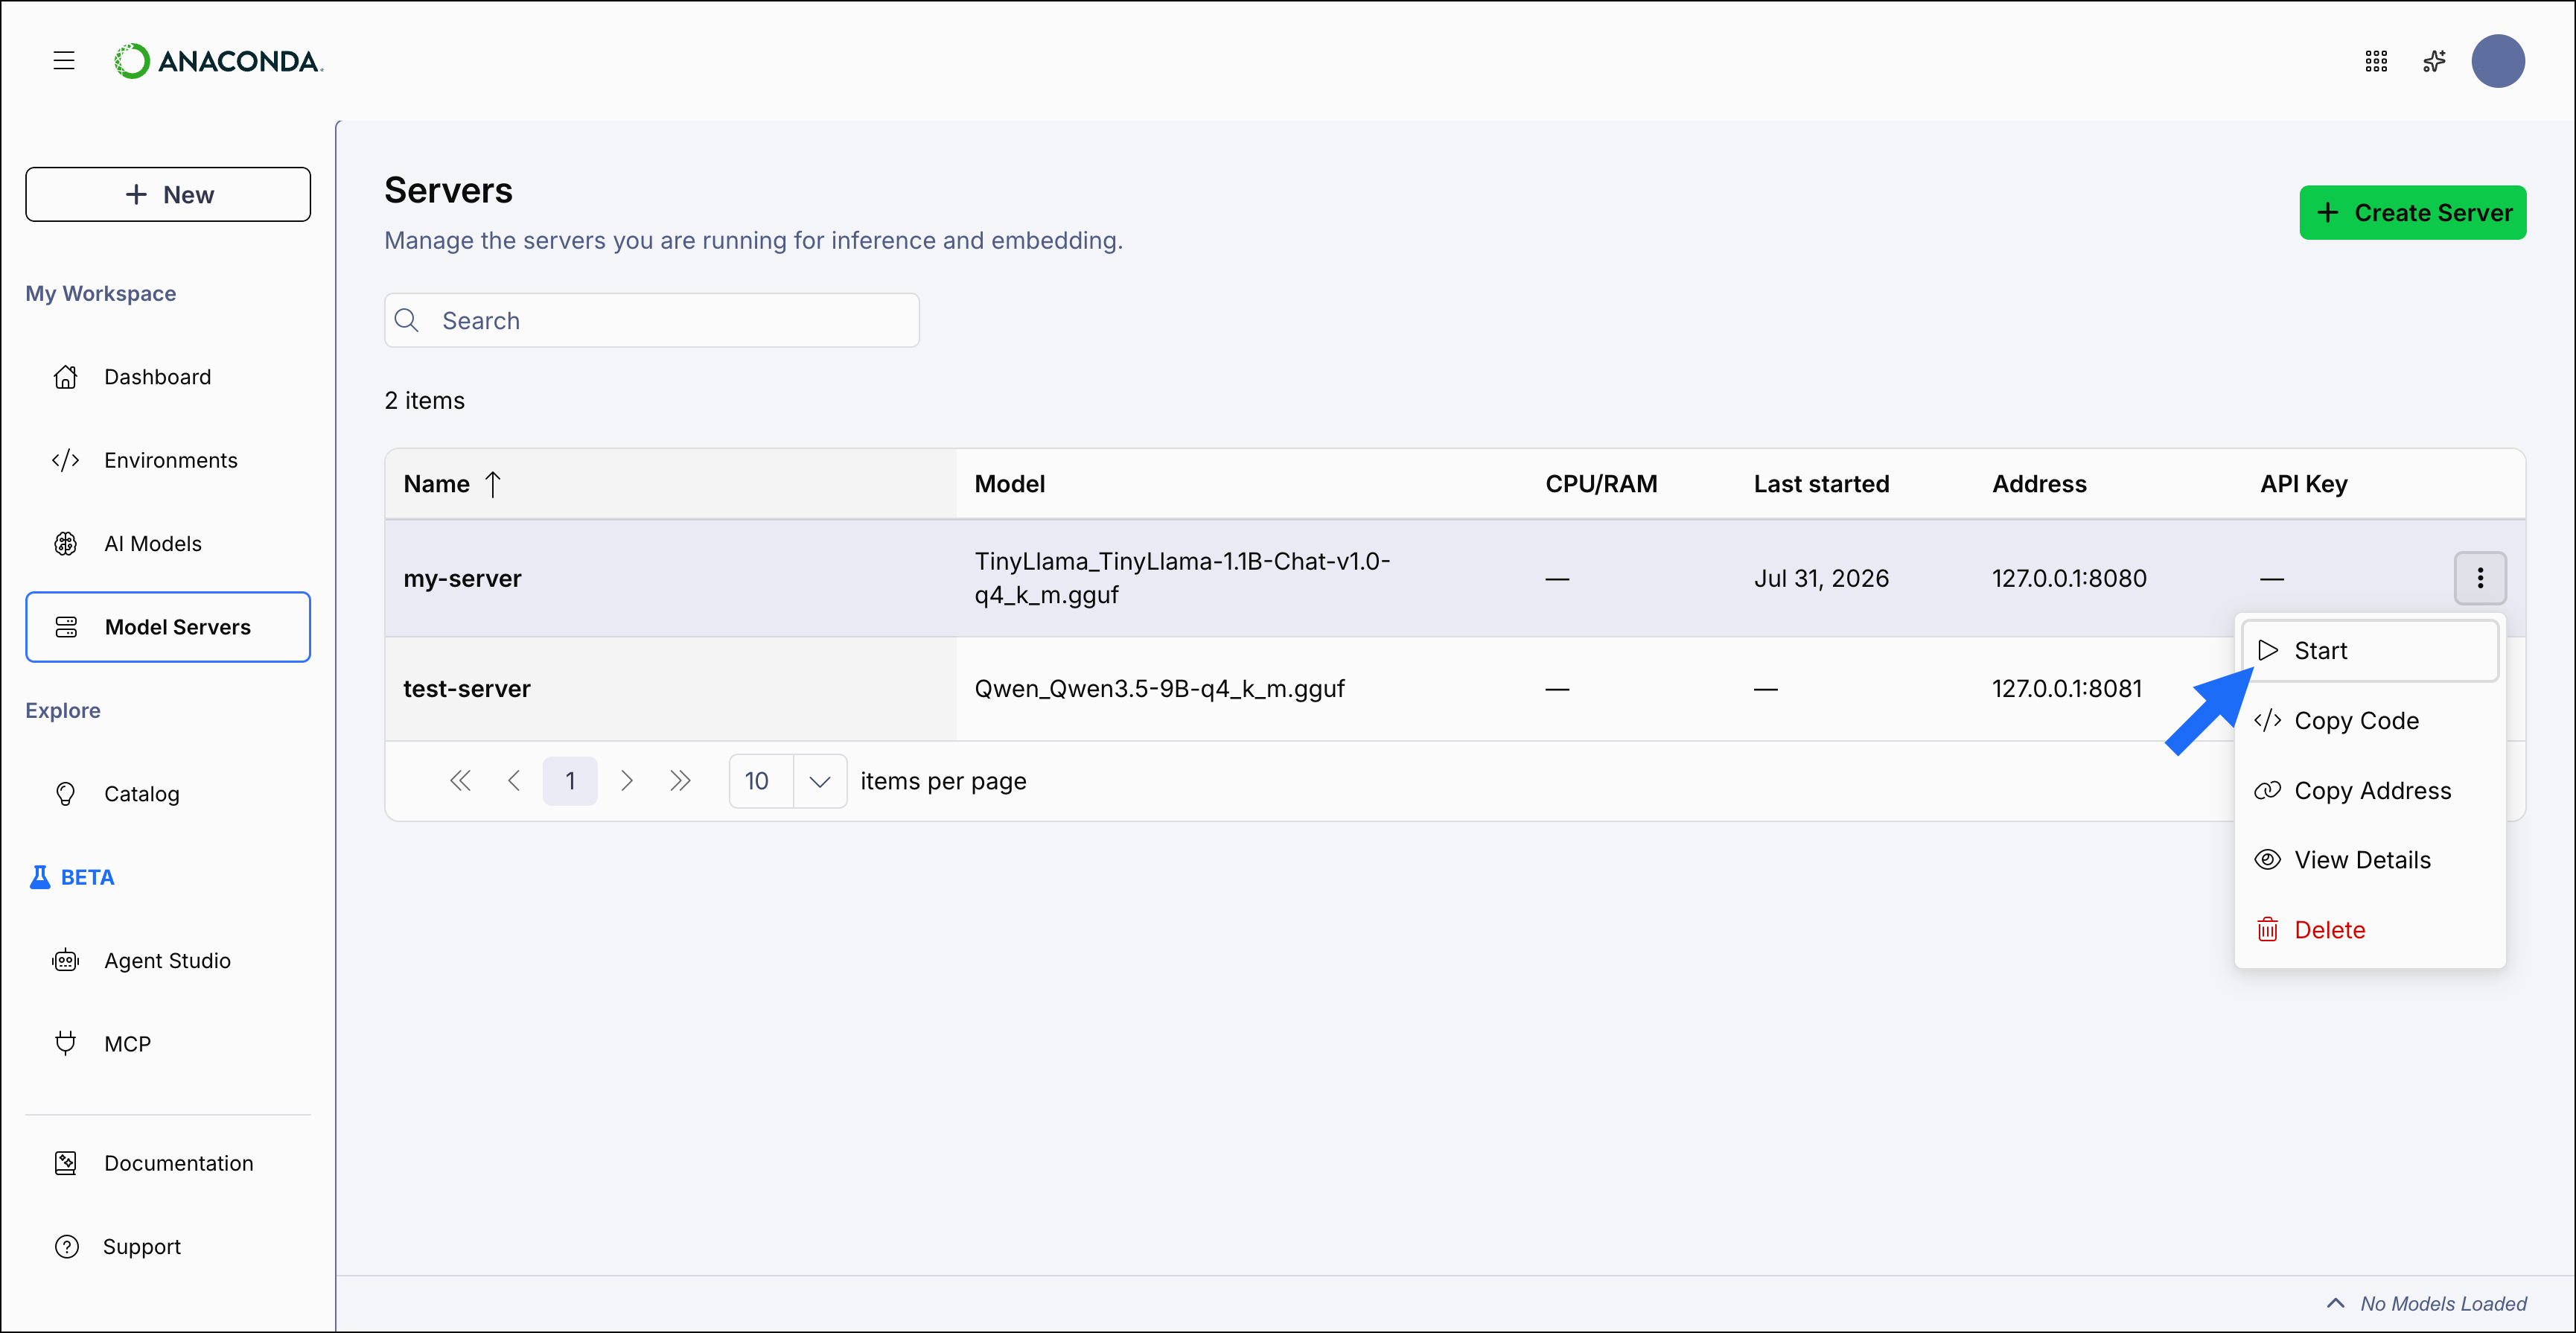
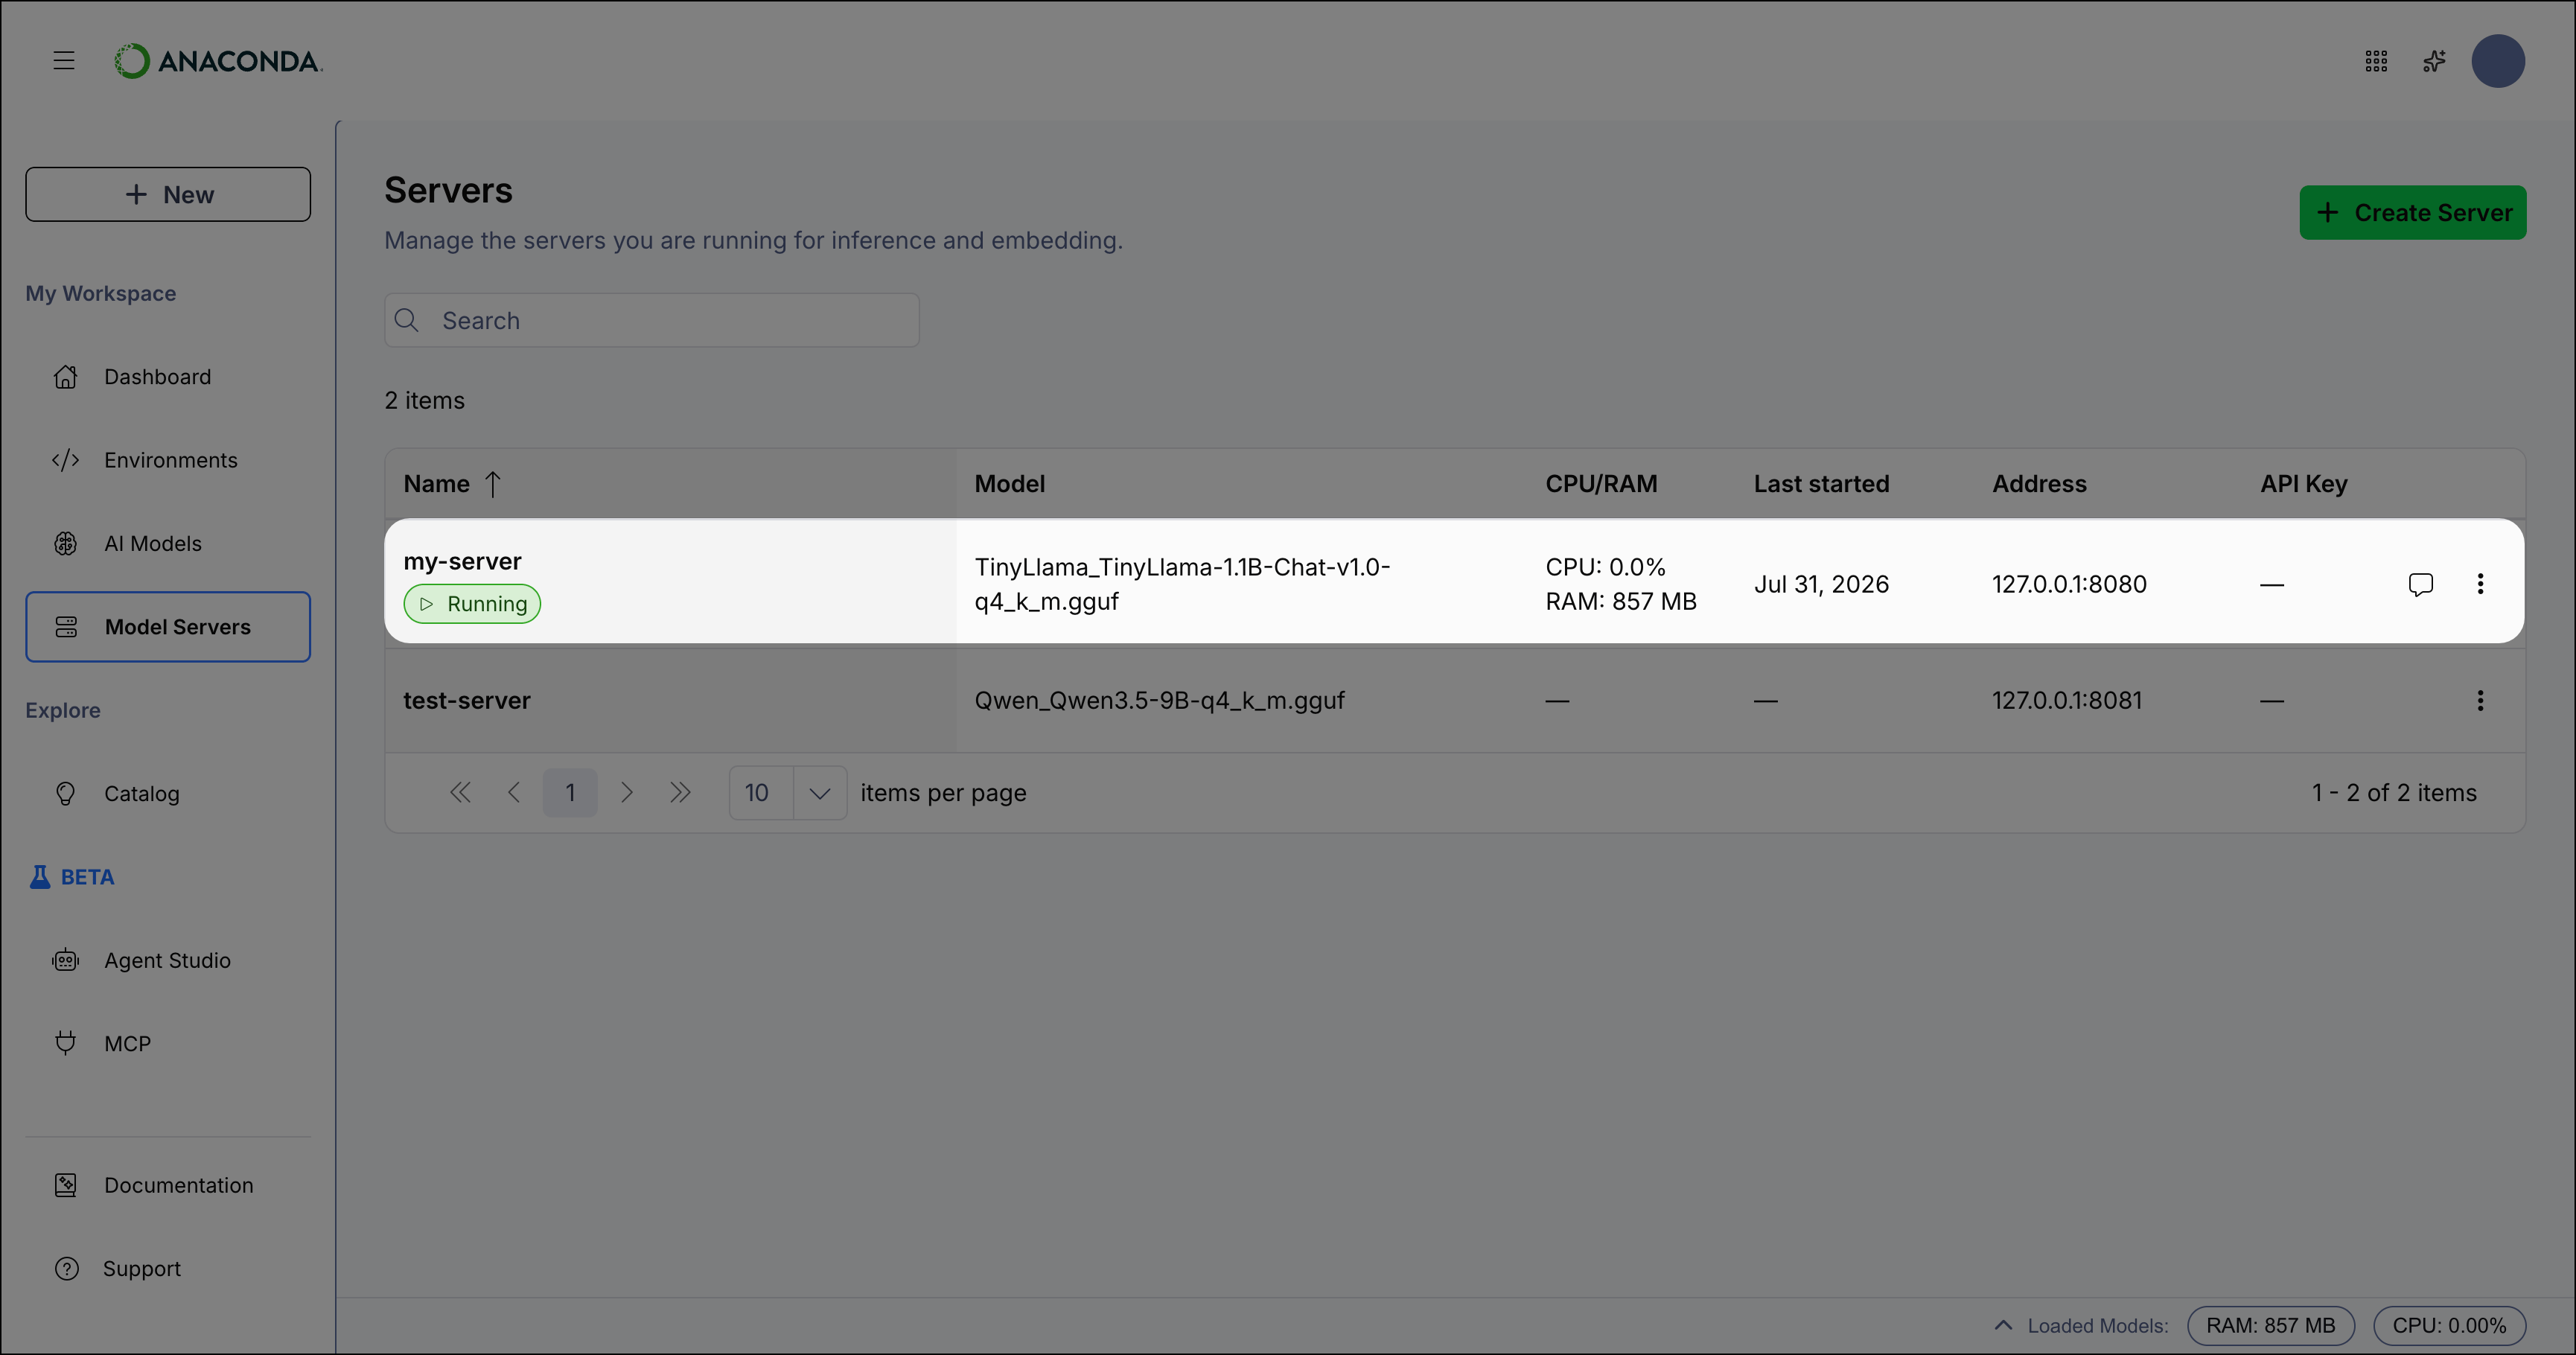
Viewing server details
Once you’ve created a server, you can view and edit its details. To open a server’s details page, click the server’s row on the Servers table or click the actions menu on the server’s row and select View Details. The detail page has two tabs: Overview and Logs. The Overview tab shows four cards:- Details: The server’s address, API key, model, and unique server ID. Hover over the ID or Address fields and click Copy to copy their values for use in API requests. Click Edit to modify the server configuration.
- Code: Ready-to-use connection code pre-filled with this server’s address. The code varies by model and configuration. See Connecting applications to servers for more information.
- Model Settings: The current values for Maximum Response Length, Context Length, Temperature, and System Prompt. Click Edit to update these settings.
- Usage Metrics: Current-session RAM and CPU usage for the running server. See Resource consumption for more information.
You must stop the server before editing its details or model settings.
Viewing server logs
The server records all incoming traffic and displays relevant information in the server logs. To view logs, open the server’s detail page and select the Logs tab. The server logs record the following:- System information: Provides information about your system’s hardware capabilities.
- Build information: Provides information about the version of the server you are using.
- Chat template: Shows the sequence of messaging defined for the system.
- Server listening: Displays the server address and port number being listened to.
- Slot information: Displays the number of available slots for the server. Each slot is able to manage one user API request at a time.
- Task information: Displays information such as time spent processing and responding to a request, the request task ID, and which slot fulfilled the task.
<YYYY><MM><DD><HH><MM><SS>_api-server.log), so you can efficiently locate specific server logs, if necessary:
- Windows
- macOS
For Windows machines, you can find the logs here:
C:\Users\<USERNAME>\AppData\Roaming\anaconda-desktop\logsUnderstanding server settings
Server address
Your local server address, often referred to aslocalhost or 127.0.0.1, is the default address for model servers. It is a loopback address, meaning any network communication sent to this address remains within the same machine, keeping your data secure and private. This is common for developing applications.
If you are working in an office network and want to make your server accessible to other devices within the same network, you can set the server address to your machine’s local IP address. These are typically private networks, meaning they’re not routable on the public internet.
Setting the server address to 0.0.0.0 configures it to accept connections on all network interfaces. This can expose your server to the public internet if your network is configured to allow external connections and route traffic from external sources to your server.
Server port
The server port tells the model server where to listen for incoming traffic (that is, where to listen and pick up API requests). For more information, see Cloudflare’s article on ports.API key
An API key is an optional string that must be passed as anAuthorization: Bearer token in the header of requests made to your server. You can choose any unique string as the API key, but the value you set when creating the server must match what you use in the Authorization: Bearer header.
Testing your API key
Testing your API key
To test an API key:
- Select Model Servers from the left-hand navigation.
- Enter your API key in the API Key field.
-
Load a model into the API server.
You must use a
text-generationtype model. -
Open (Terminal on macOS/Linux) and run the following command:
Connecting applications to servers
Connecting your application to a model server requires setting two environment variables: thebase_url, which directs your API calls to the server hosting your model, and the api_key, which authenticates your requests.
Follow the steps below to find these variables’ values and save them as environment variables in your application.
1
Configure your server
From the Model Servers page:
- Note your Server Address and Server Port (the default is
http://localhost:8080). This will be yourbase_url. - (Optional) Set an API Key. You can use any unique string value. If you don’t set an API key, you don’t need to provide an
api_keyin your application. - Load a model and click Start.
2
Configure your application
Set your credentials as environment variables:
Setting environment variables is considered a best practice for security. However, for local testing and development, you can add the credentials directly in your code instead.
Environment variables set directly in the terminal will only last as long as the terminal session is active. To make these environment variables permanent, follow your system’s standard process for persisting environment variables.
Environment variables set directly in the terminal will only last as long as the terminal session is active. To make these environment variables permanent, follow your system’s standard process for persisting environment variables.
OpenAI API compatibility
Anaconda Desktop model servers are OpenAI API compatible for chat completions. See OpenAI’s Chat Completion API documentation for more information on making chat completion requests.For production use, store the
base_url and api_key values as environment variables rather than hardcoding them in your application.