Channel names must be unique. If your username is already in use as a channel name, a new channel will not be generated for you on your initial login.
Viewing channels you can access
The dashboard shows a list of channels that you have access to. If you have access to more than 10 channels, you can click Show more… at the bottom of the list to view all your channels. Private channels that you don’t have access to will not appear in this list.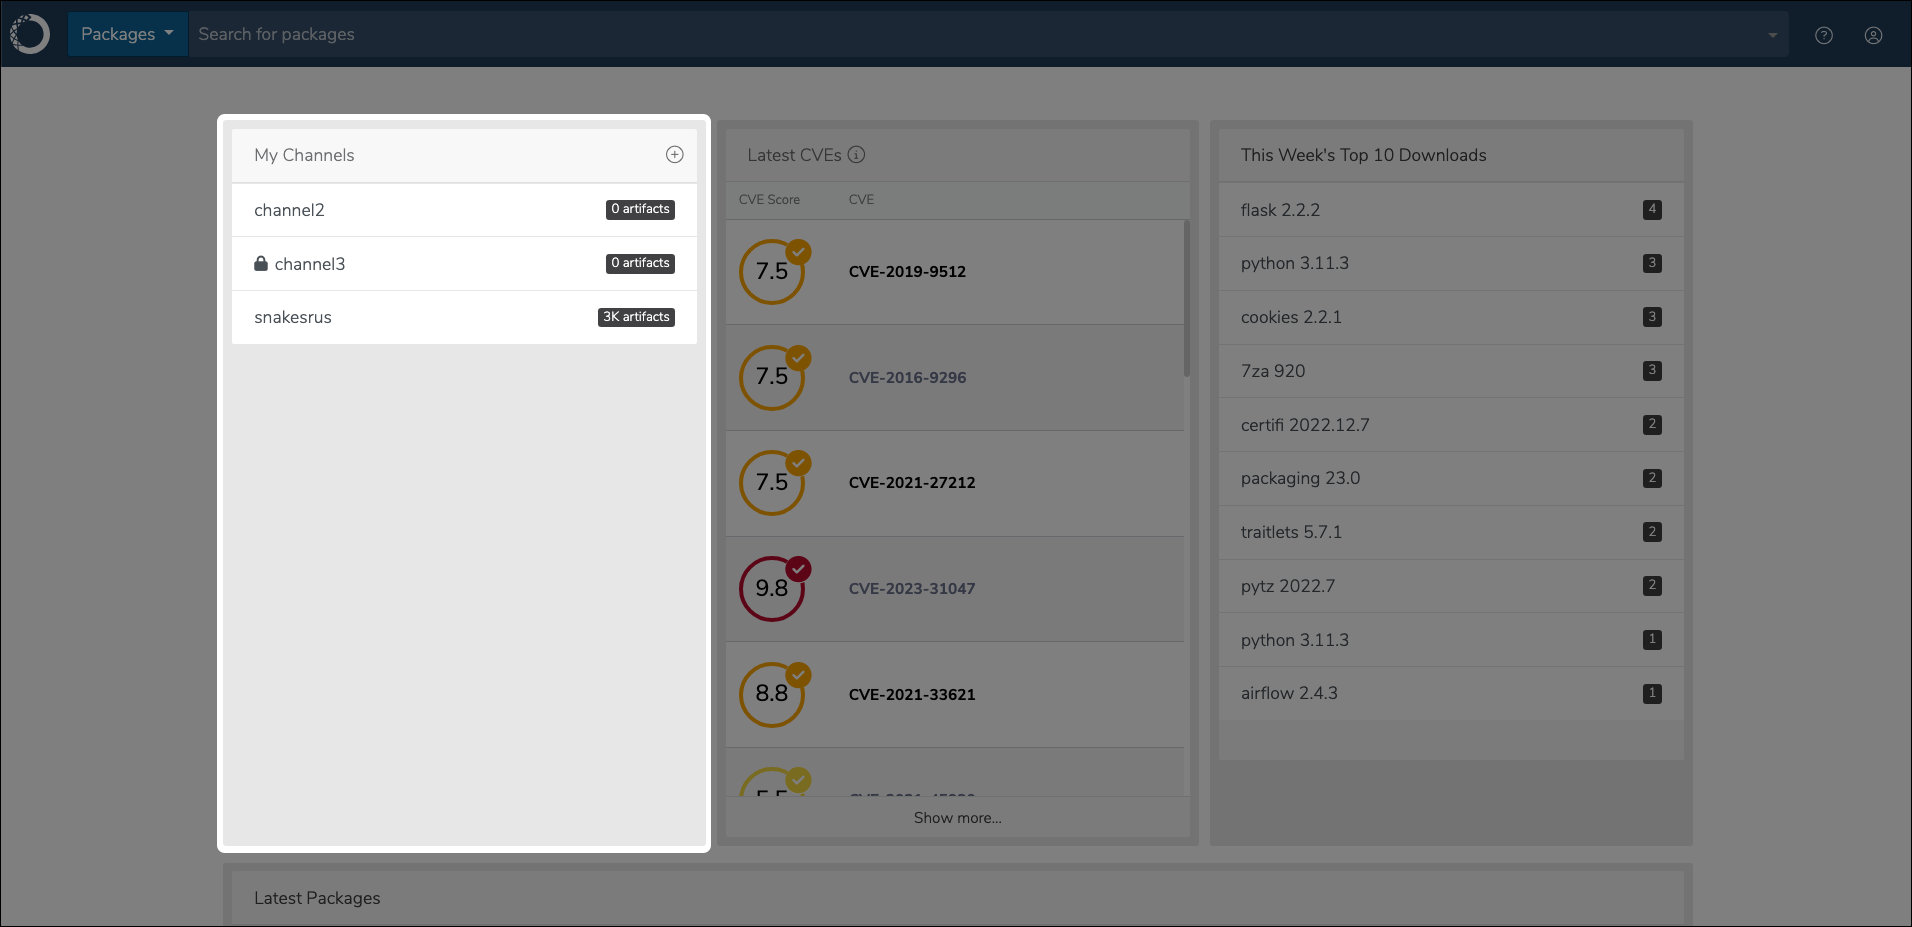
Viewing channel details
To view a channel’s details page, click on the name of any channel. You can access the channel details page from the dashboard, or from the My Channels page.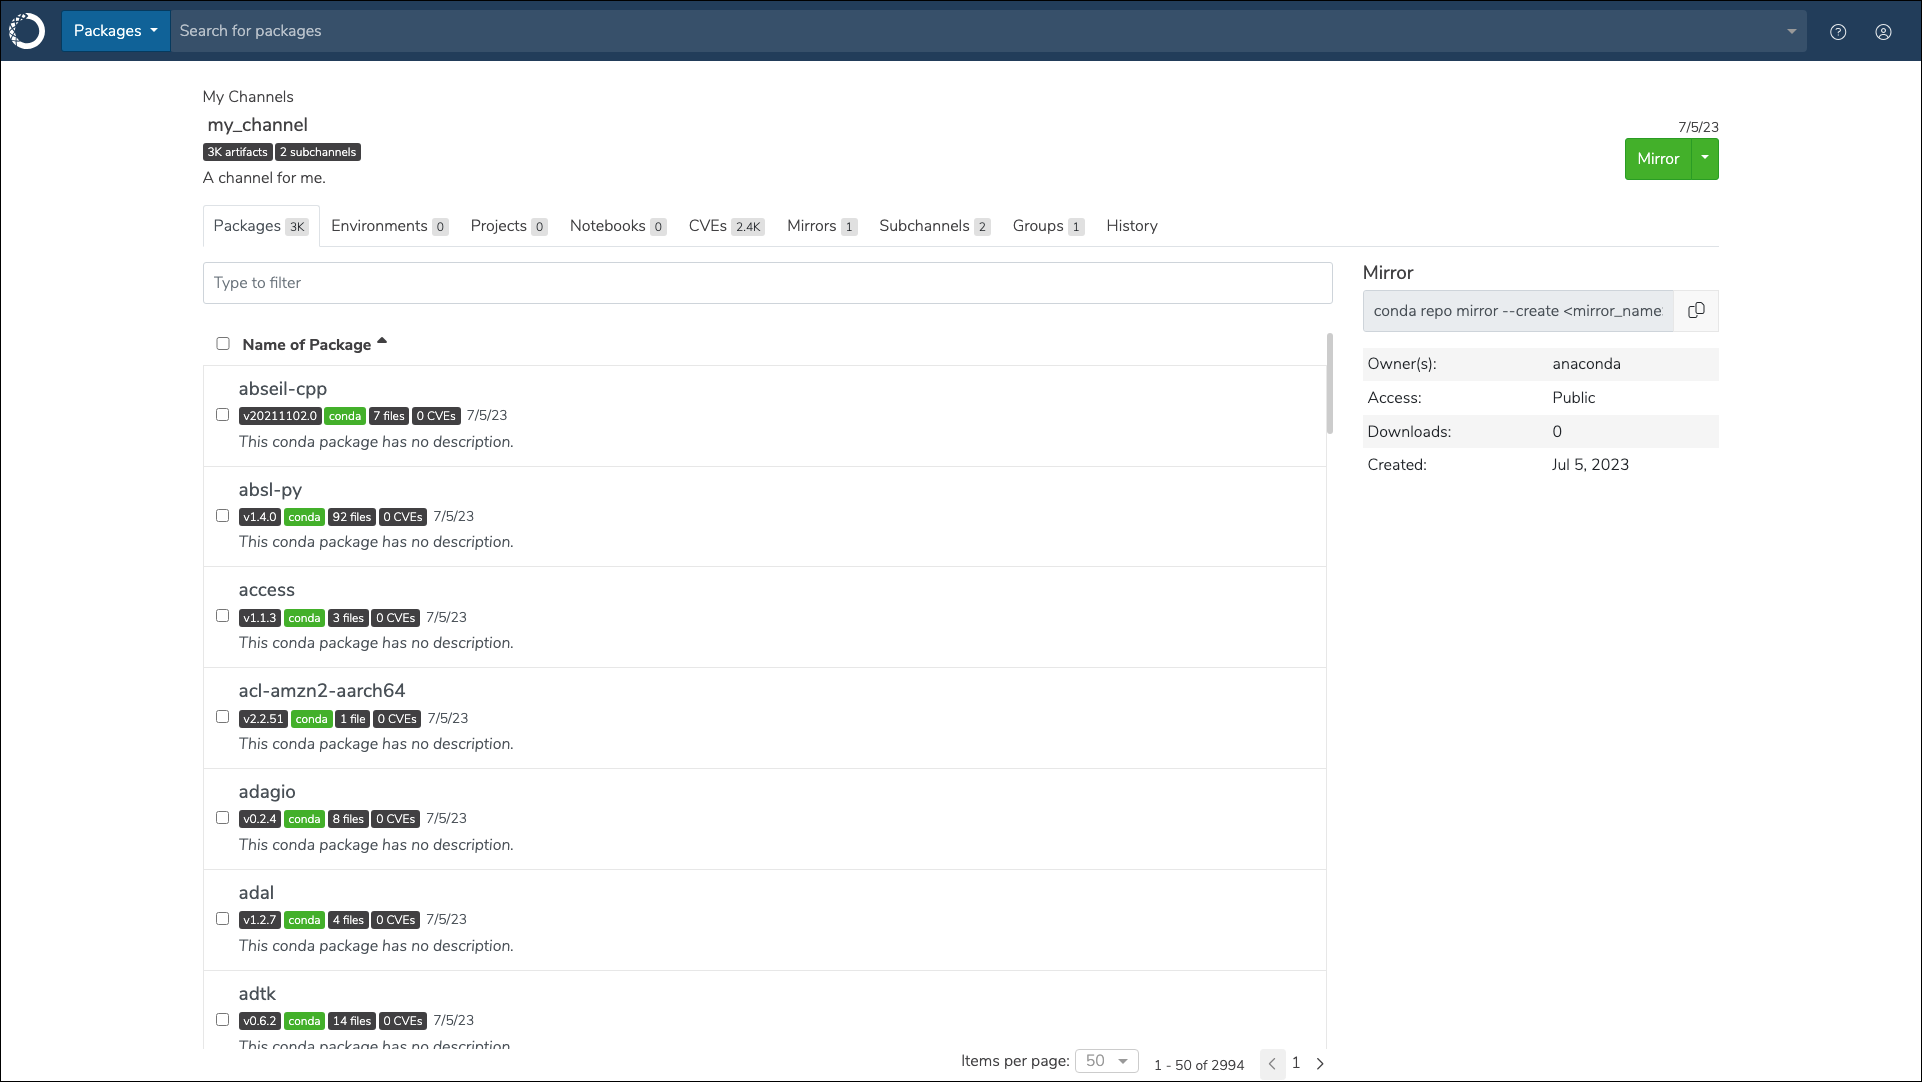
Viewing subchannel details
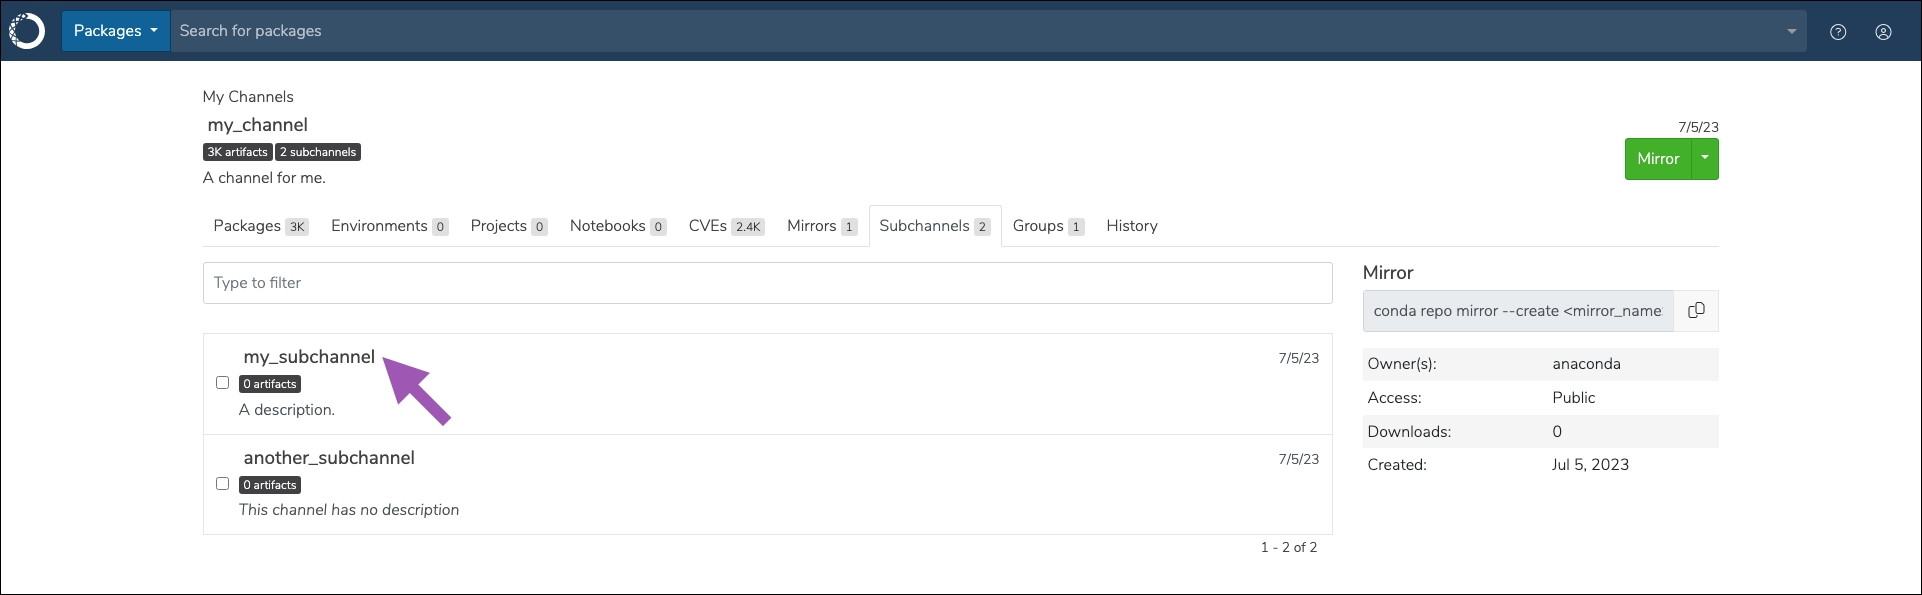
To view a subchannel’s details page:- Navigate to the channel’s details page.
- Select the Subchannels tab.
- Click on the name of the subchannel you want to view.
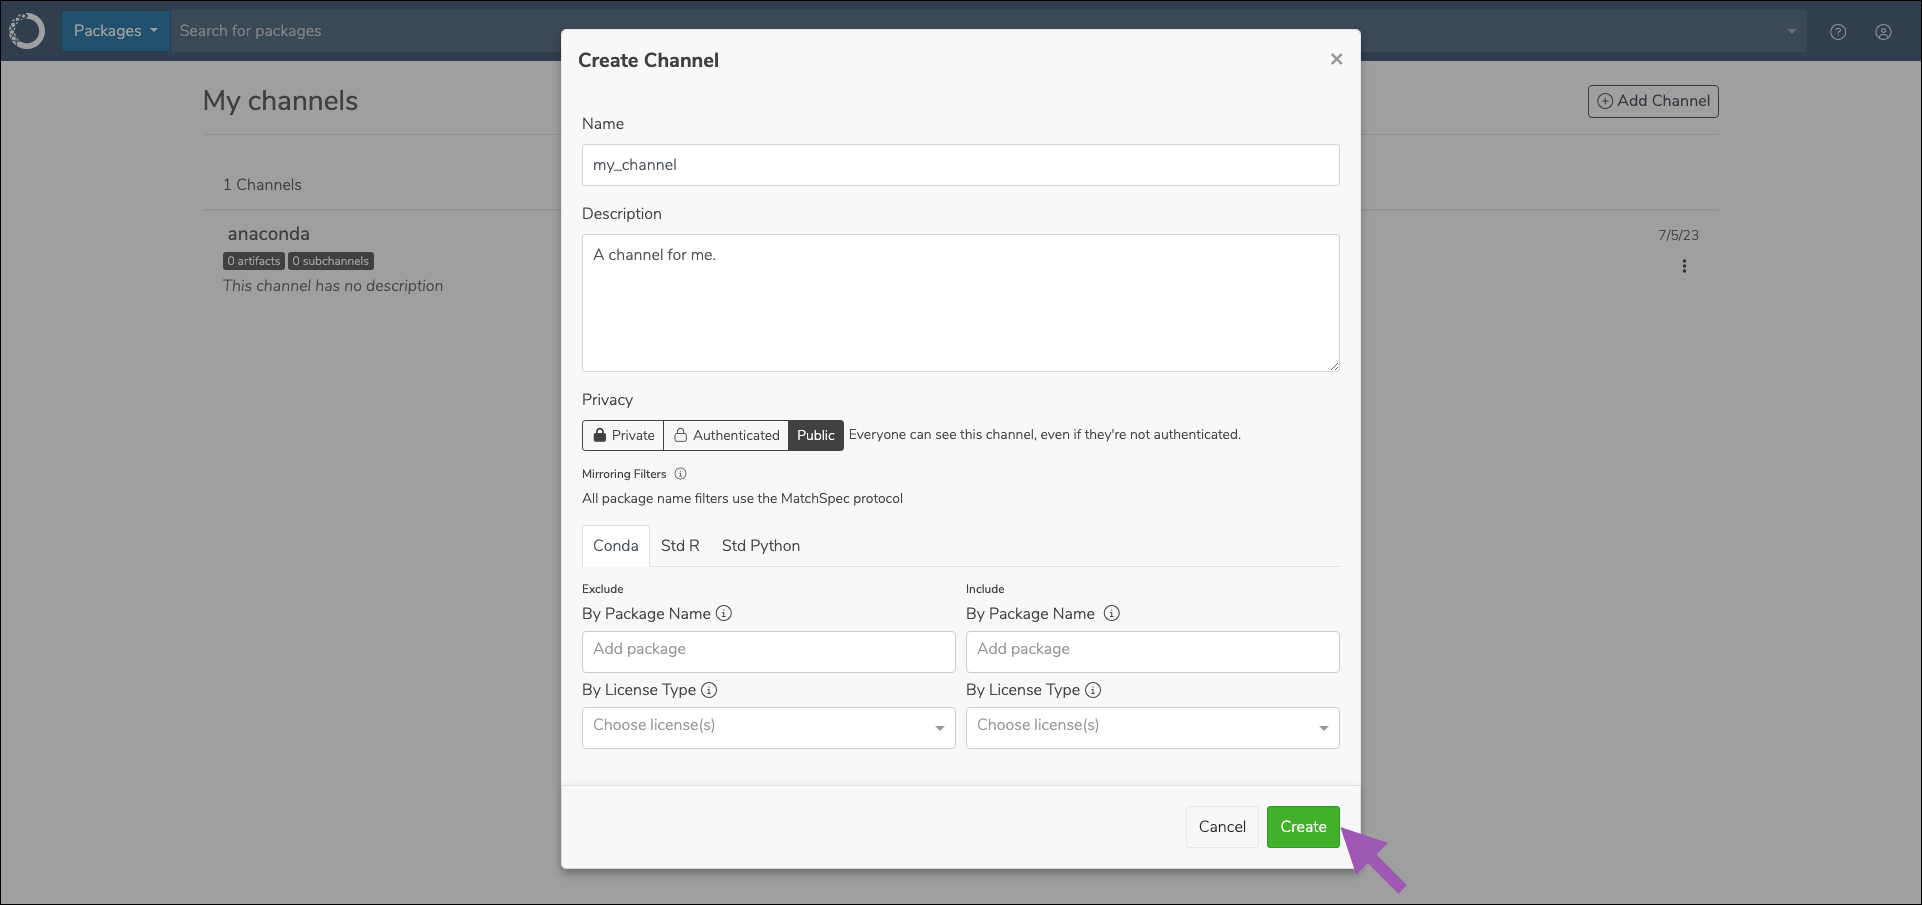
Creating a channel
To create a new channel in Anaconda Server:-
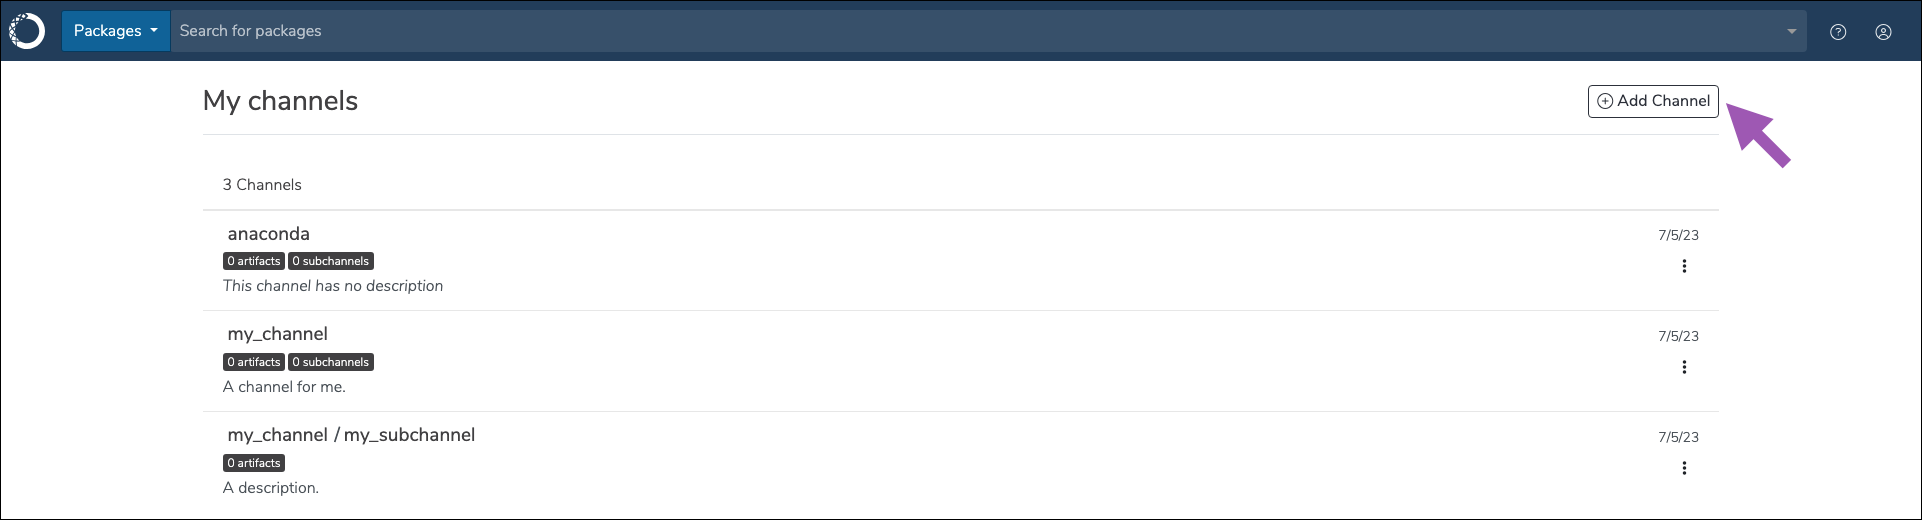
Open the user dropdown menu and select My channels or All channels (depending on your permissions), then click Add Channel.
- Enter a unique name for your channel.
- Provide a brief description of the channel.
- Set the privacy level for your channel.
- Set any package filters for your channel.
-
Click Create.
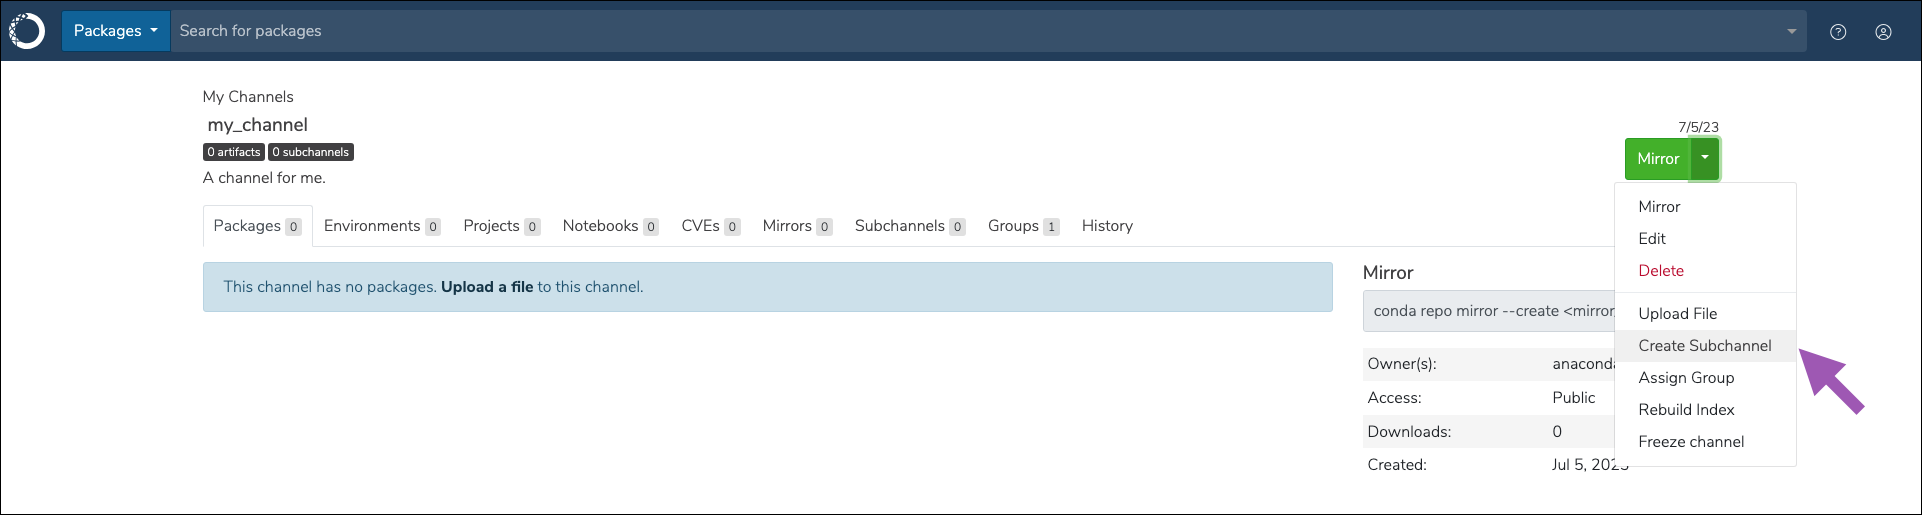
Creating a subchannel
To create a subchannel in Anaconda Server:- Navigate to a channel’s details page.
-
Open the actions dropdown menu and select Create Subchannel.
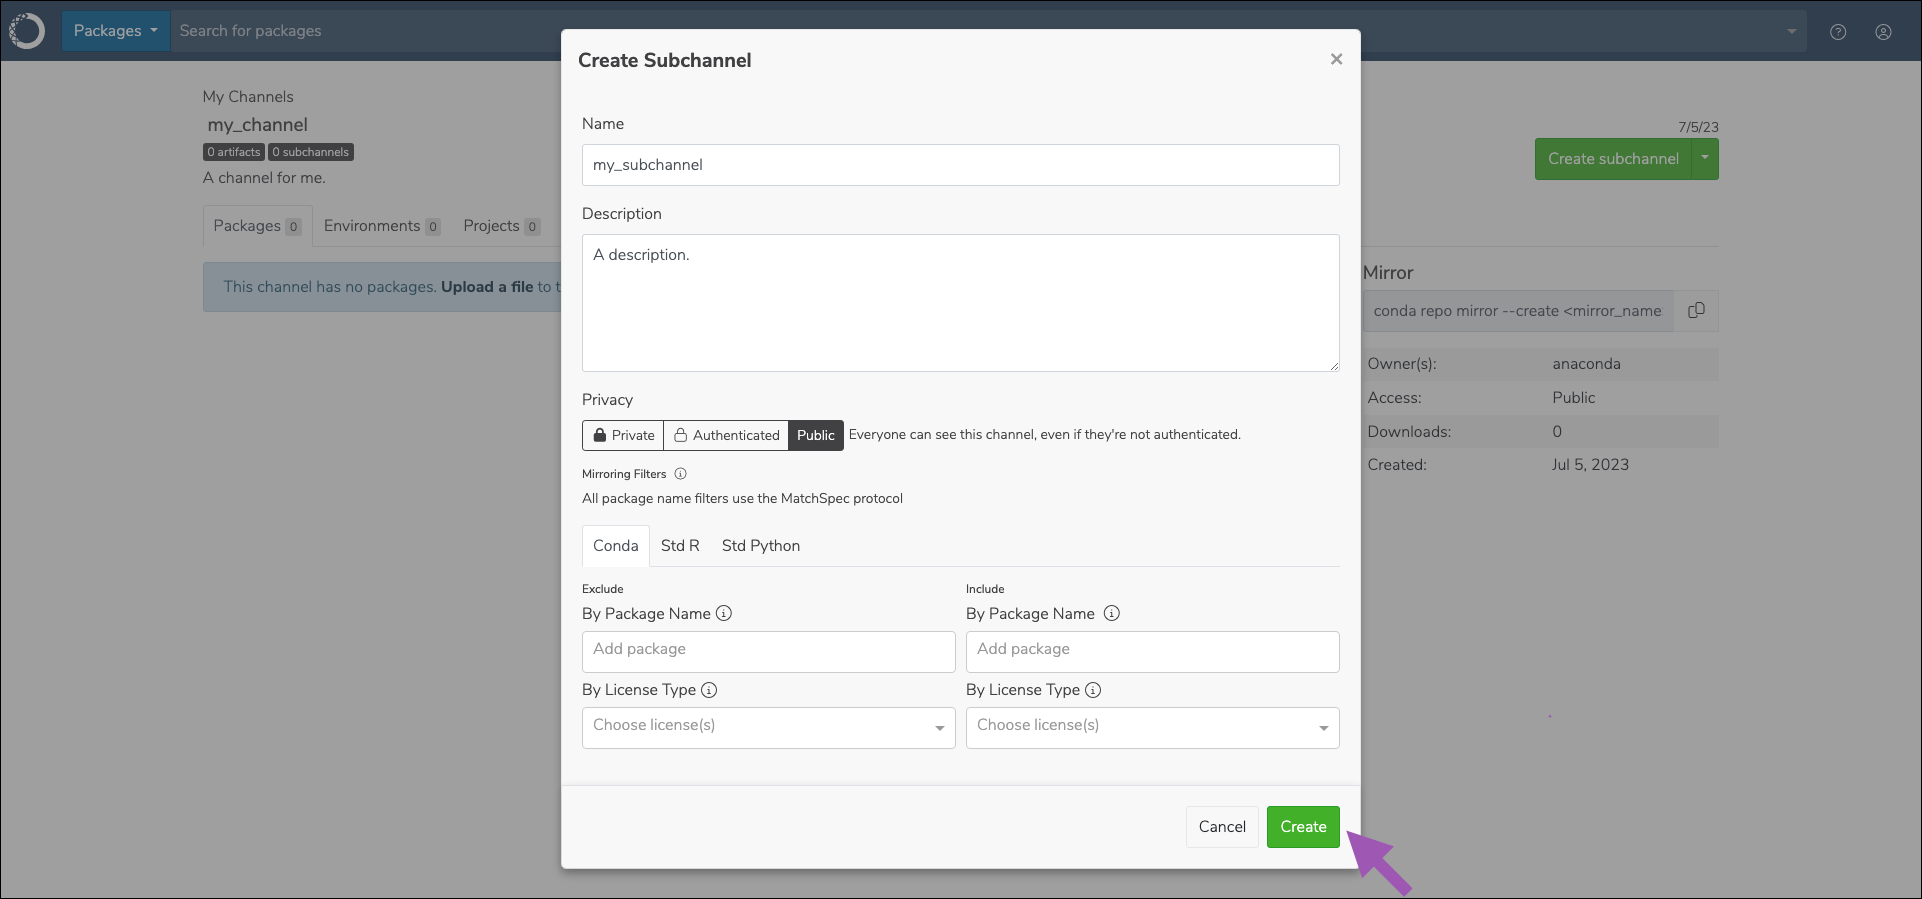
- Enter a unique name for your subchannel.
- Provide a brief description of the subchannel.
- Set the privacy level for your subchannel.
- Set any package filters for your subchannel.
-
Click Create.
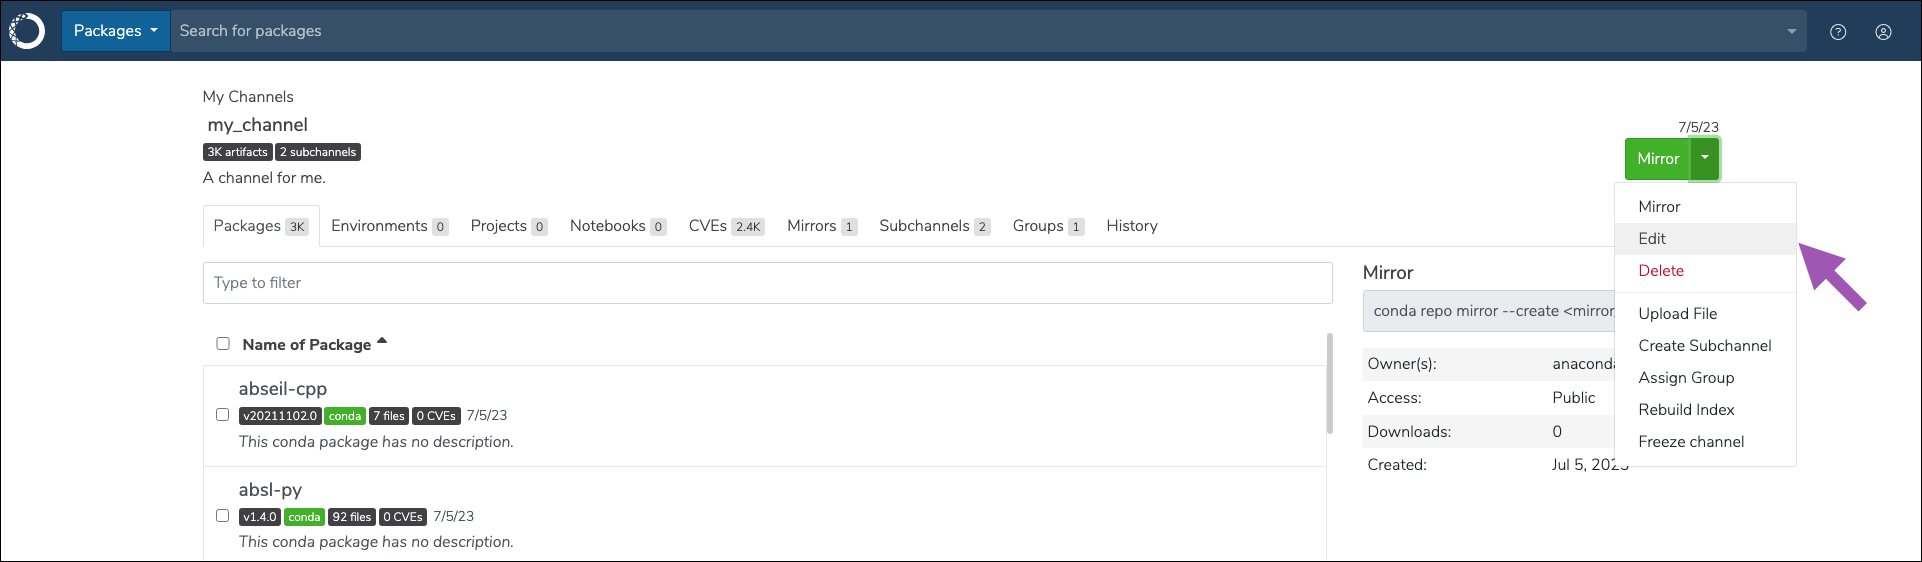
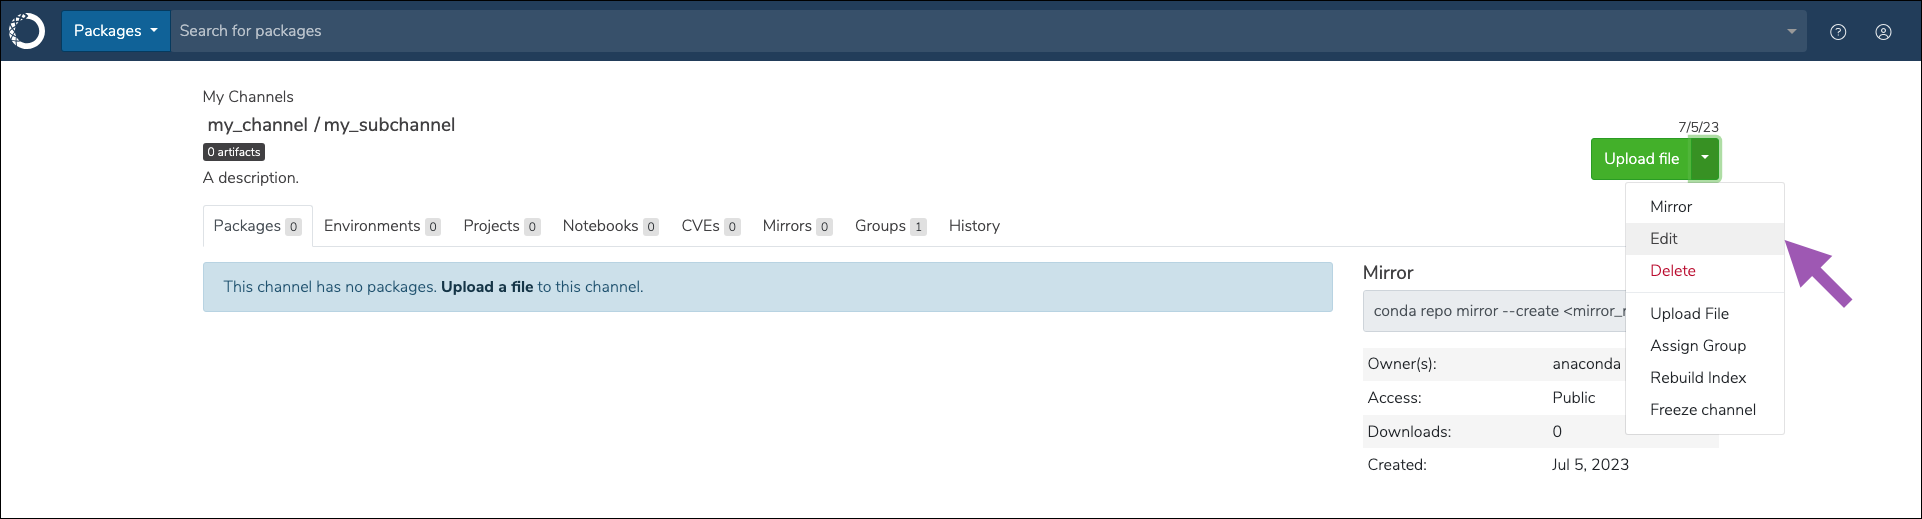
Editing a channel
You can update the name, description, privacy level, and package filters of your channel at any time after creation. To edit a channel:- Navigate to the channel’s details page.
-
Open the actions dropdown menu and select Edit.
Editing a subchannel
You can update the name, description, privacy level, and package filters of your subchannel at any time after creation. To edit a subchannel:- Navigate to the subchannel’s details page.
-
Open the actions dropdown menu and select Edit.
Deleting a channel
To delete a channel in Anaconda Server:- Navigate to a channel’s details page.
-
Open the actions dropdown menu and select Delete.
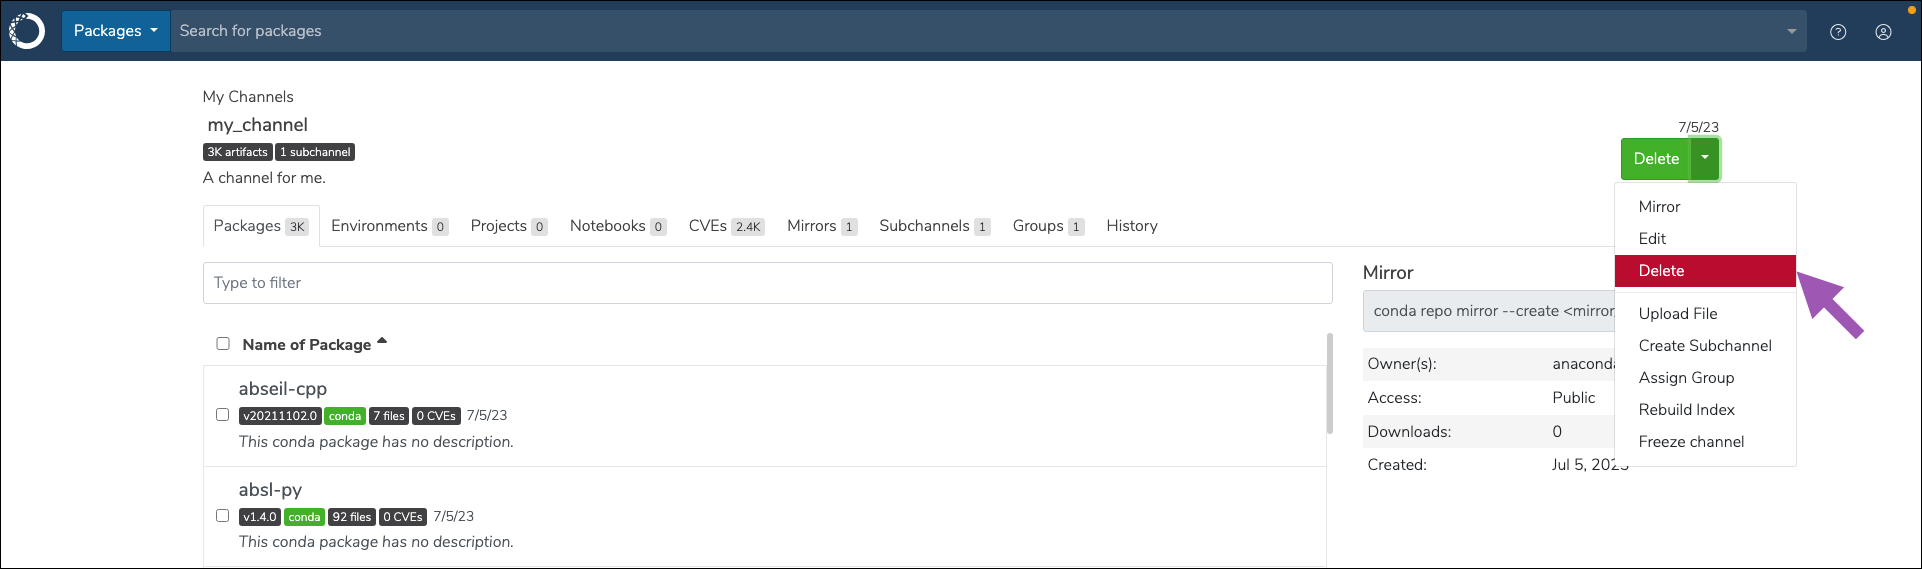
You cannot delete channels that contain subchannels.
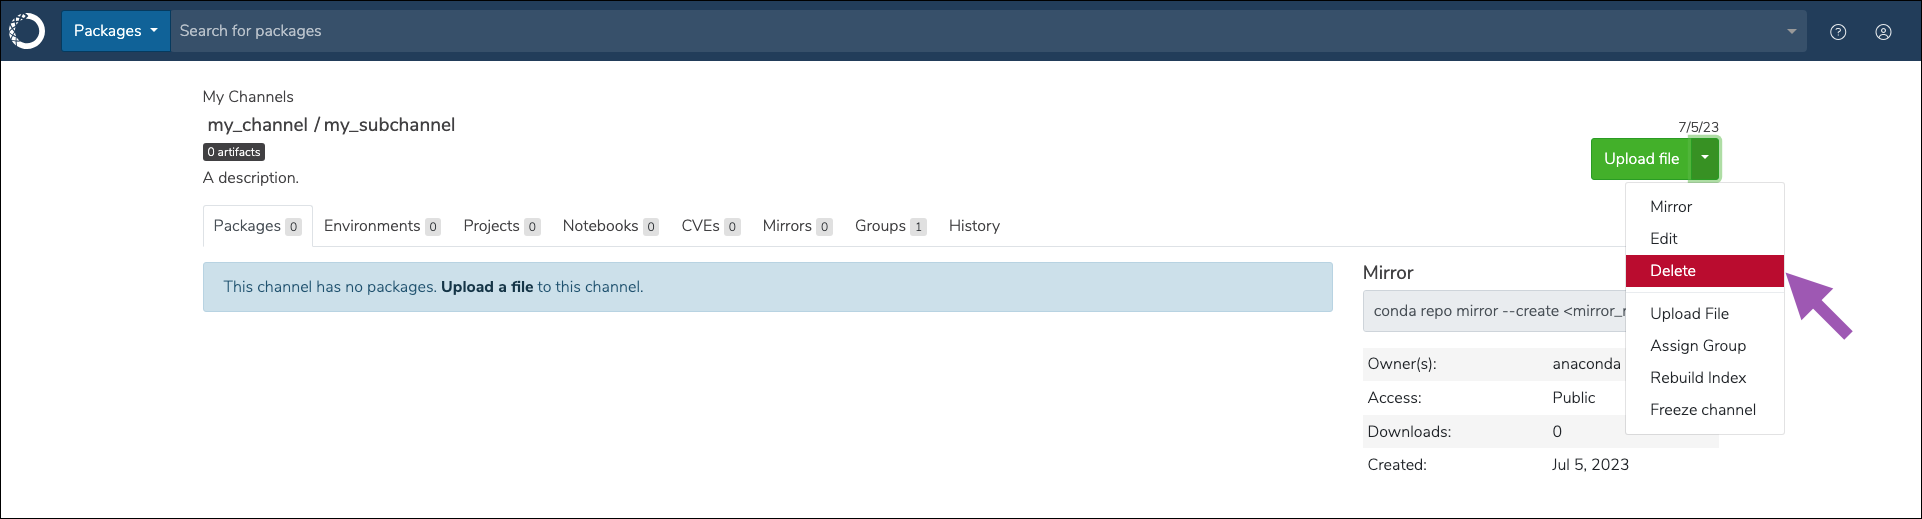
Deleting a subchannel
To delete a subchannel in Anaconda Server:- Navigate to the subchannel’s details page.
-
Open the actions dropdown menu and select Delete.
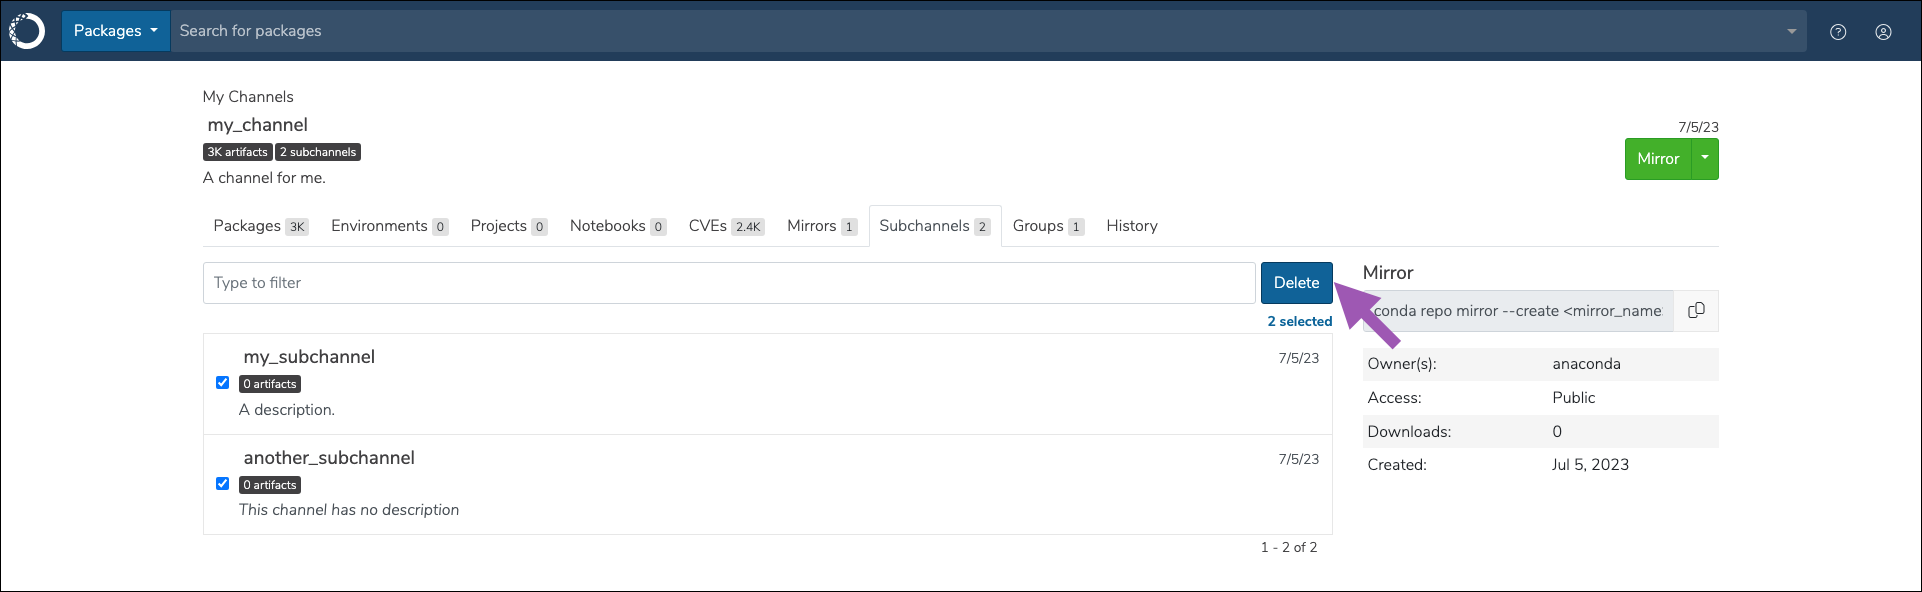
- Navigate to a channel’s details page.
- Select the Subchannels tab.
-
Select the checkboxes next to the subchannels you want to delete, then click Delete.
Freezing a channel
Creating a mirror consumes a large amount of CPU resources. This is because, each time an artifact is added to the channel from the mirror, the channel index is rebuilt to add the artifact to the Packages tab of your channel. If you want to conserve or reduce your CPU usage, you can freeze your channel before creating a mirror to prevent the channel index from being rebuilt every time an artifact is registered from the mirror’s source.Because the channel index is prevented from being built, the Rebuild Index option is disabled while a channel is frozen. Channels and subchannels that are frozen also have their Move and Delete options disabled for packages, projects, environments, and notebooks. In addition, you cannot Copy packages to a channel that is frozen.
- Navigate to the channel’s details page.
-
Open the actions dropdown menu and select Freeze Channel.
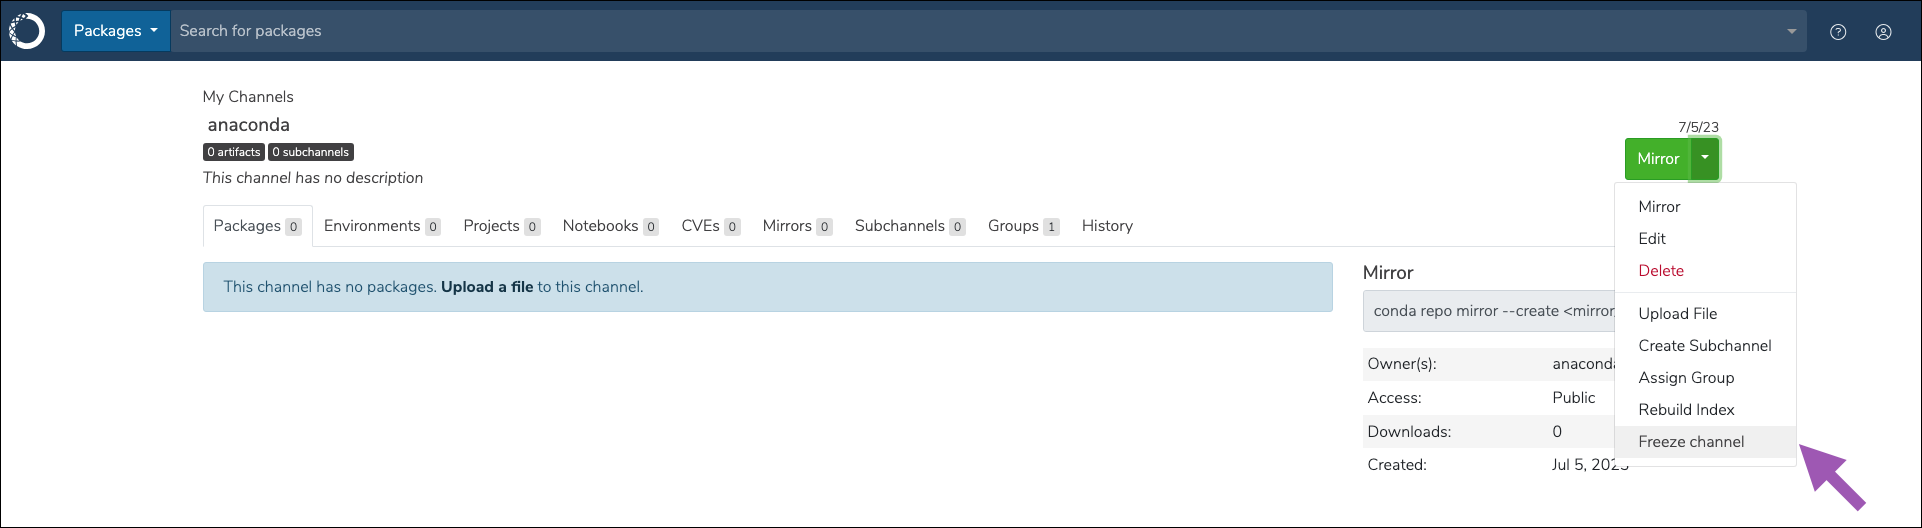
-
Click Freeze.
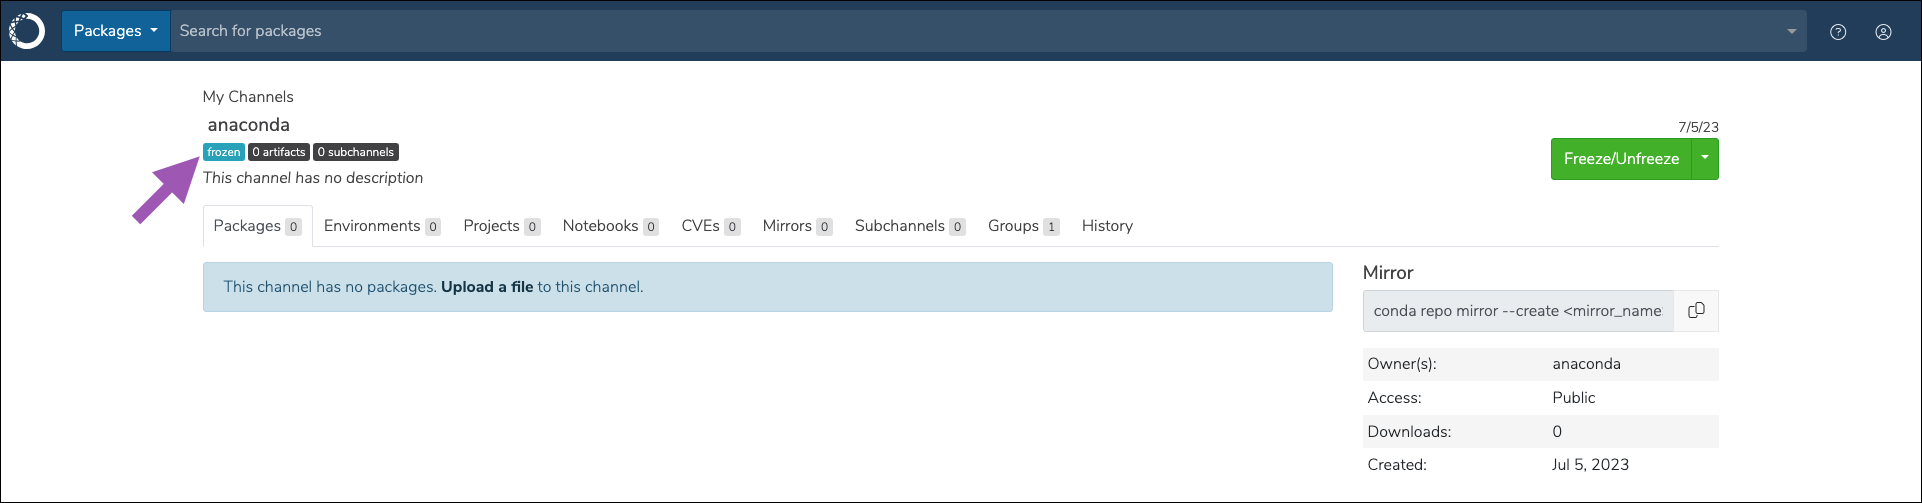
Frozen channels display a frozen tag below their channel name.
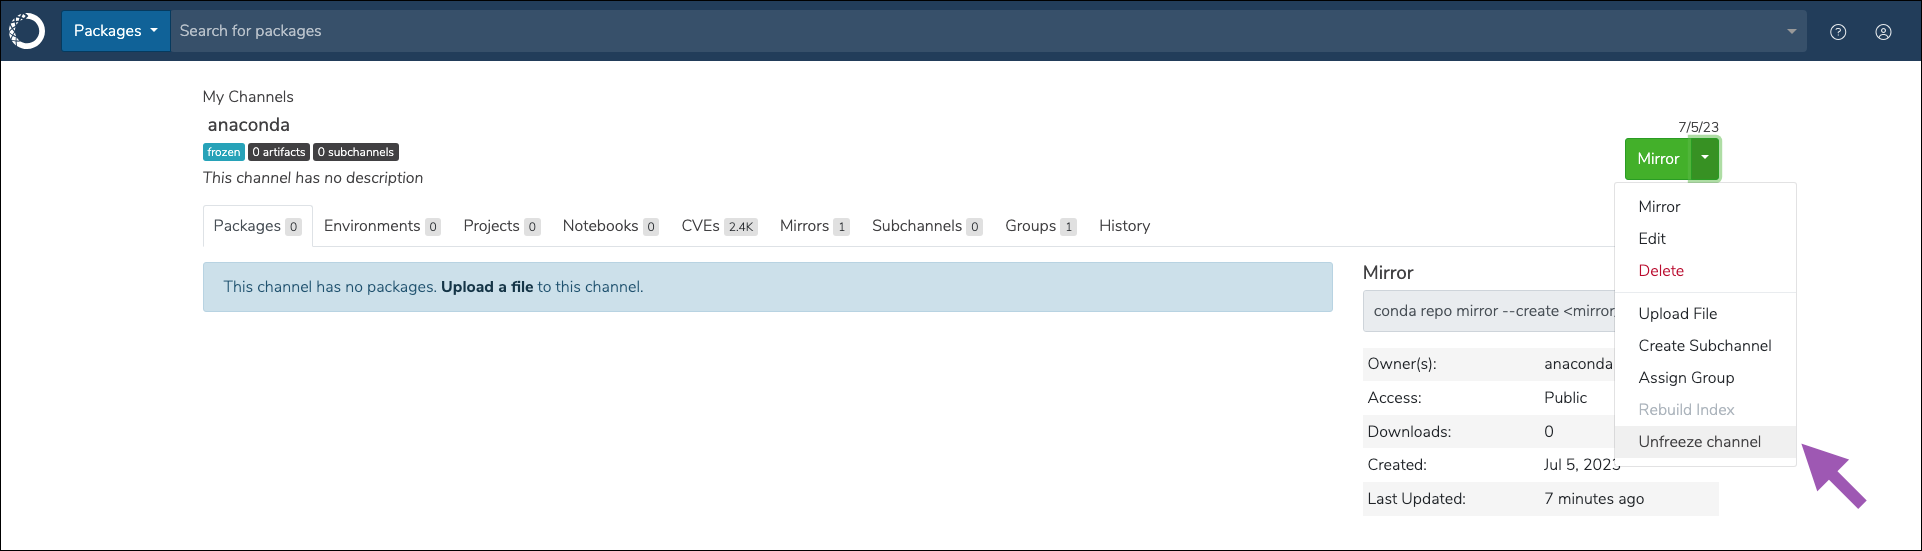
Unfreezing a channel
Once the mirror completes, unfreeze the channel to rebuild the channel index. To unfreeze a channel:- Navigate to the channel’s details page.
- Open the actions dropdown menu and select Unfreeze Channel.
-
Click Unfreeze.
It can take some time for packages to appear in the Packages tab. As a general rule, the larger the repository, the longer the wait.

It is not necessary to freeze the channel again once its mirror has completed. The best practice is to freeze the channel, create your mirror, allow it to complete, then unfreeze the channel.
Running the blob cleanup tool
The blob cleanup tool removes artifacts associated with deleted channels to free disc space. If an artifact on a deleted channel exists in another channel, it will not be removed. You can turn on and schedule the blob cleanup tool to run on its own by adding a few lines of code to thedocker-compose.yml file.
- Open a terminal.
- Log in to the server that hosts your Anaconda Server installation. Speak with your system administrator if you need help with this step.
-
Open your anaconda installer directory by running the following command:
-
Open your
docker-compose.ymlfile. -
Find the
repo_worker:section of the file and append the following lines:REPO_ENABLE_CLEANUP_BLOBS_JOB=trueREPO_SCHEDULE_CLEANUP_BLOBS_CRON=0 0 1 * *
- Save your additions and close the file.
-
Restart your instance for changes to take effect. To restart your instance, run the following commands:
0 0 1 * * will run the tool on the first day of the month at midnight. To modify when this job runs:
- Open your
docker-compose.ymlfile. - Find the
REPO_SCHEDULE_CLEANUP_BLOBS_CRON=<CRON_EXPRESSION>line and replace the<CRON_EXPRESSION>with a valid cron expression, then save it. - Restart your instance for changes to take effect.
Running the blob cleanup tool via file configuration will not clear index files generated due to mirroring.
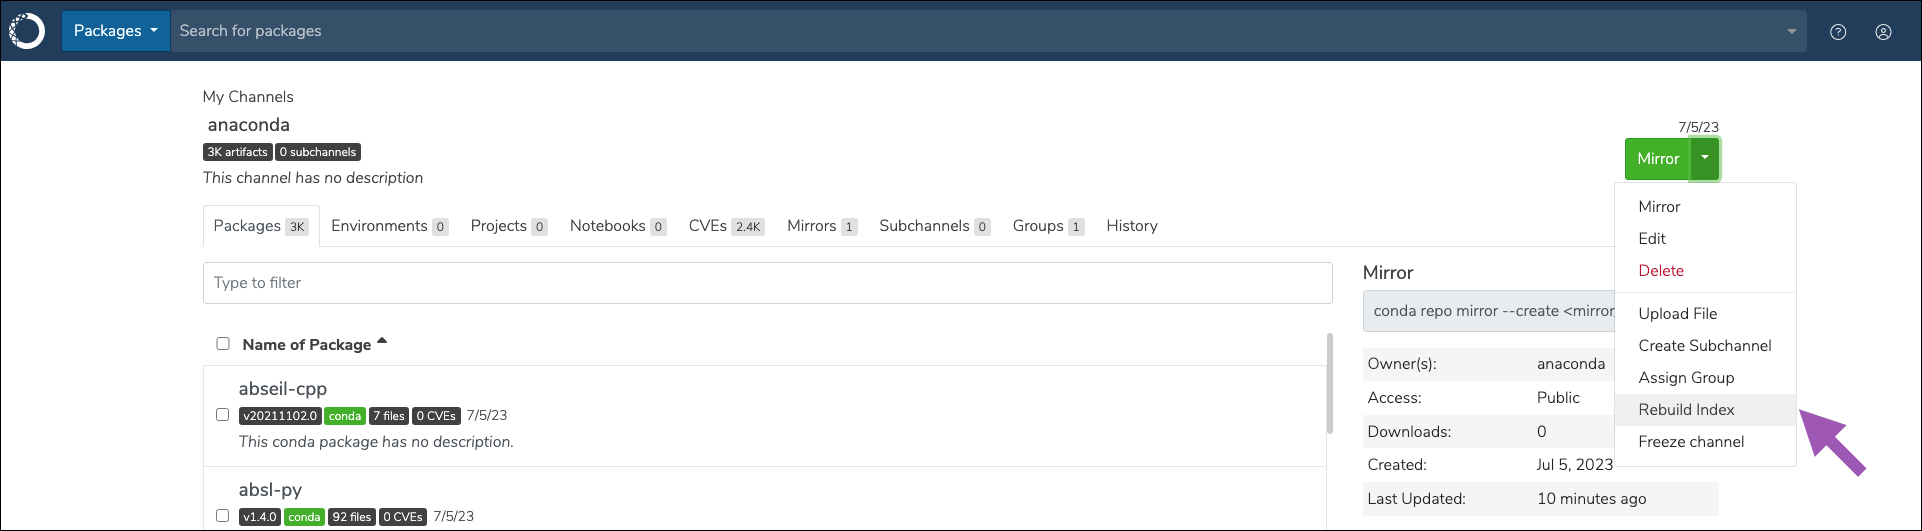
Rebuilding your channel index
The channel index is automatically rebuilt when certain actions, such as adding or deleting a package, are made. However, if you need to manually rebuild your channel’s index for any reason, follow these steps:- Navigate to the channel’s details page.
-
Open the actions dropdown menu and select Rebuild Index.
Setting your default channel
If your permissions allow, you can update your default channel at any time. To update your default channel:- Open the user dropdown menu and select Settings.
- Update the current entry in the Default Channel field.
-
Click Save.

Managing channels with the CLI
If you want to create and manage your channels using the CLI, see Anaconda Server CLIManaging channels with the API
You can also use the API to perform various functions for channels and subchannels. Access the API interface by opening a browser and navigating tohttp(s)://<FQDN>/swagger/ui, replacing <FQDN> with your Anaconda Server fully qualified domain name.
The following is a list of available endpoints you can use to manage your channels in Anaconda Server.