- Creating a channel
- Creating a subchannel
- List channels you can access
- Viewing channel details
- Viewing subchannel details
- Editing a channel
- Editing a subchannel
- Creating a group
- Adding members to a group
- Assigning a group to a channel
- Deleting a channel
- Deleting a subchannel
Creating a channel
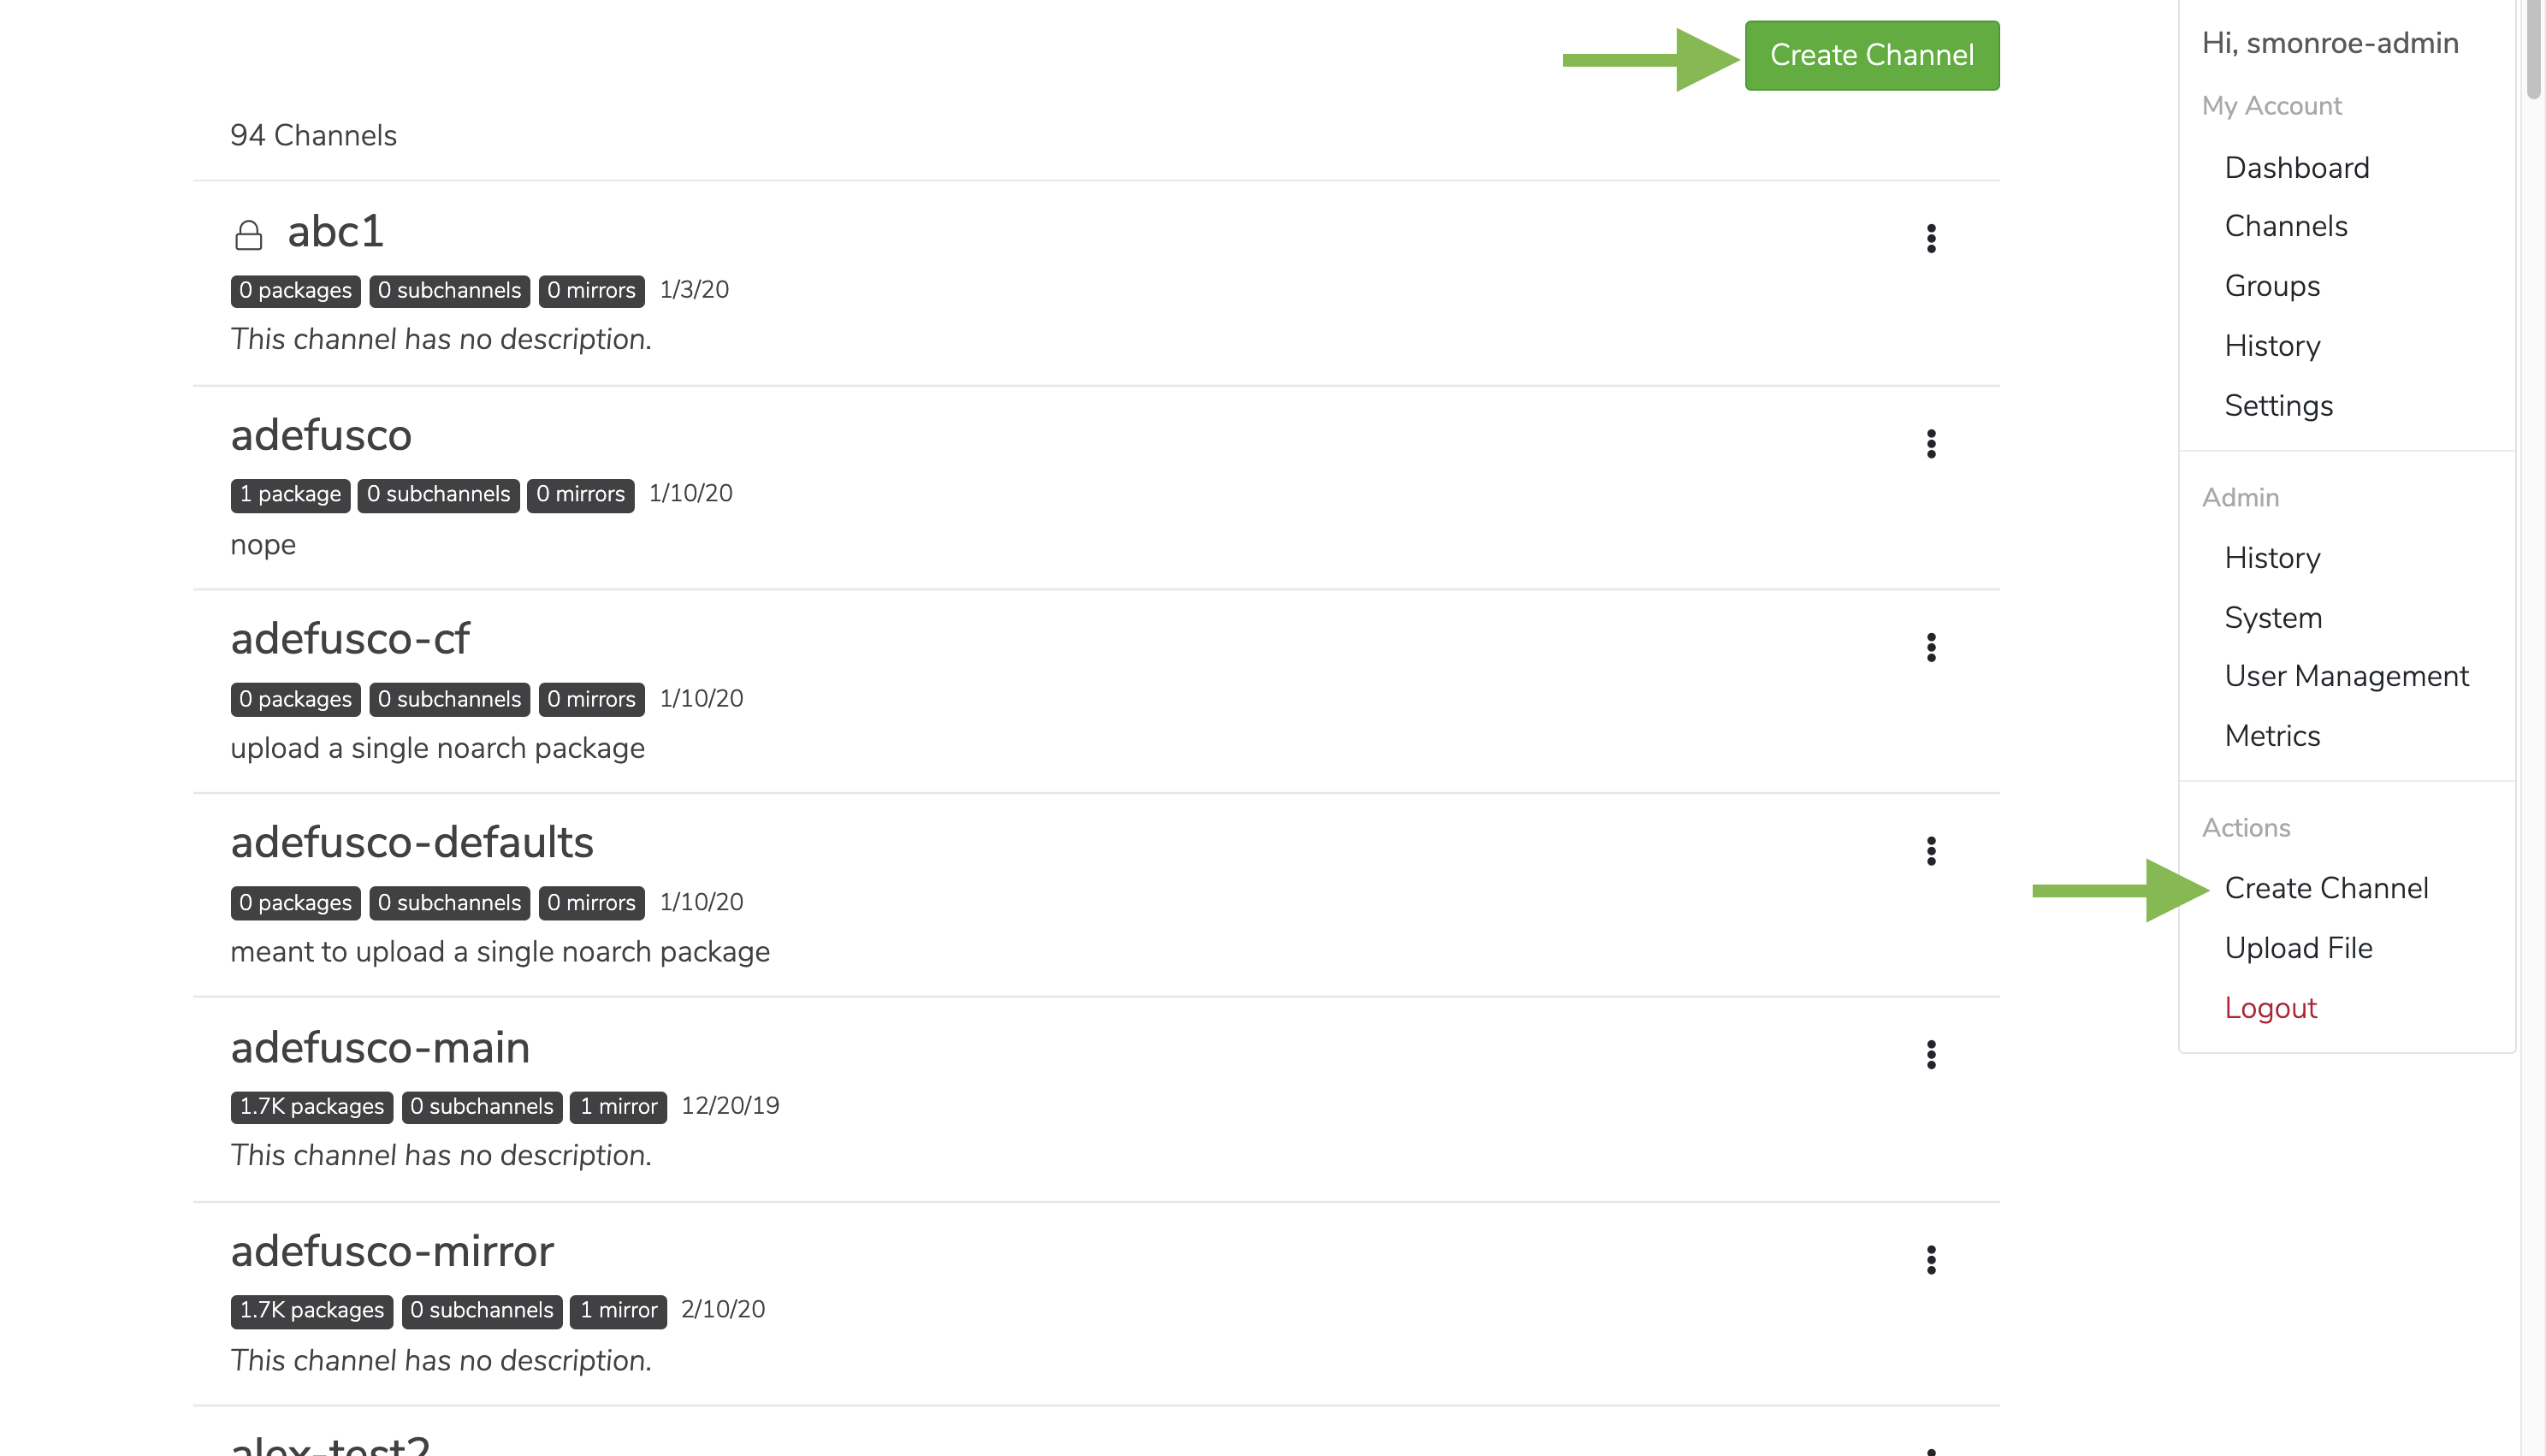
There are a few key things to note when creating a channel:- If a channel name is already in use, create a new channel with a different name. That channel can then be set as the default channel on the Settings page under My Account.
- If an email is used as a username, the portion of the email before the ”@” symbol (also known as the “local-part”) will be used as the username. Because channel names are restricted to a limited set of characters (a-z 0-9 - _), some characters may be replaced with
_. For example, if the email address[email protected]is used as a username, the channelerica_lamarawill be created. - If you don’t see any way of creating a channel (as shown in the following UI section), you might be lacking the permission to do so. Ask your administrator about modifying your permissions to allow you to create channels.
-
Click to open the User Menu (left click on the user icon in the header on the right side), and then click Create a Channel.
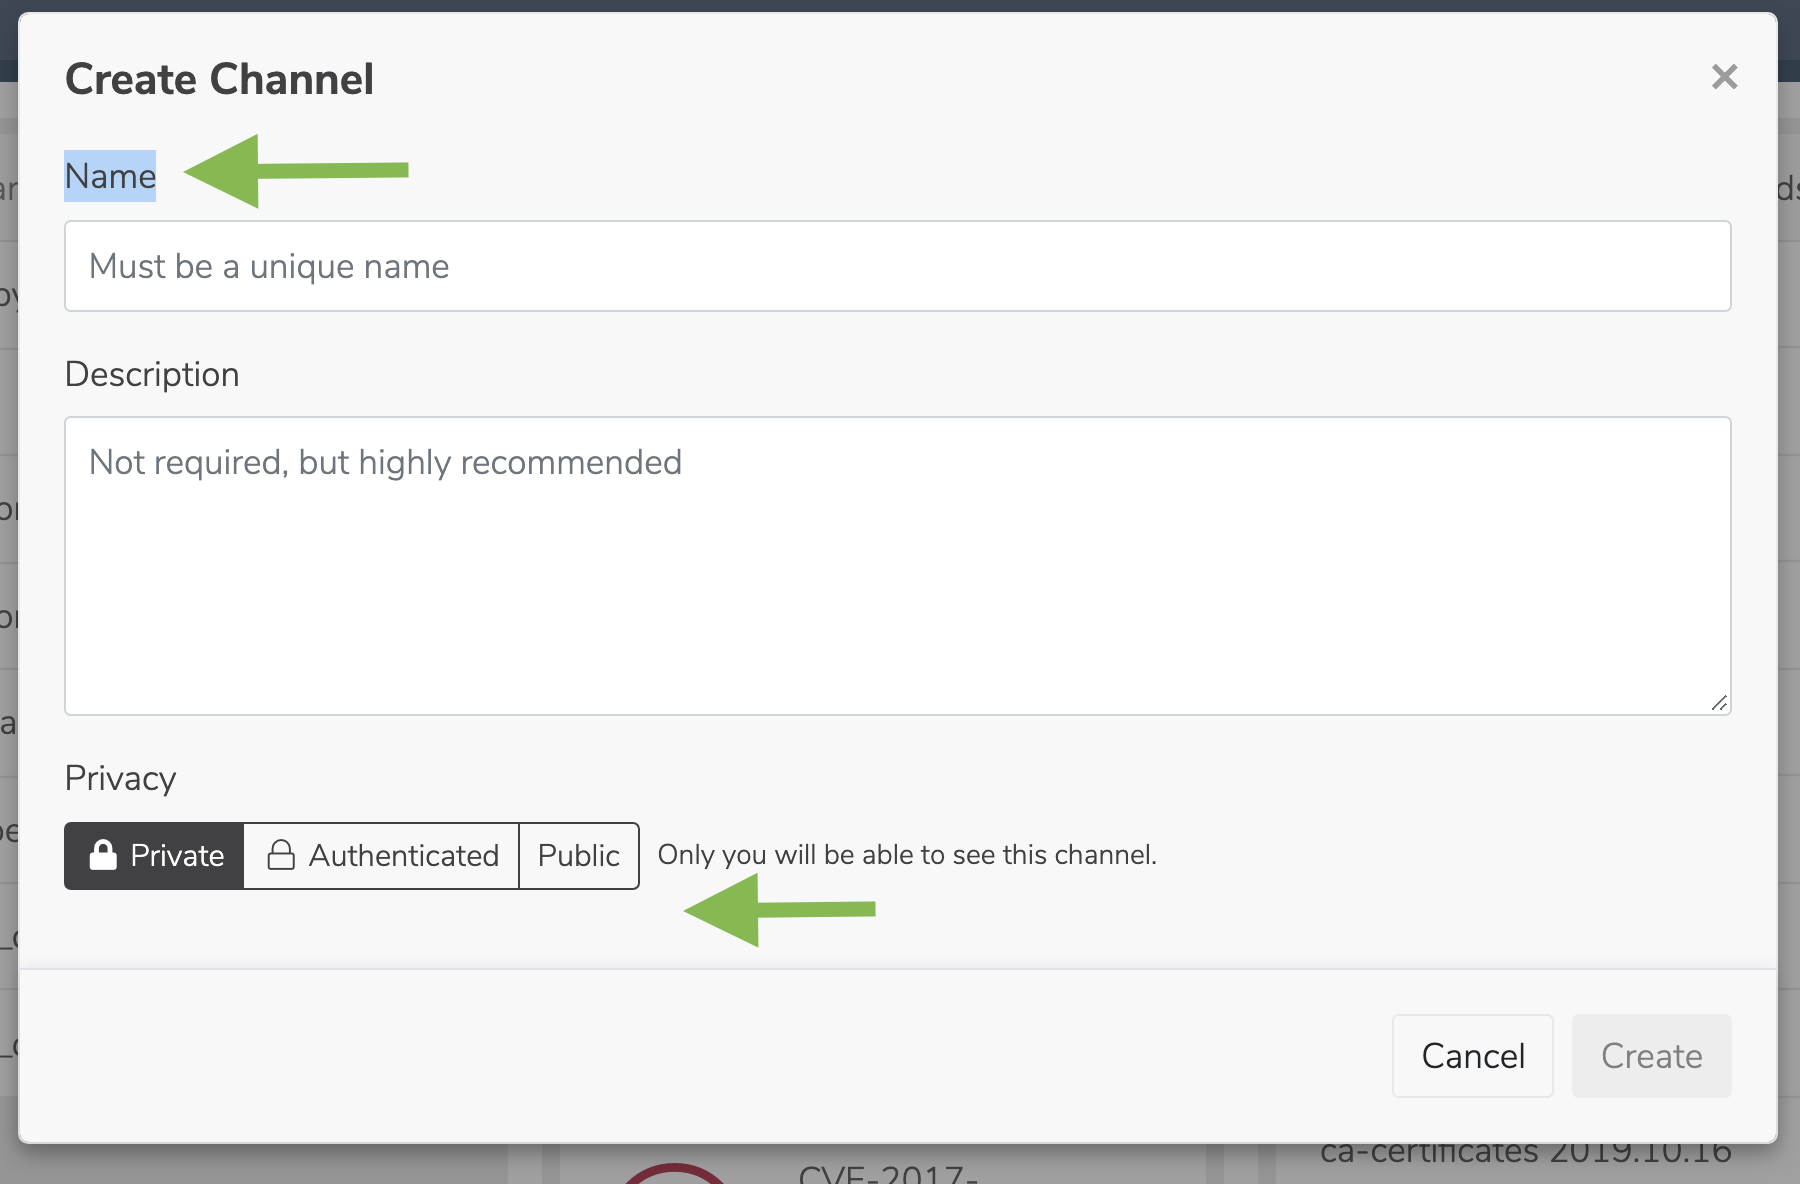
-
Fill in a name and description when prompted.
Creating a subchannel
Via the UI- Go to the details page of a channel.
- You will notice a green button on the right side with an arrow to the right of it. Click that arrow, and then select Create subchannel.
- Fill in a name and description when prompted.
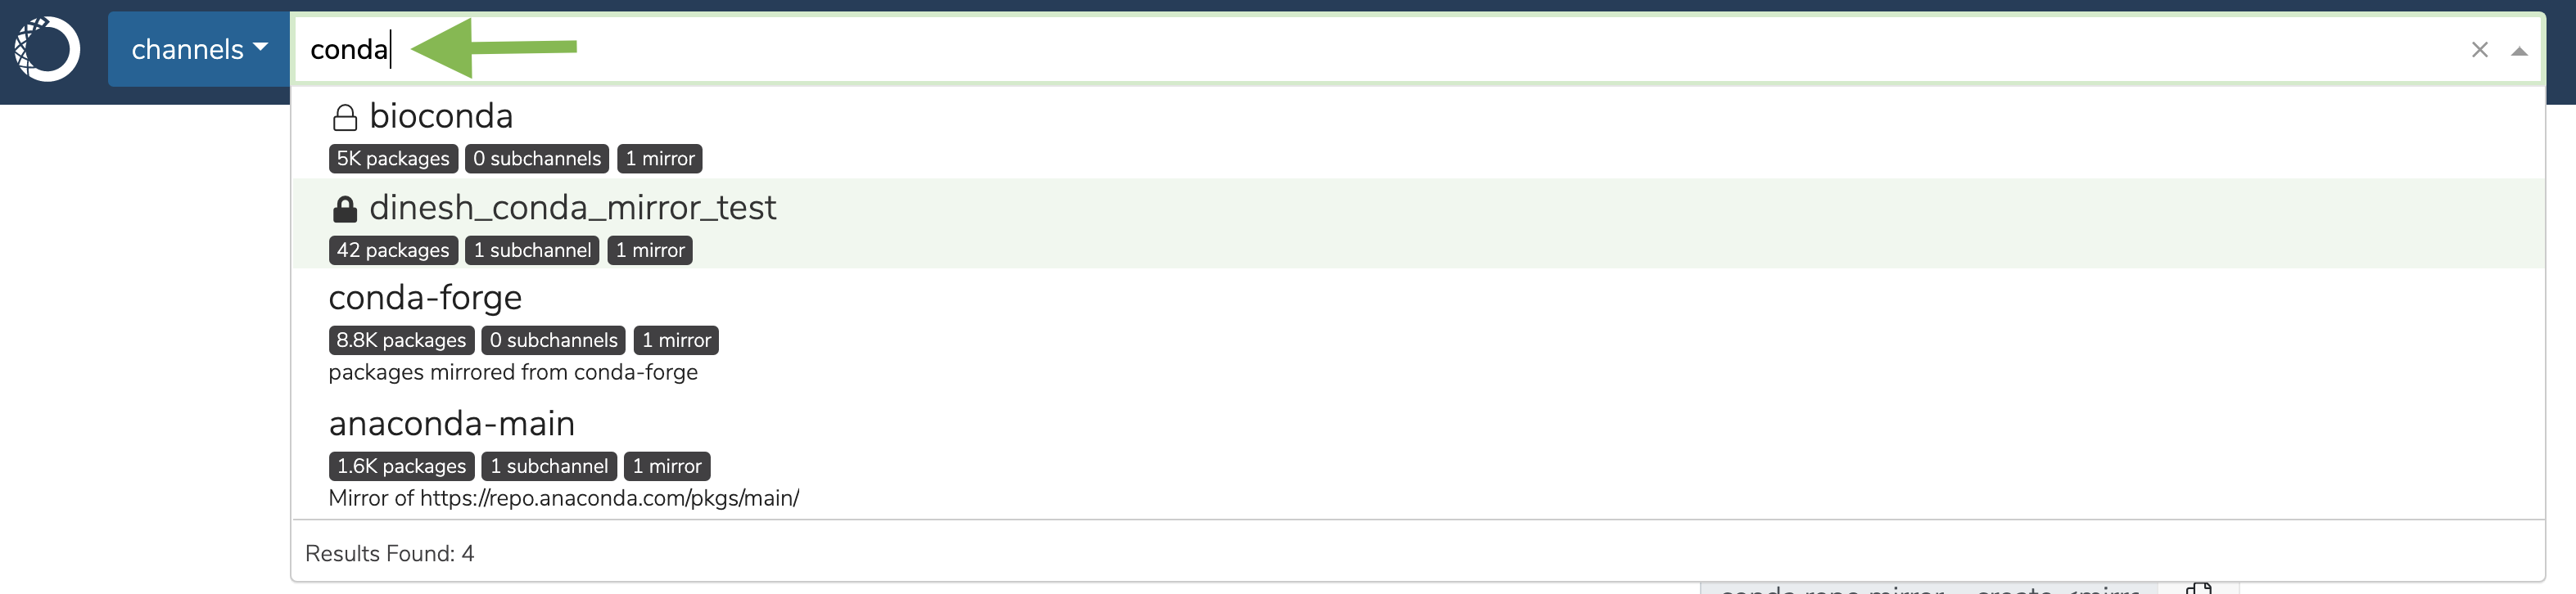
List channels you can access
Via the UI On the dashboard in the top left you will see a list of channels that you have access to. If you have more than 10 channels that you have access to, you can click the Show more button at the bottom of the list of channels. Private channels that you don’t have access to don’t show up. Alternatively, you can click on the user icon in the header and select Channels to get a list of channels that you own and have access to. If you are an administrator, you will see all channels in your organization.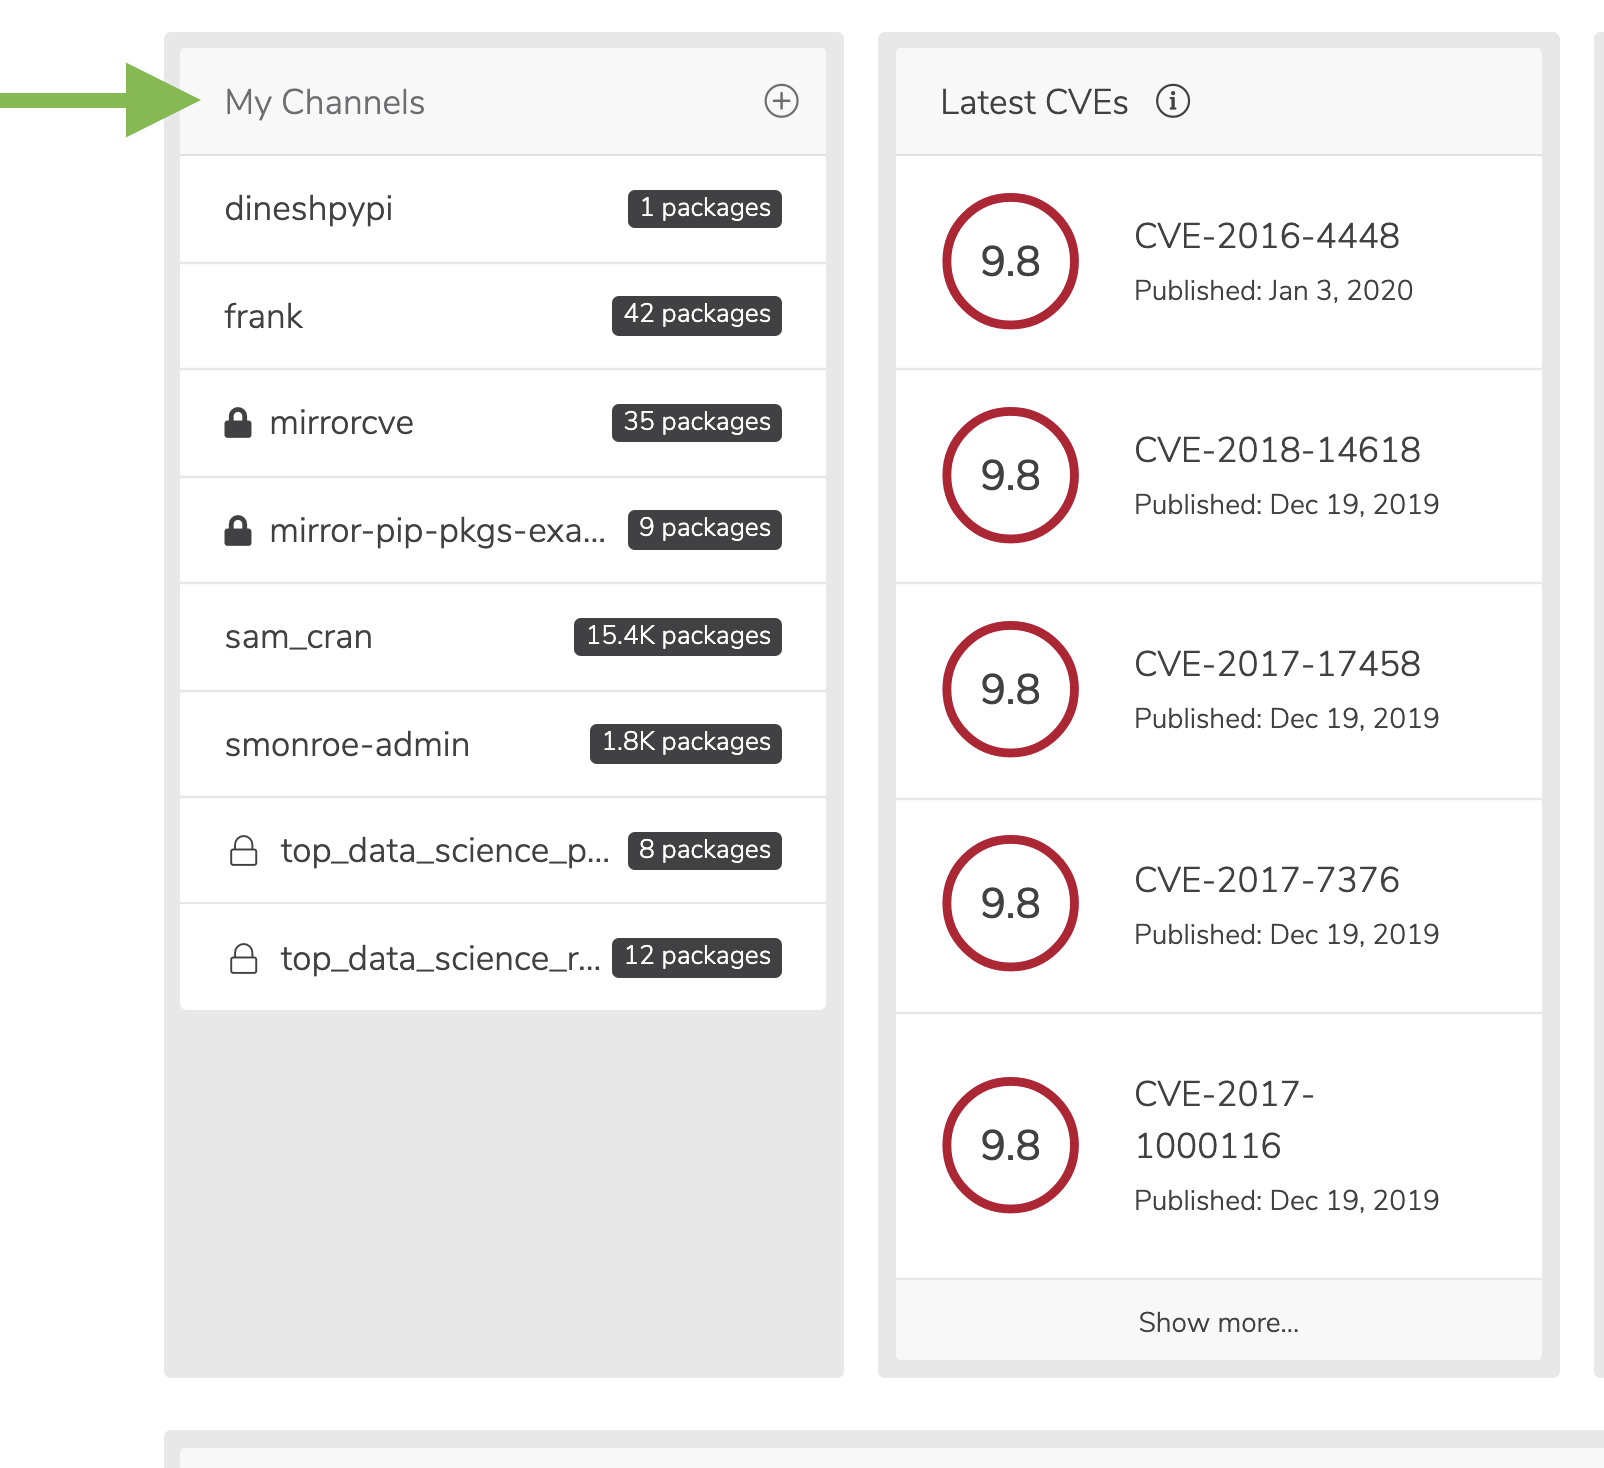
Viewing channel details
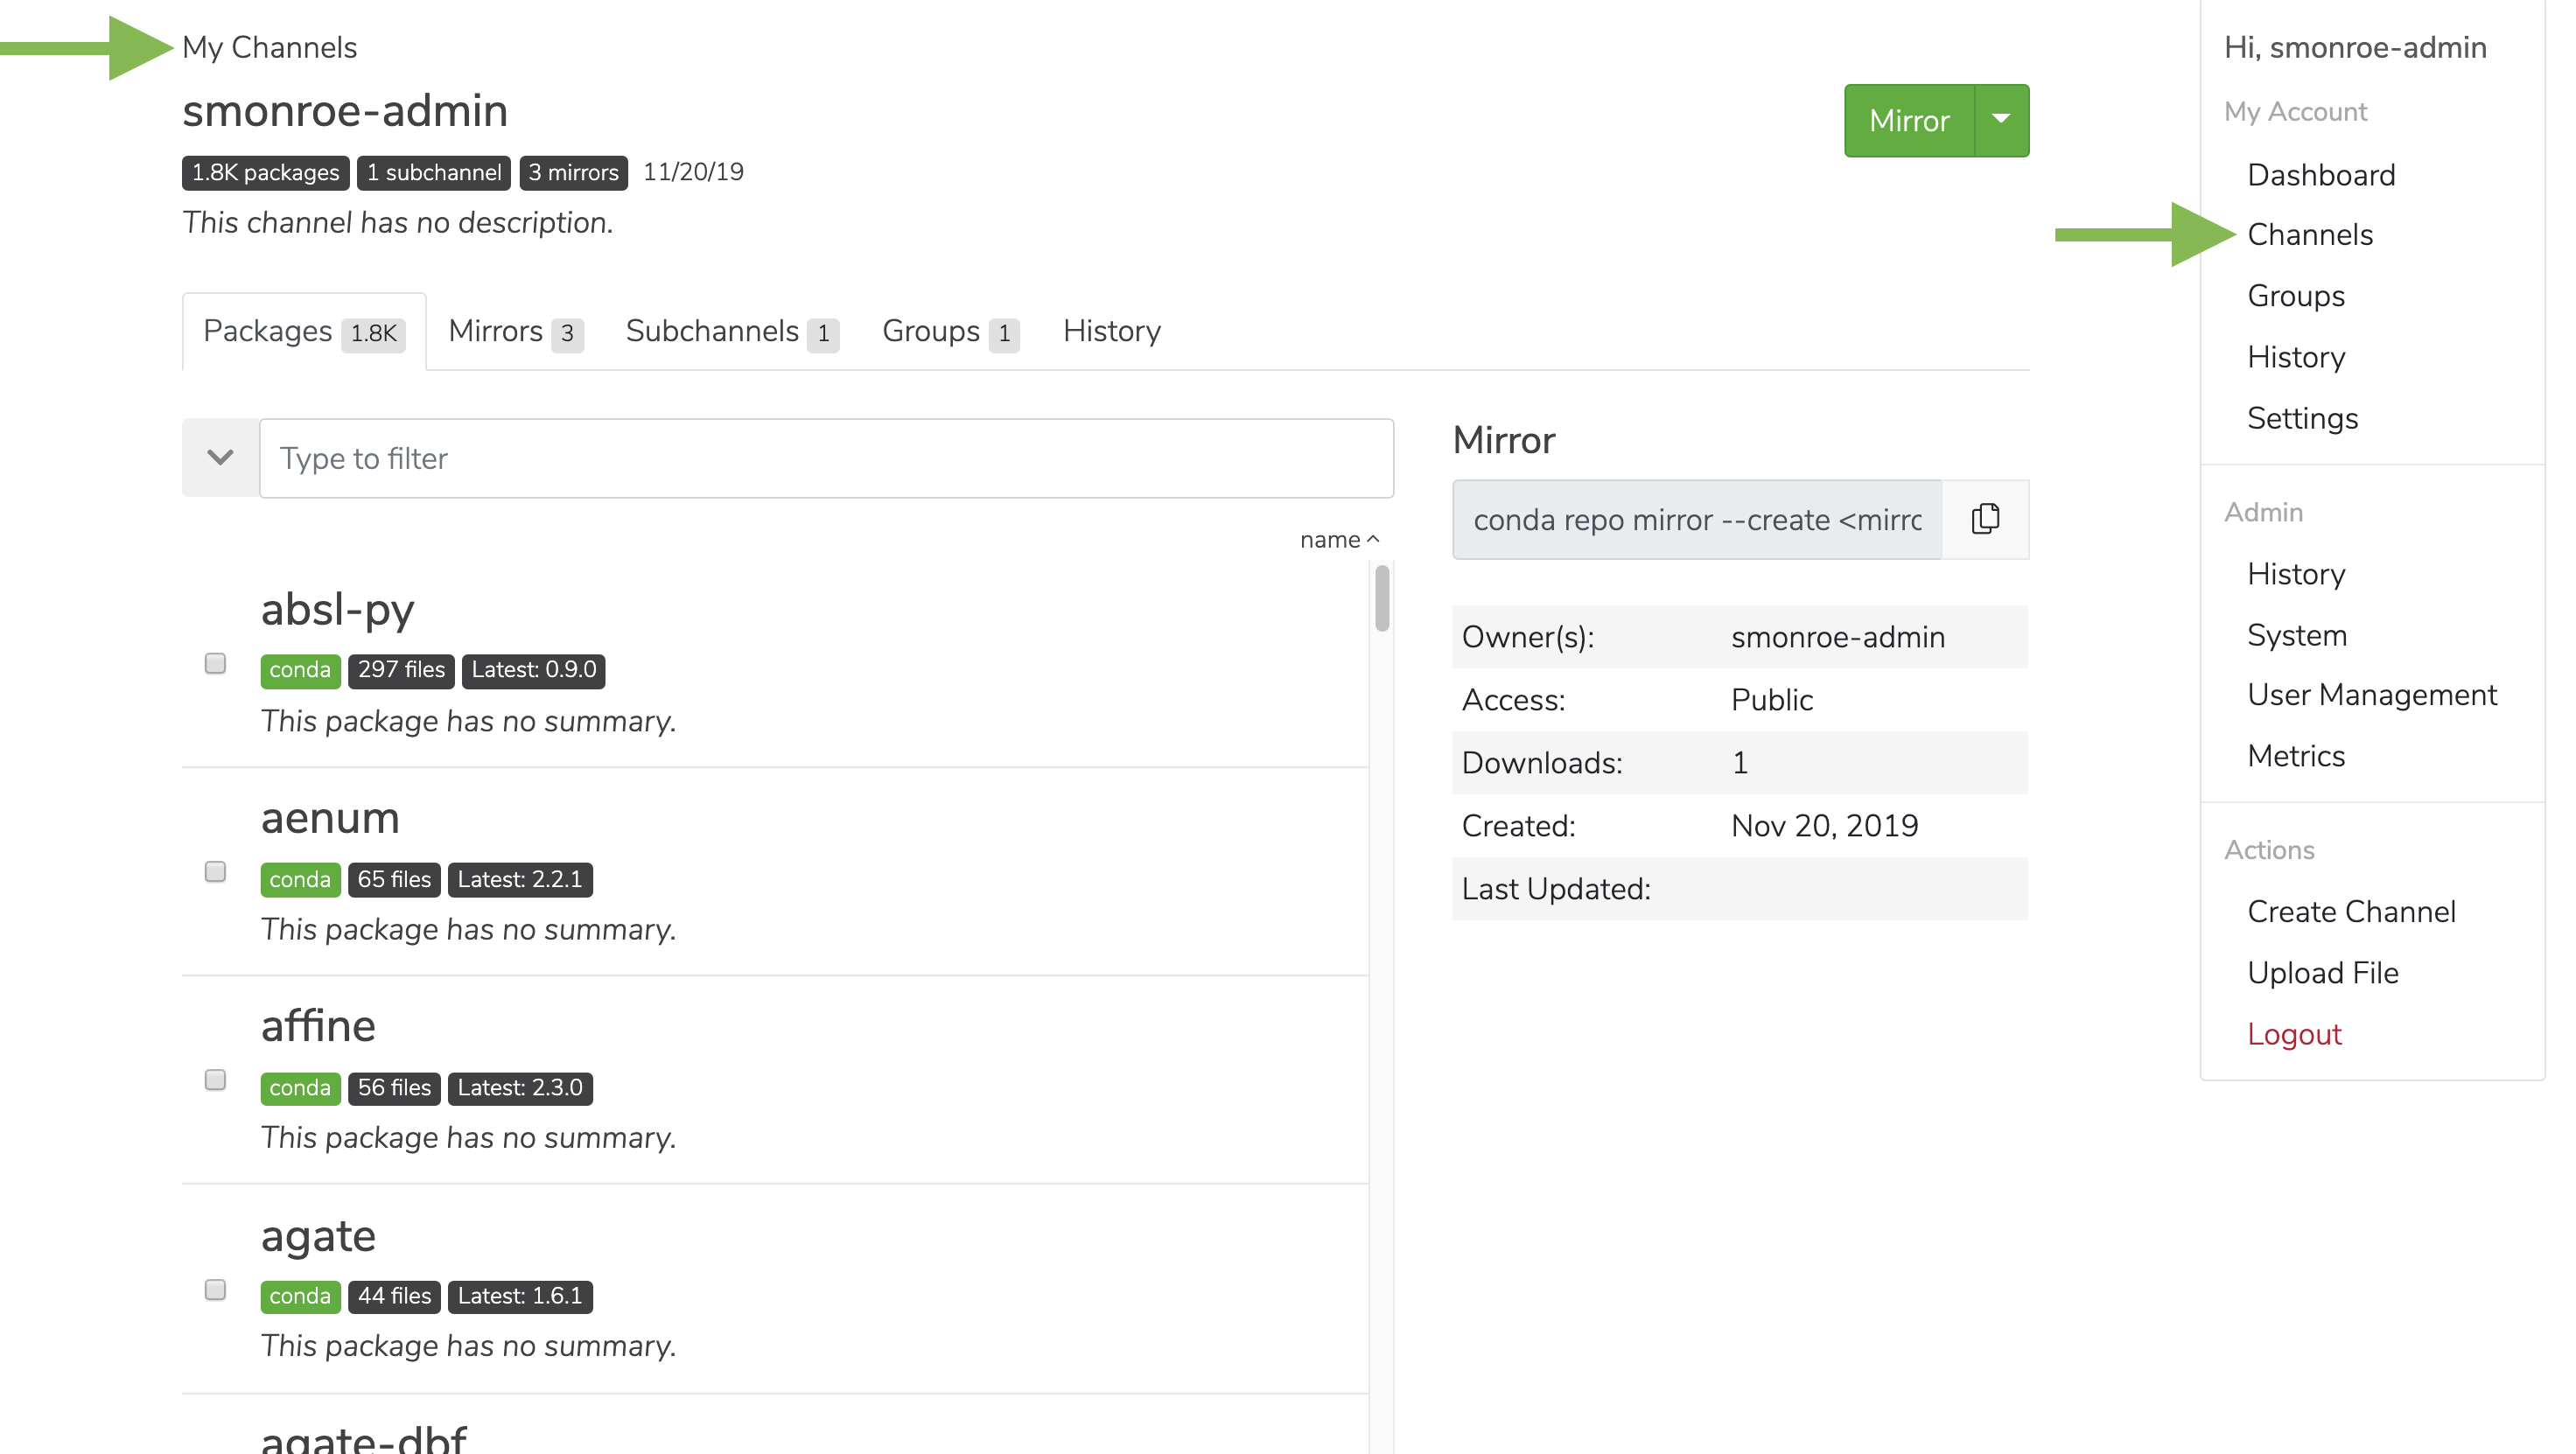
Inside each channel is metadata on the channel, such as the name and description. Additionally, you can get a list of packages, mirrors, subchannels, groups, and history. Via the UI- From the dashboard, click on the name of a channel. Alternatively, click on the user menu icon in the far right of the top navigation.
-
Select channels to see a list of all the channels you have access to, and then click through to view the details.
Viewing subchannel details
Inside each channel is metadata on the channel, such as the name and description. Additionally, you can get a list of packages, mirrors, subchannels, groups, and history. Via the UI- Go to the channel’s detail page and click on the Subchannels tab.
- Click on the subchannel to see the subchannel details.
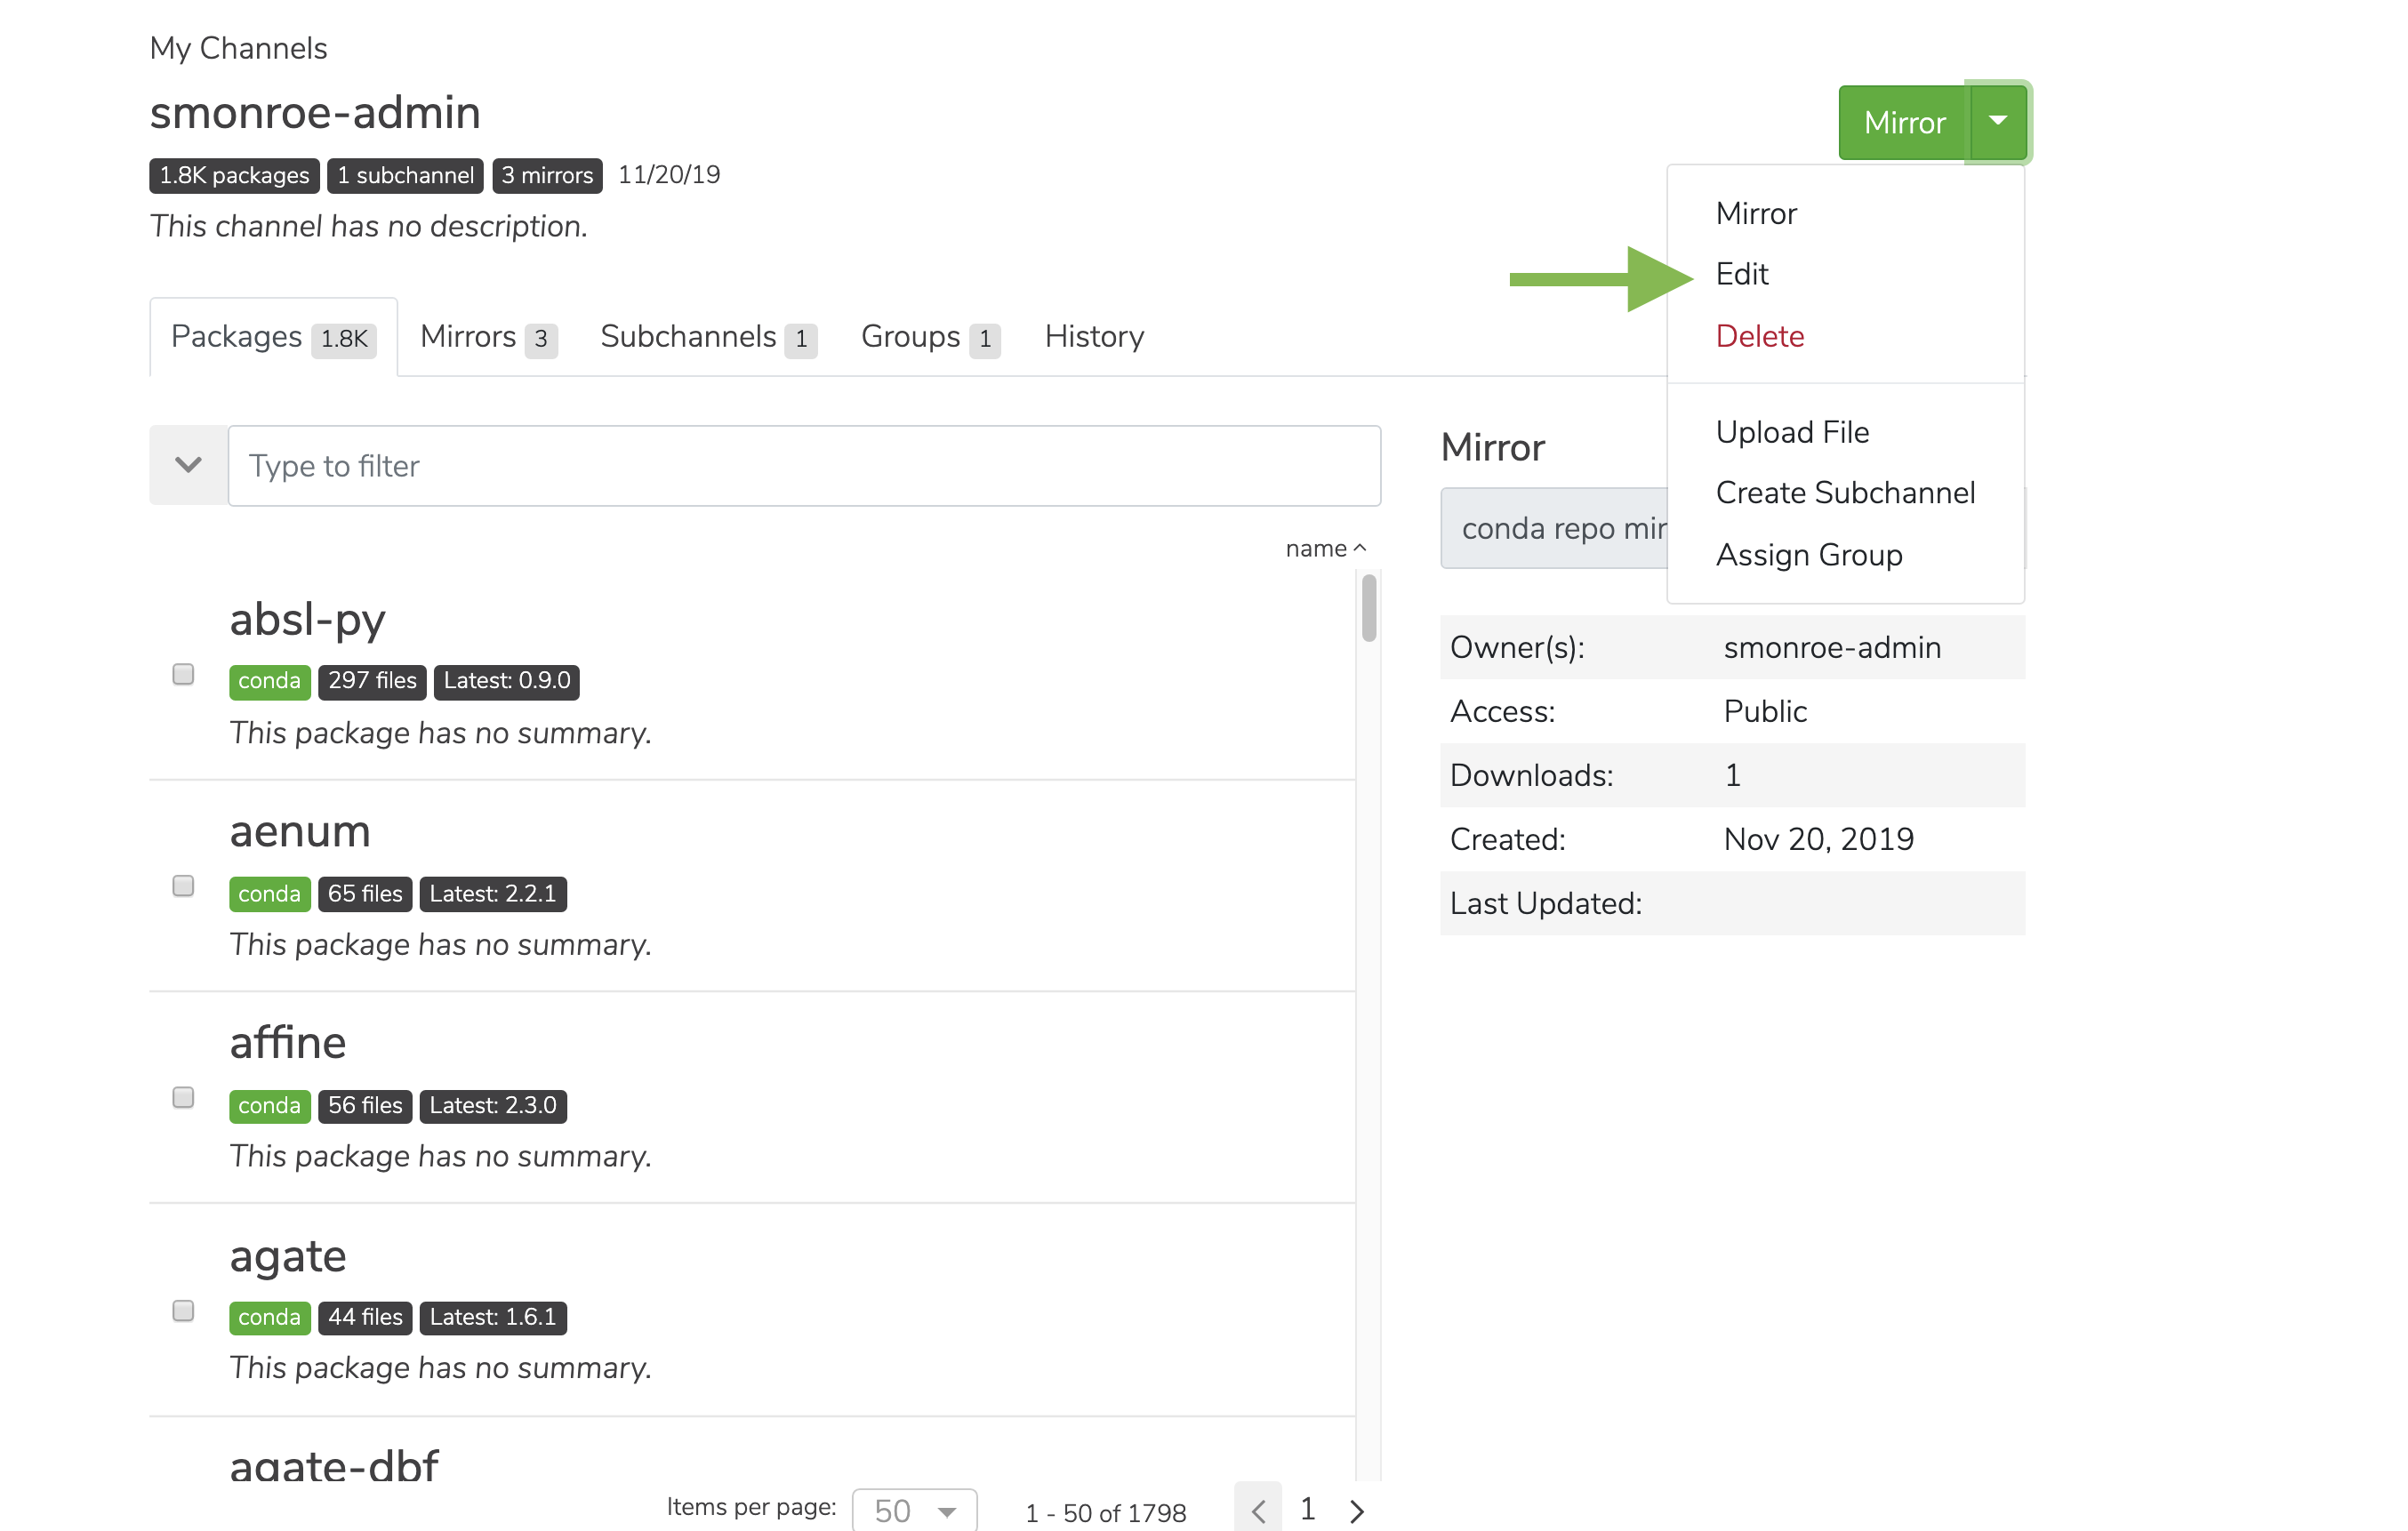
Editing a channel
Inside each channel is metadata on the channel that you can edit, such as the name, description, and privacy. Via the UI- From the dashboard, click on the name of a channel. Alternatively, click on the user menu icon in the far right of the top navigation.
- Select channels to see a list of all the channels you have access to, and then click through to view the details.
-
On the channel details page, click the down arrow next to the large green button and select Edit from the menu.
Editing a subchannel
Via the UI- Go to a channel’s detail page and click on the Subchannels tab.
- Click on the subchannel you want to view details for.
- On the subchannel details page, click the down arrow next to the large green button and select Edit from the menu.
Creating a group
- Click on the My account button in the top right.
-
In the dropdown, under My Account, select Groups.
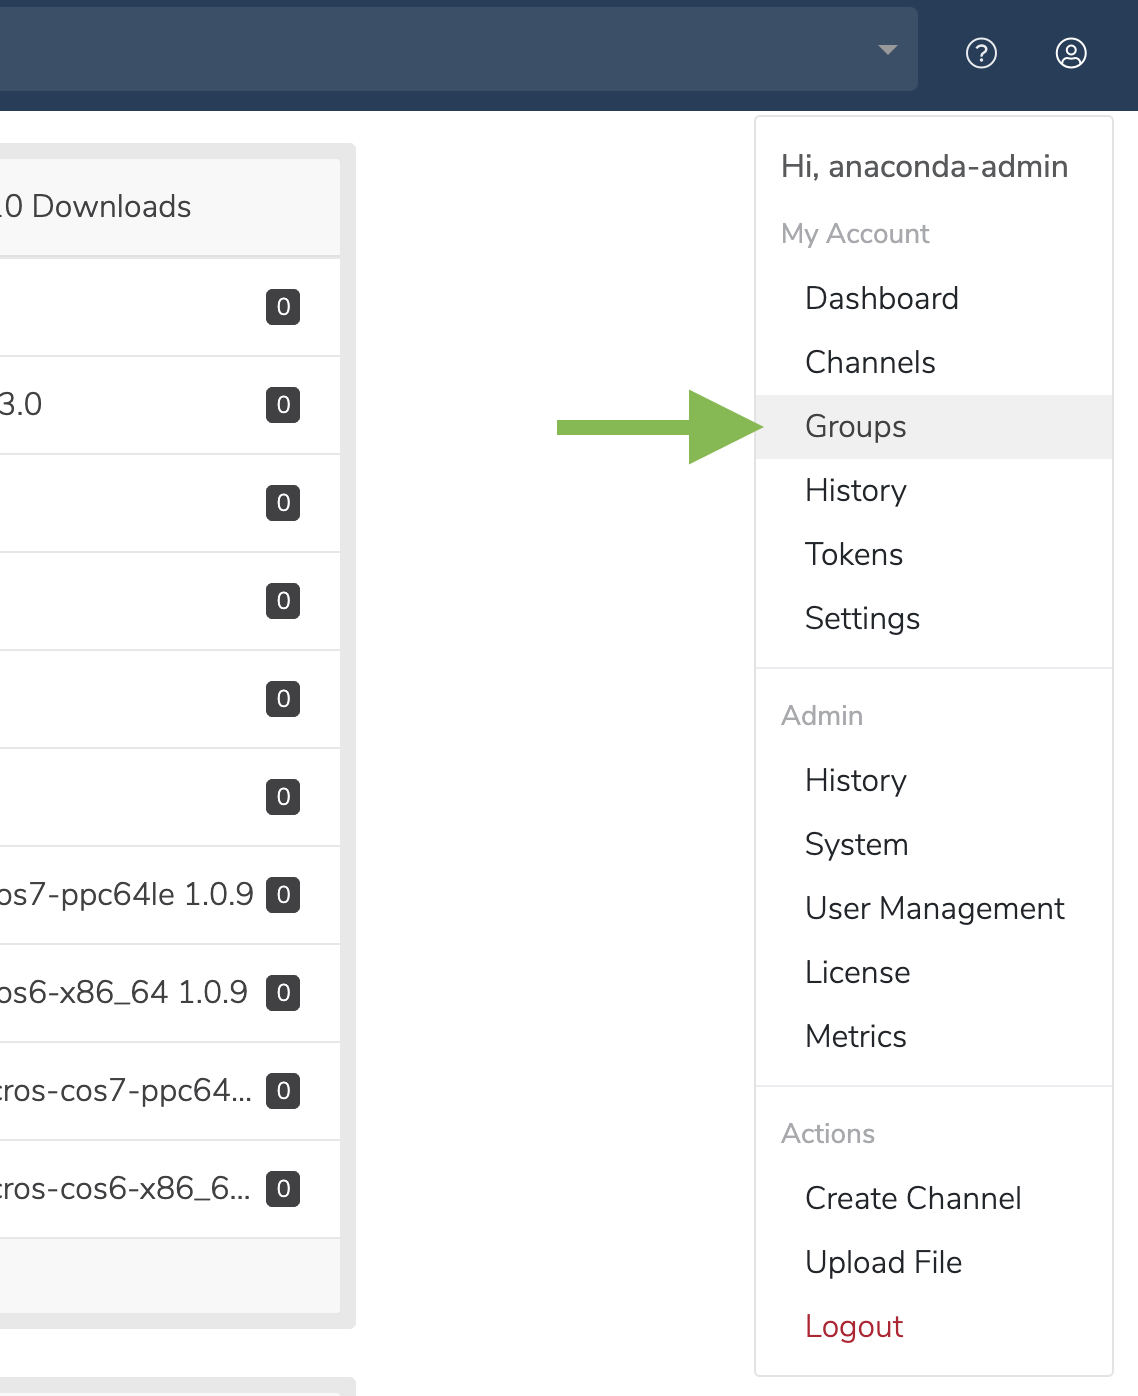
- On this page, you can see the groups that have already been created. Click the Create Group button to create a new group.
- Enter a unique group name and description, then click Create.
Members can be added to a group once it is created.
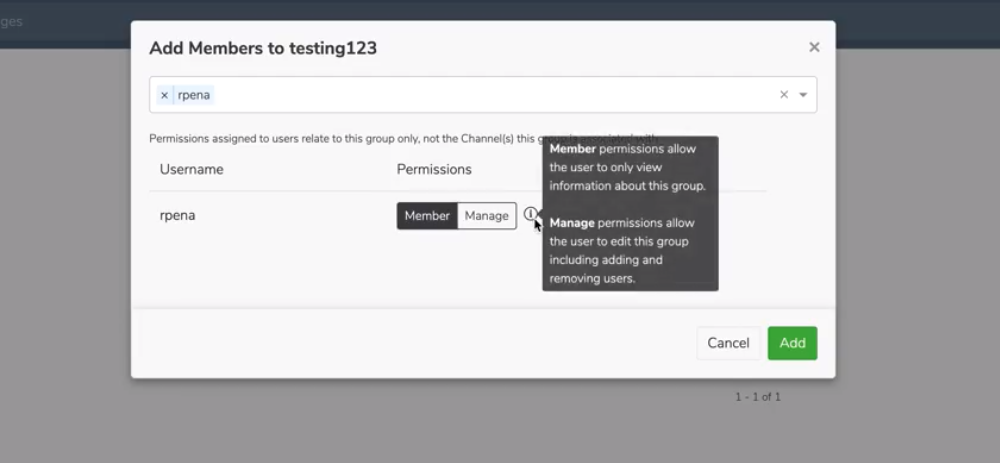
Adding members to a group
-
From the group page, click the Add button to add a new member to the group and assign member permissions.
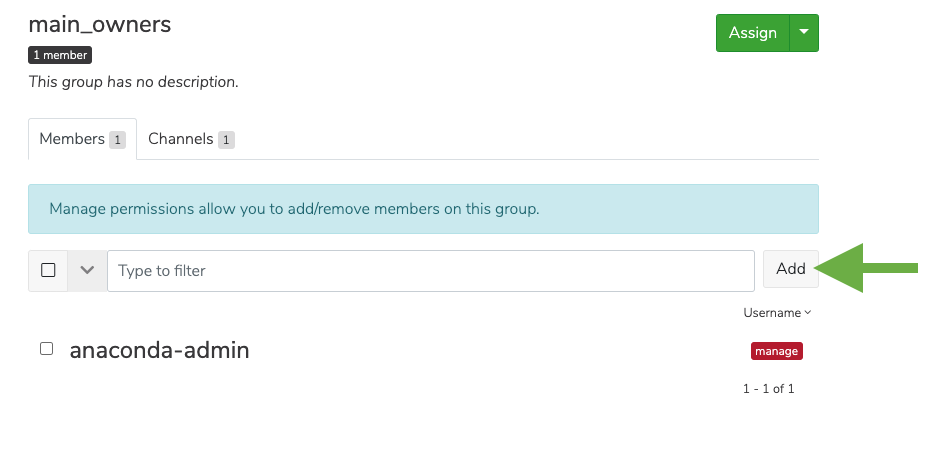
-
Once the member’s username has populated under Username, you can select their permission level. Click on the information icon next to the permissions to learn more about the permissions available.
Assigning a group to a channel
- From the group page, click on the Channels tab.
-
If the group has yet to be assigned to a channel, the following notification will be displayed on the page:
This group is not associated with any channels. Assign this group to a channel.
- Click on Assign this group.
- In the popup window, the dropdown search bar will list the channels to which you have permission to modify. Select the channel you want to add your group to.
- Then, select the permission you want to assign to the group as a whole, and then click Add.