Channels let administrators curate specific sets of packages and control who can access them. By creating virtual channels and applying policy filters to them, you’re defining unique sets of packages to meet the needs of specific users. Assigning both a channel and its intended users to a group ensures that only those users can access the packages the channel contains.
Just getting started? For basic information about channels, see What is a channel?

Channel types

  • Anaconda channels: Anaconda hosts several channels that connect to our premium, curated repository and provide you with thousands of the most popular data science platform software packages available on the open source market today.
  • Community channels: Community channels provide organizations with access to a broader ecosystem of conda packages that are built and maintained by volunteers in the open-source community.
    While the individual packages in the community channels are maintained by volunteers, the channels themselves are hosted and maintained by Anaconda.
    Community-maintained packages are selected for inclusion in the community channels based on Anaconda’s review of their suitability and their compatibility with Anaconda-built packages.
    Community channels are not enabled by default. For more information about enabling community channels, see Enabling community channels.
  • Virtual channels: Virtual channels are copies of their source channel. For example, if you create a virtual channel from the Anaconda main channel, it contains the same packages as the main.
    You can create virtual channels using any of Anaconda’s hosted channels as a source.
  • External channels: External channels point to an anaconda.org URL to look for packages.
    You cannot apply policy filters to external channels. Currently, Anaconda only supports connection to external channels located at https://conda.anaconda.org/, but we plan to support any URL soon.

Channel permissions

There are two levels of permissions associated with channels in Anaconda: internal and private.
  • Internal channels: Internal channels are visible to all members of your organization who have been assigned a seat.
  • Private channels: Private channels have their contents restricted to those members who are part of the group the channel is assigned to. For more information about assigning channels to a group, see Groups.
Organization Administrators can change the permission level of a channel at any time.
  1. From the Channels page, open the actions dropdown beside the channel.
  2. Select either Make Channel Internal or Make Channel Private. (Your available option depends on the current permissions level of the channel.)
Private channels that are not assigned to a group are only visible to organization administrators.

Creating a channel

  1. From the Channels page, select Add channel to open the Create Channel dialog.
  2. Enter a unique channel name.
  3. Select Virtual as your channel type.
  4. Select channel from the Source dropdown.
  5. Set the permission level for the channel.
  6. Select Save.
Virtual channels using community as a source might take a few minutes to complete.

Adding a channel to your .condarc file

Business tier only.
In order to access packages from your organization’s channels, you must configure your .condarc file to tell conda where the channel is located. Complete the following steps to add one of your organizations’ channels to your .condarc file:
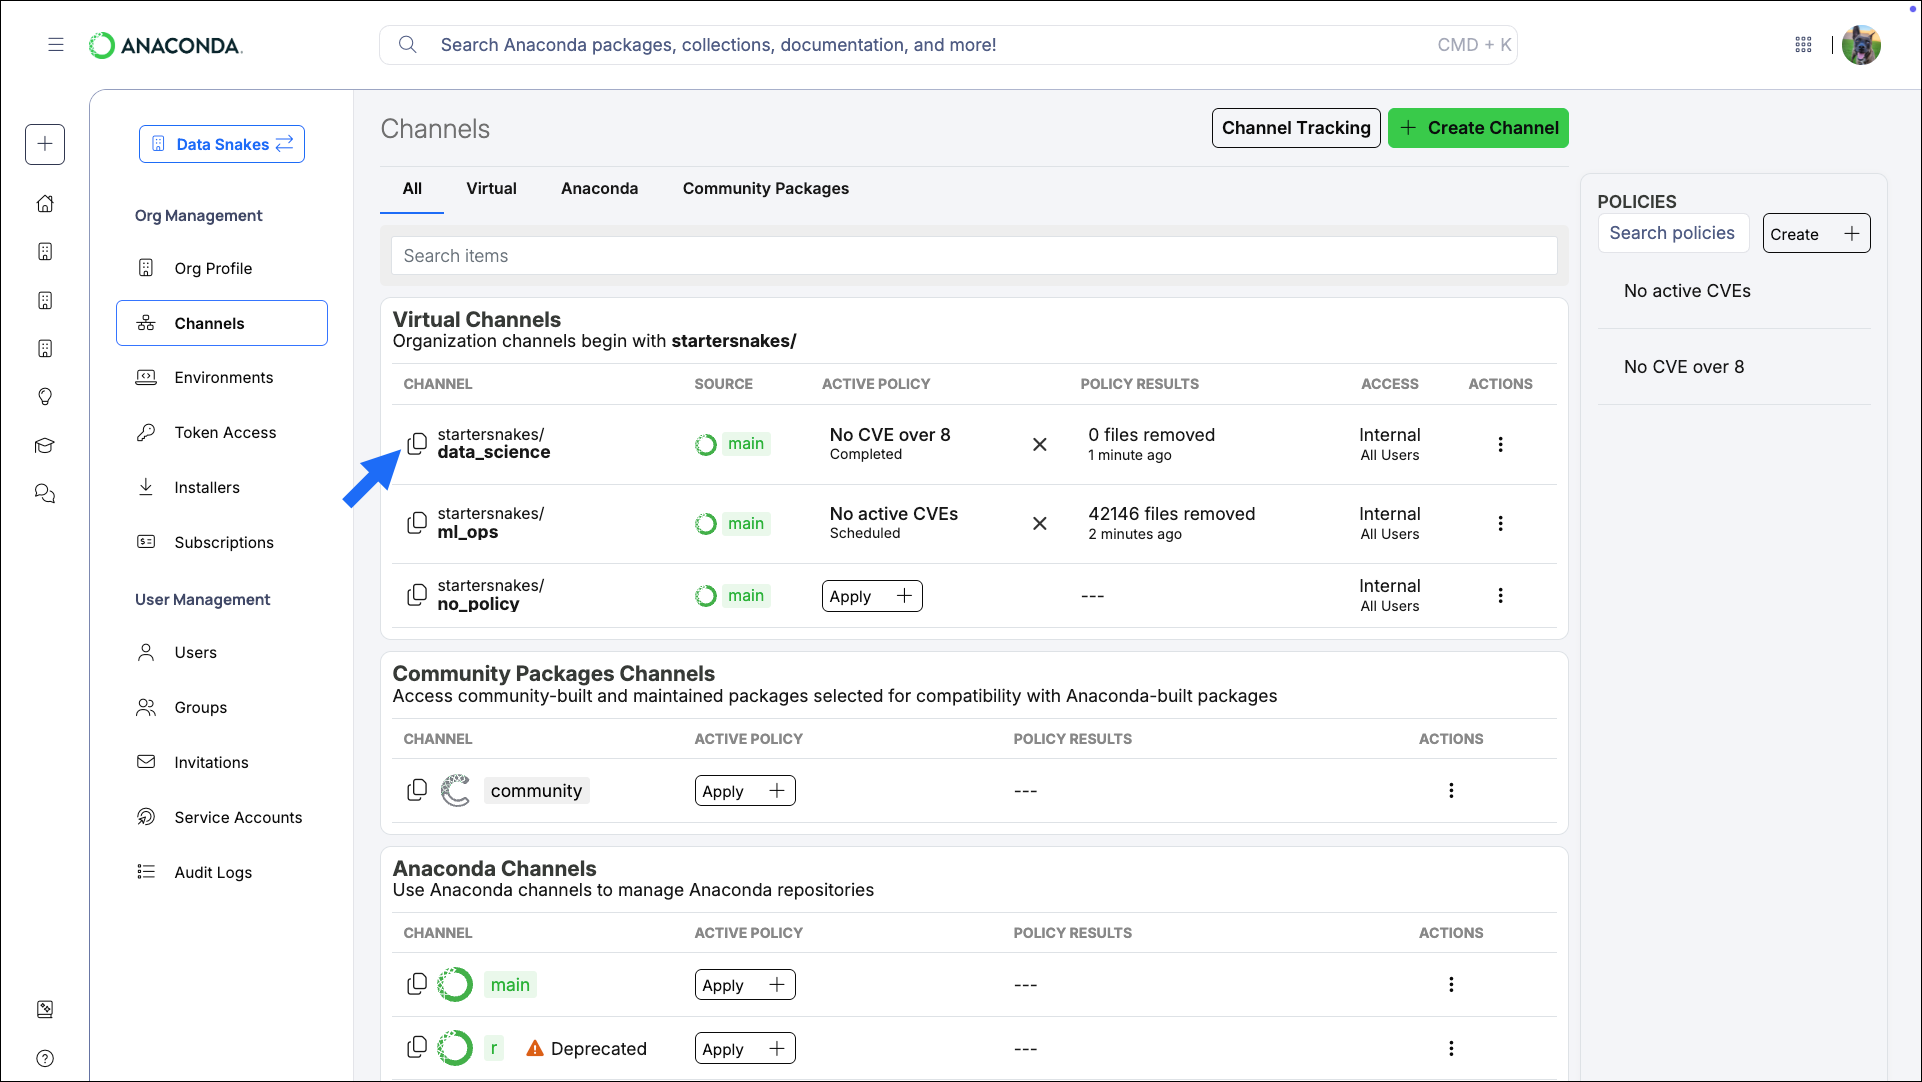
  1. Navigate to your Organizations page.
  2. Select your organization.
  3. Select Channels from the left-hand navigation.
  4. Select Copy channel path.
  5. Open your terminal and run the following command:
    # Replace <CHANNEL_PATH> with the copied channel path
    conda config --prepend channels <CHANNEL_PATH>
    
    This command adds the specified channel to the top of your channels: list, giving it top priority when conda is searching for packages. For more information about channel priority and additional conda config command arguments, see Channels.
Example .condarc file
    channel_settings:
      - channel: https://repo.anaconda.cloud/*
        auth: anaconda-auth
    channels:
      - https://repo.anaconda.cloud/repo/<ORG_ID>/<CHANNEL_NAME>
      - defaults
    add_anaconda_token: true
    restore_free_channel: false
    default_channels:
      - https://repo.anaconda.cloud/repo/main
      - https://repo.anaconda.cloud/repo/r
      - https://repo.anaconda.cloud/repo/msys2
If you want to use your organizations’ channels exclusively, make sure that they are the only channels present in your .condarc’s channels: list.

Removing a channel from your .condarc file

To remove a channel from your channels: list, open a terminal and run the following command:
# Replace <CHANNEL> with the URL listed in the channels: section of the .condarc file
conda config --remove channels <CHANNEL>
For example, if you don’t want to pull packages from the default channels, you can run the following command:
conda config --remove channels defaults
This will leave the channels listed under default_channels: in the .condarc file for later use, if needed, but won’t look for packages in those locations.
You can add the default channels to your .condarc file’s channels: list at any time by running the command: conda config --append channels defaults

Viewing channel details

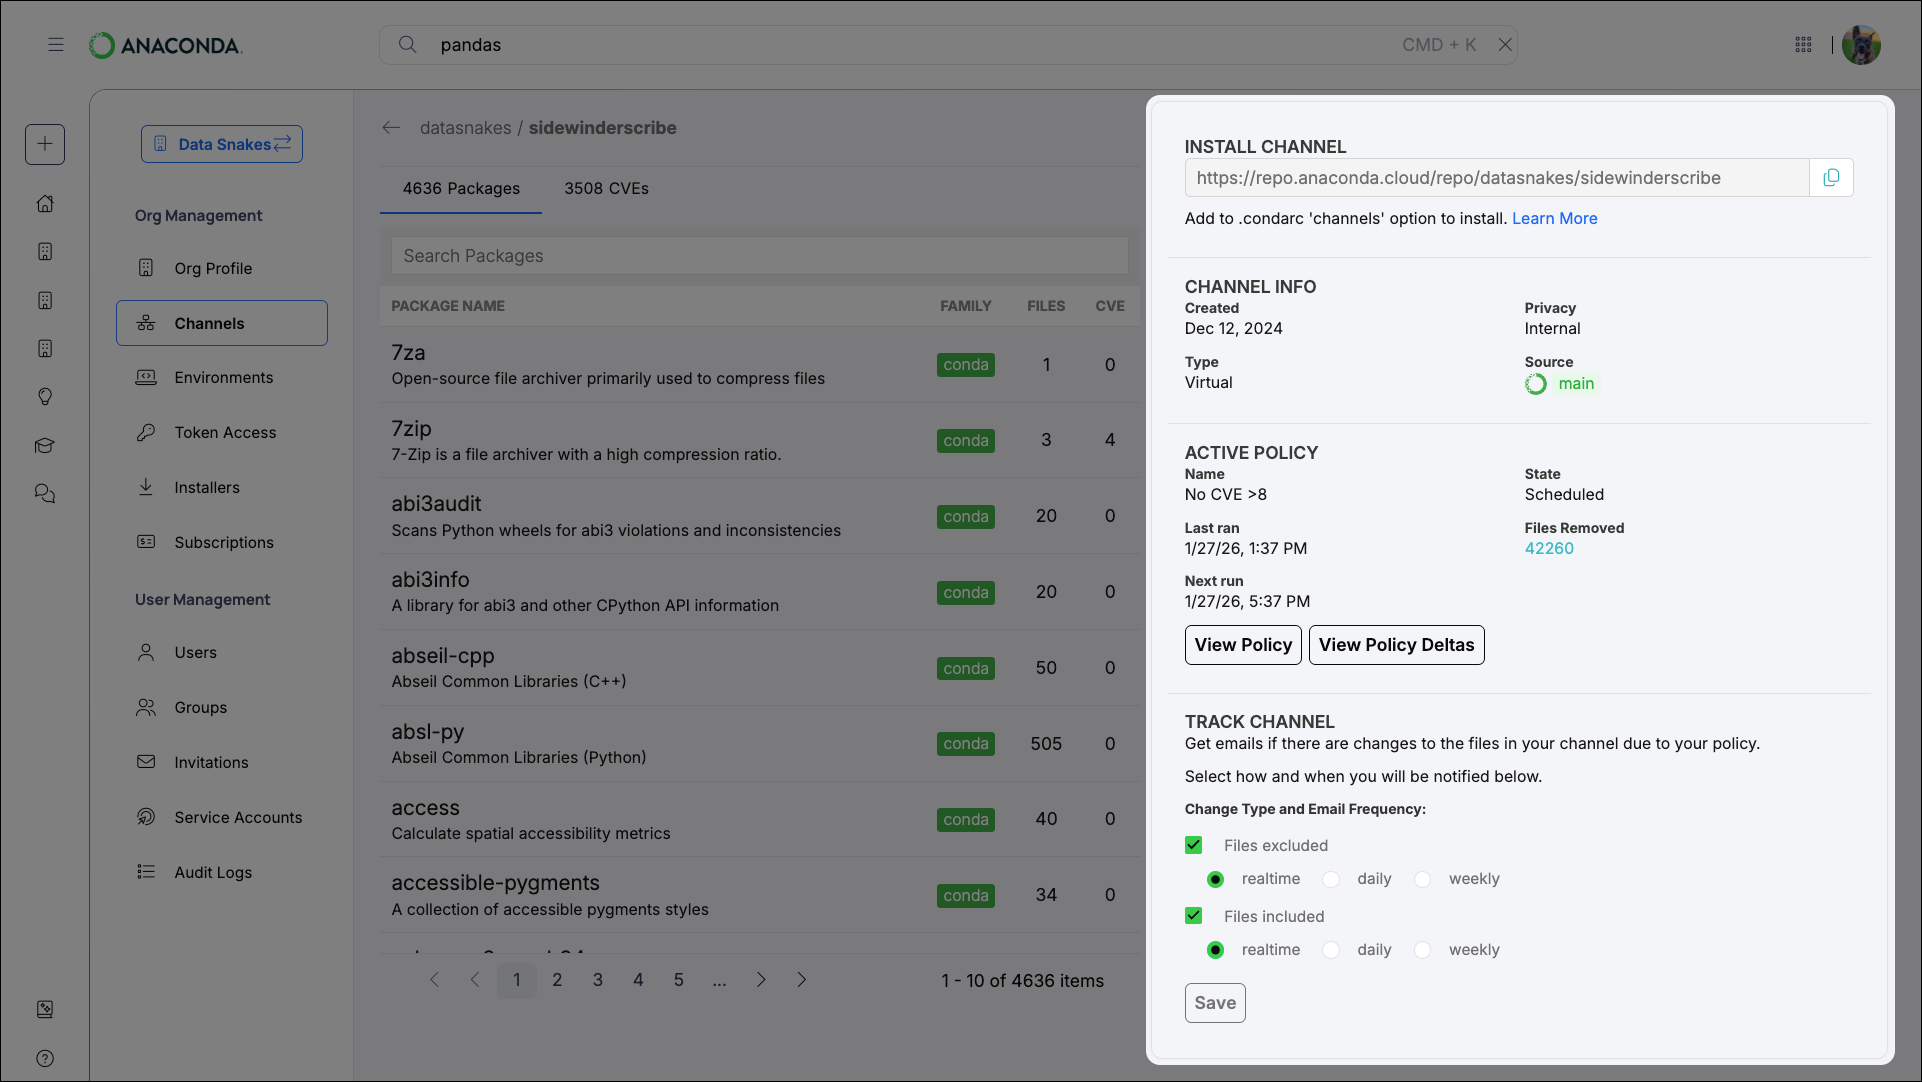
From the Channels page, select any channel to view its details. The channel details page provides the following information about the channel:
  • The channel’s address (a URL you can copy and add to your .condarc file to access the channel’s packages)
  • General information about the channel
  • Information about the policy that is applied to the channel
You can also track your channel from the channel details page.

Channel tracking

Track your channels to receive emails at configurable intervals to keep up-to-date with the latest changes to your channels’ contents.
  1. From the Channels page, select Channel Tracking to view the Track Channels page.
    You can also track a channel from the channel details page.
  2. Select your channel from the list, choose which types of emails you would like to receive, and then set the frequency at which you would like to receive them. You can receive emails in realtime, daily, or weekly. Select Save to retain your changes.
    Because deltas are generated when the policy filter runs, the realtime option can generate a maximum of one email every four hours.