> ## Documentation Index
> Fetch the complete documentation index at: https://anaconda.com/docs/llms.txt
> Use this file to discover all available pages before exploring further.
# Okta integration using OIDC
If you are using Okta as an OpenID Connect provider, you can follow these instructions to integrate your instance of Keycloak, enabling your end users to log in to Package Security Manager using Okta.
## Prerequisites
You *must* have administrator privileges in both Keycloak and Okta to complete this procedure.
## Integrating Okta with Keycloak
1. Log in to Okta.
2. Select **Applications** from the left-hand menu, then click **Create App Integration**.
3. Select **OIDC - OpenID Connect** as your **Sign-in method**.
4. Select **Web Application** as your **Application type**.
5. Click **Next**.
6. Rename the Web app and keep this browser tab open for now. Open a new tab and log in to Keycloak.
7. Verify you are in the dev realm.
8. Select **Identity providers** from the left-hand menu.
9. Click **OpenID Connect v1.0**.
10. Set the **Alias** and **Display name** for your provider.
Your alias is part of your **Redirect URI**. If you update your alias, you will need to manually modify your **Redirect URI** when you add it to Okta.
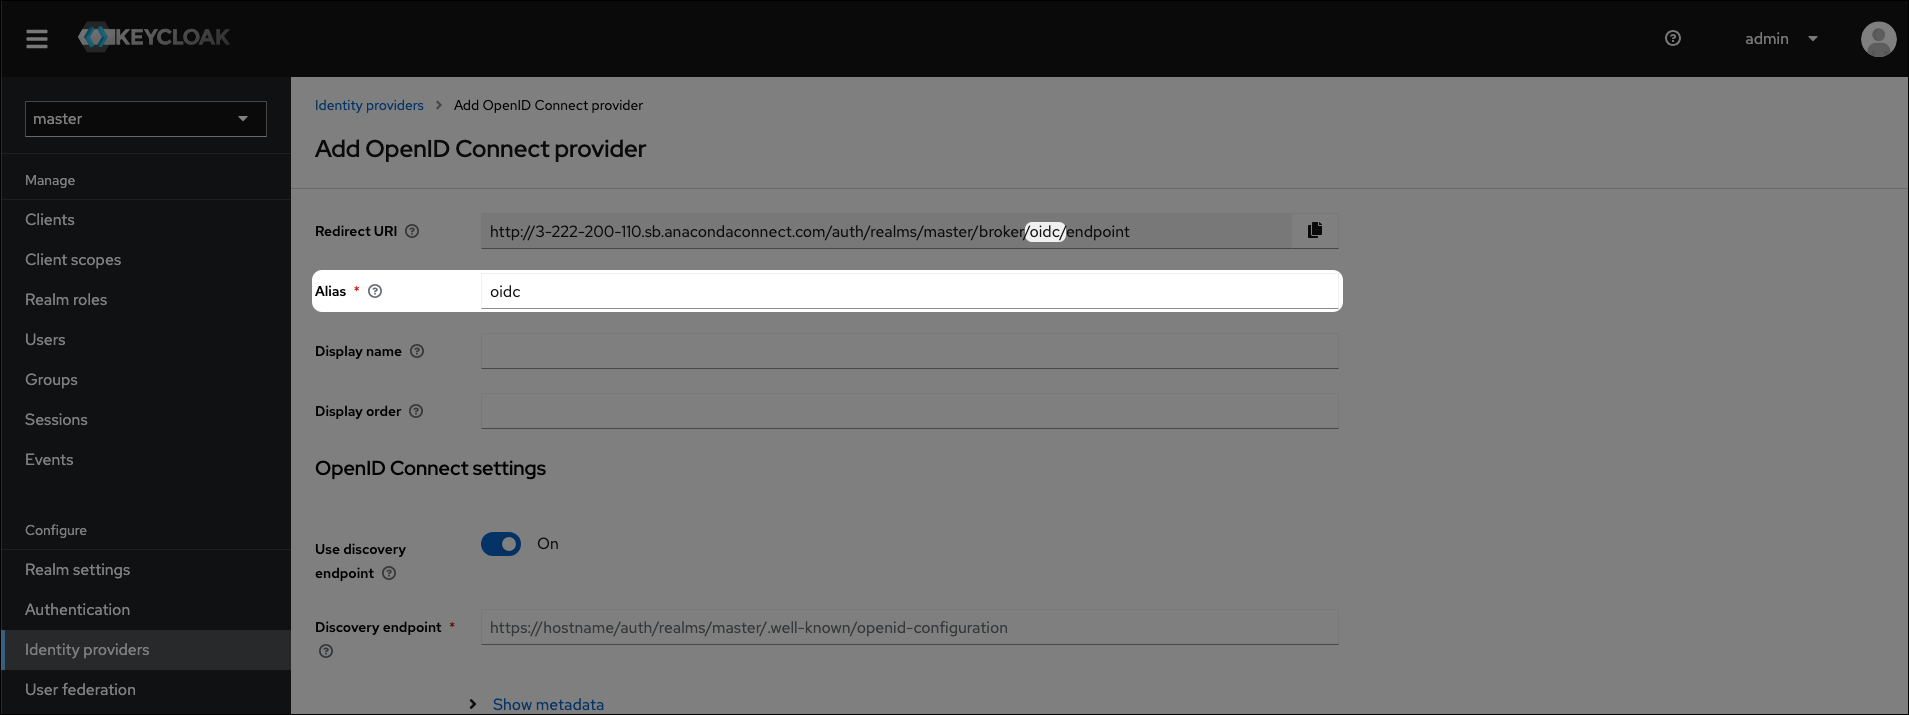 11. Copy the **Redirect URI** from Keycloak.
12. Return to your Okta tab and add the URI you just copied from Keycloak to **Sign-in redirect URIs**.
13. Optionally, add a URL to the **Sign-out redirect URIs**. Anaconda recommends returning your end users back to your organization’s Okta dashboard for a more complete user experience.
14. Click **Save**.
Now that you’ve created your App Integration, you have a **Client ID** and a **Client Secret** for your application.
15. Copy the **Client ID** and **Client Secret** and paste their values into their respective fields in Keycloak, under **OpenID Connect Settings**.
16. If necessary, toggle **Use discovery endpoint** to `OFF`.
17. Enter the **Authorization URL** and **Token URL** in their respective fields.
You can view the URLs you need by opening a browser and navigating to the following URL:
```sh theme={null}
# Replace with your organizations Okta URL
# Replace with the Client ID of the application you just created
https:///oauth2/default/.well-known/openid-configuration?client_id=``
```
18. Click **Add**.
19. Return to Okta and assign the application to users or groups that require access to Package Security Manager.
20. Test your setup by logging in to Package Security Manager using an Okta user account.
11. Copy the **Redirect URI** from Keycloak.
12. Return to your Okta tab and add the URI you just copied from Keycloak to **Sign-in redirect URIs**.
13. Optionally, add a URL to the **Sign-out redirect URIs**. Anaconda recommends returning your end users back to your organization’s Okta dashboard for a more complete user experience.
14. Click **Save**.
Now that you’ve created your App Integration, you have a **Client ID** and a **Client Secret** for your application.
15. Copy the **Client ID** and **Client Secret** and paste their values into their respective fields in Keycloak, under **OpenID Connect Settings**.
16. If necessary, toggle **Use discovery endpoint** to `OFF`.
17. Enter the **Authorization URL** and **Token URL** in their respective fields.
You can view the URLs you need by opening a browser and navigating to the following URL:
```sh theme={null}
# Replace with your organizations Okta URL
# Replace with the Client ID of the application you just created
https:///oauth2/default/.well-known/openid-configuration?client_id=``
```
18. Click **Add**.
19. Return to Okta and assign the application to users or groups that require access to Package Security Manager.
20. Test your setup by logging in to Package Security Manager using an Okta user account.