> ## Documentation Index
> Fetch the complete documentation index at: https://anaconda.com/docs/llms.txt
> Use this file to discover all available pages before exploring further.
# Enabling two-factor authentication
Two-factor authentication (2FA) can be enabled in Keycloak using either Google Authenticator or the One-Time Password(OTP) tool FreeOTP.
For more background on OTPs, see [Keycloak’s documentation on OTP](https://www.keycloak.org/docs/latest/server_admin/#one-time-password-otp-policies).
## For all new users
1. [Log in to the Keycloak administrative console](/docs/psm-on-prem/6.6.0/admin/keycloak_config/user_roles#accessing-the-keycloak-administrative-console).
2. Navigate to the dev realm.
3. Select **Realm settings** from the left-hand navigation.
4. Select the **Themes** tab.
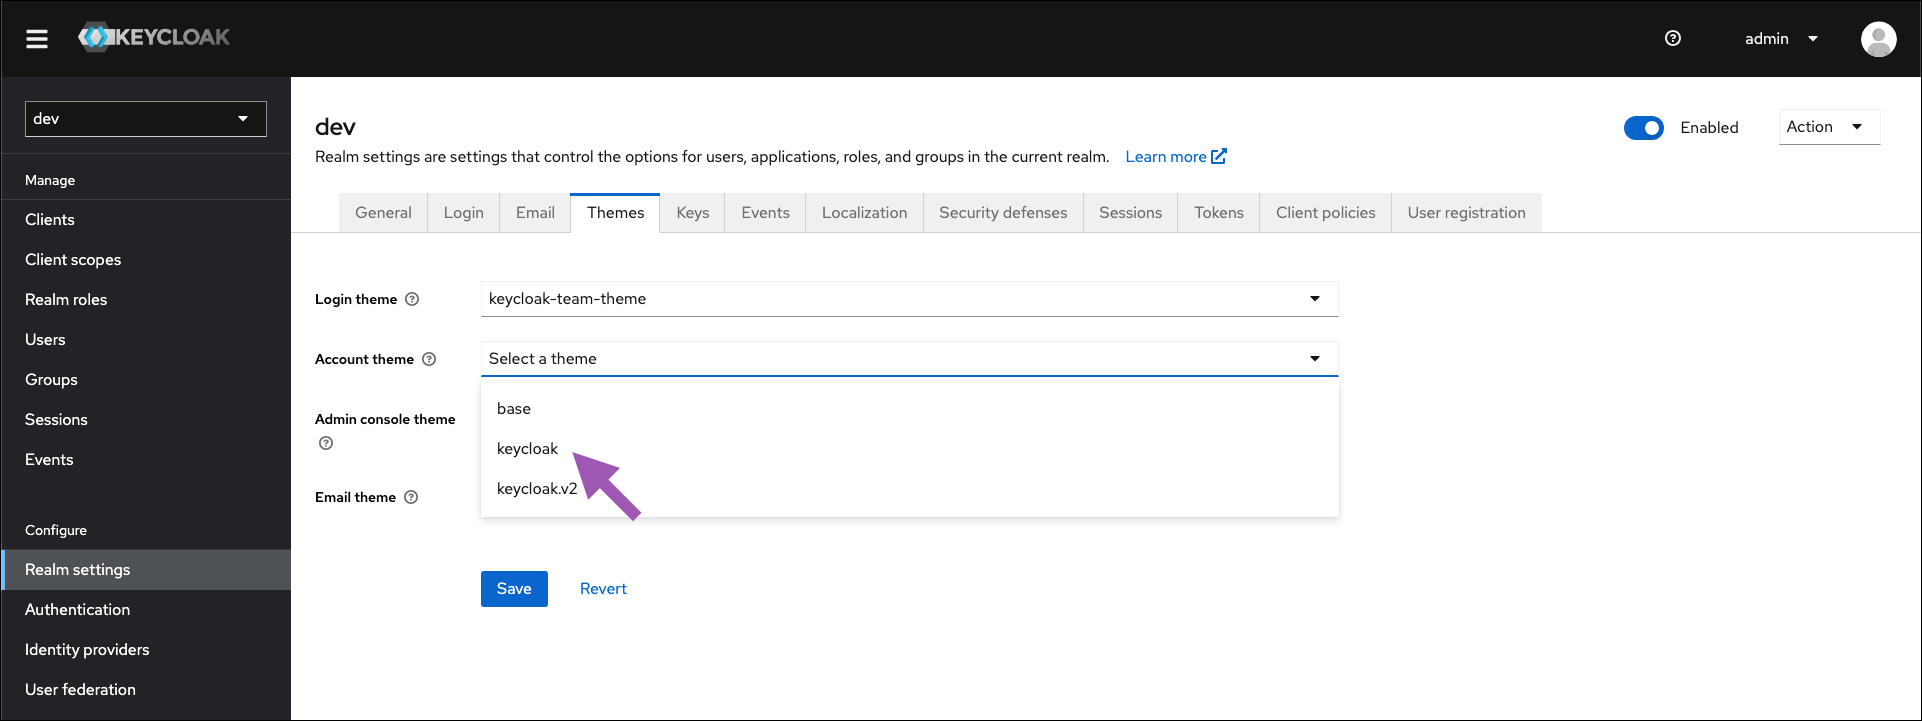 5. Open the **Account theme** dropdown menu and select **keycloak** from the list.
6. Click **Save**.
7. Select **Authentication** from the left-hand navigation.
8. Select the **Required actions** tab.
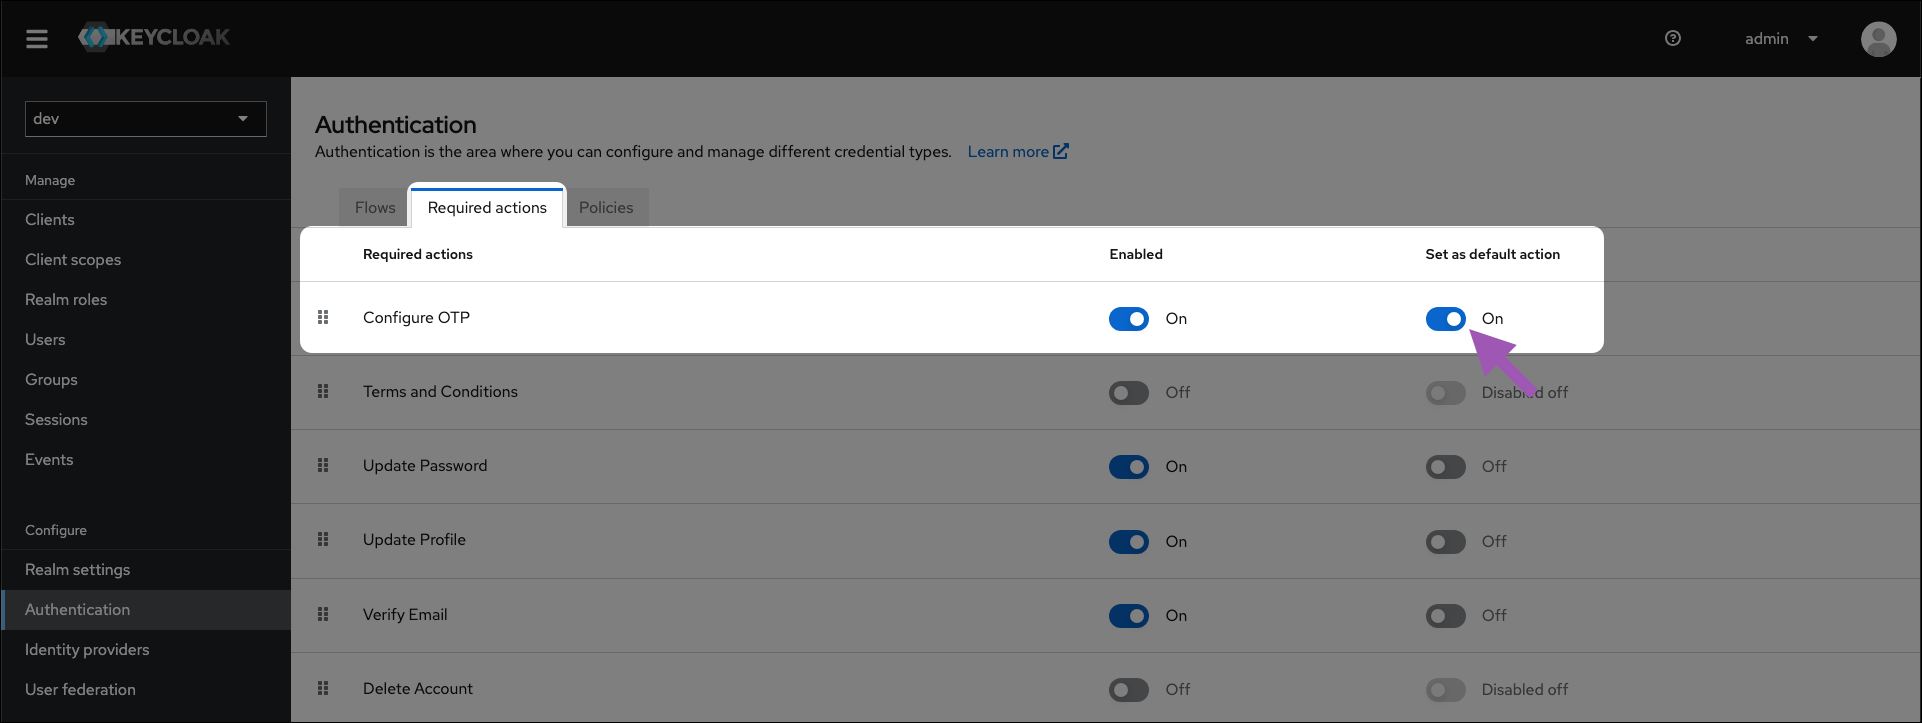
9. Find **Configure OTP** in the **Required actions** column, and toggle **Set as default action** to `ON`.
5. Open the **Account theme** dropdown menu and select **keycloak** from the list.
6. Click **Save**.
7. Select **Authentication** from the left-hand navigation.
8. Select the **Required actions** tab.
9. Find **Configure OTP** in the **Required actions** column, and toggle **Set as default action** to `ON`.
 ## For existing users
This must be done for every user that does not have an OTP configured.
1. [Log in to the Keycloak administrative console](/docs/psm-on-prem/6.6.0/admin/keycloak_config/user_roles#accessing-the-keycloak-administrative-console).
2. Navigate to the dev realm.
3. Select **Users** from the left-hand navigation.
4. Select a user from the list to view their profile page.
5. Open the **Required user actions** dropdown menu and select **Configure OTP**.
6. Click **Save**.
## For existing users
This must be done for every user that does not have an OTP configured.
1. [Log in to the Keycloak administrative console](/docs/psm-on-prem/6.6.0/admin/keycloak_config/user_roles#accessing-the-keycloak-administrative-console).
2. Navigate to the dev realm.
3. Select **Users** from the left-hand navigation.
4. Select a user from the list to view their profile page.
5. Open the **Required user actions** dropdown menu and select **Configure OTP**.
6. Click **Save**.