> ## Documentation Index
> Fetch the complete documentation index at: https://anaconda.com/docs/llms.txt
> Use this file to discover all available pages before exploring further.
# Updating your SAML username attribute in Keycloak
This process requires a Security Assertion Markup Language (SAML) proxy to be previously set up. For more information about setting up a SAML proxy, see [Configuring a proxy for outgoing Keycloak HTTP requests](/docs/psm-on-prem/6.5.1/admin/keycloak_config/saml_proxy).
When using SAML, you can update which attribute Keycloak pulls and displays for your users’ names in Anaconda Server. To do so, follow these steps:
1. [Log in to the Keycloak administrative console](/docs/psm-on-prem/6.5.1/admin/keycloak_config/user_roles#accessing-the-keycloak-administrative-console).
2. Select **Identity providers** from the left-hand navigation menu.
3. Select your SAML identity provider from the list.
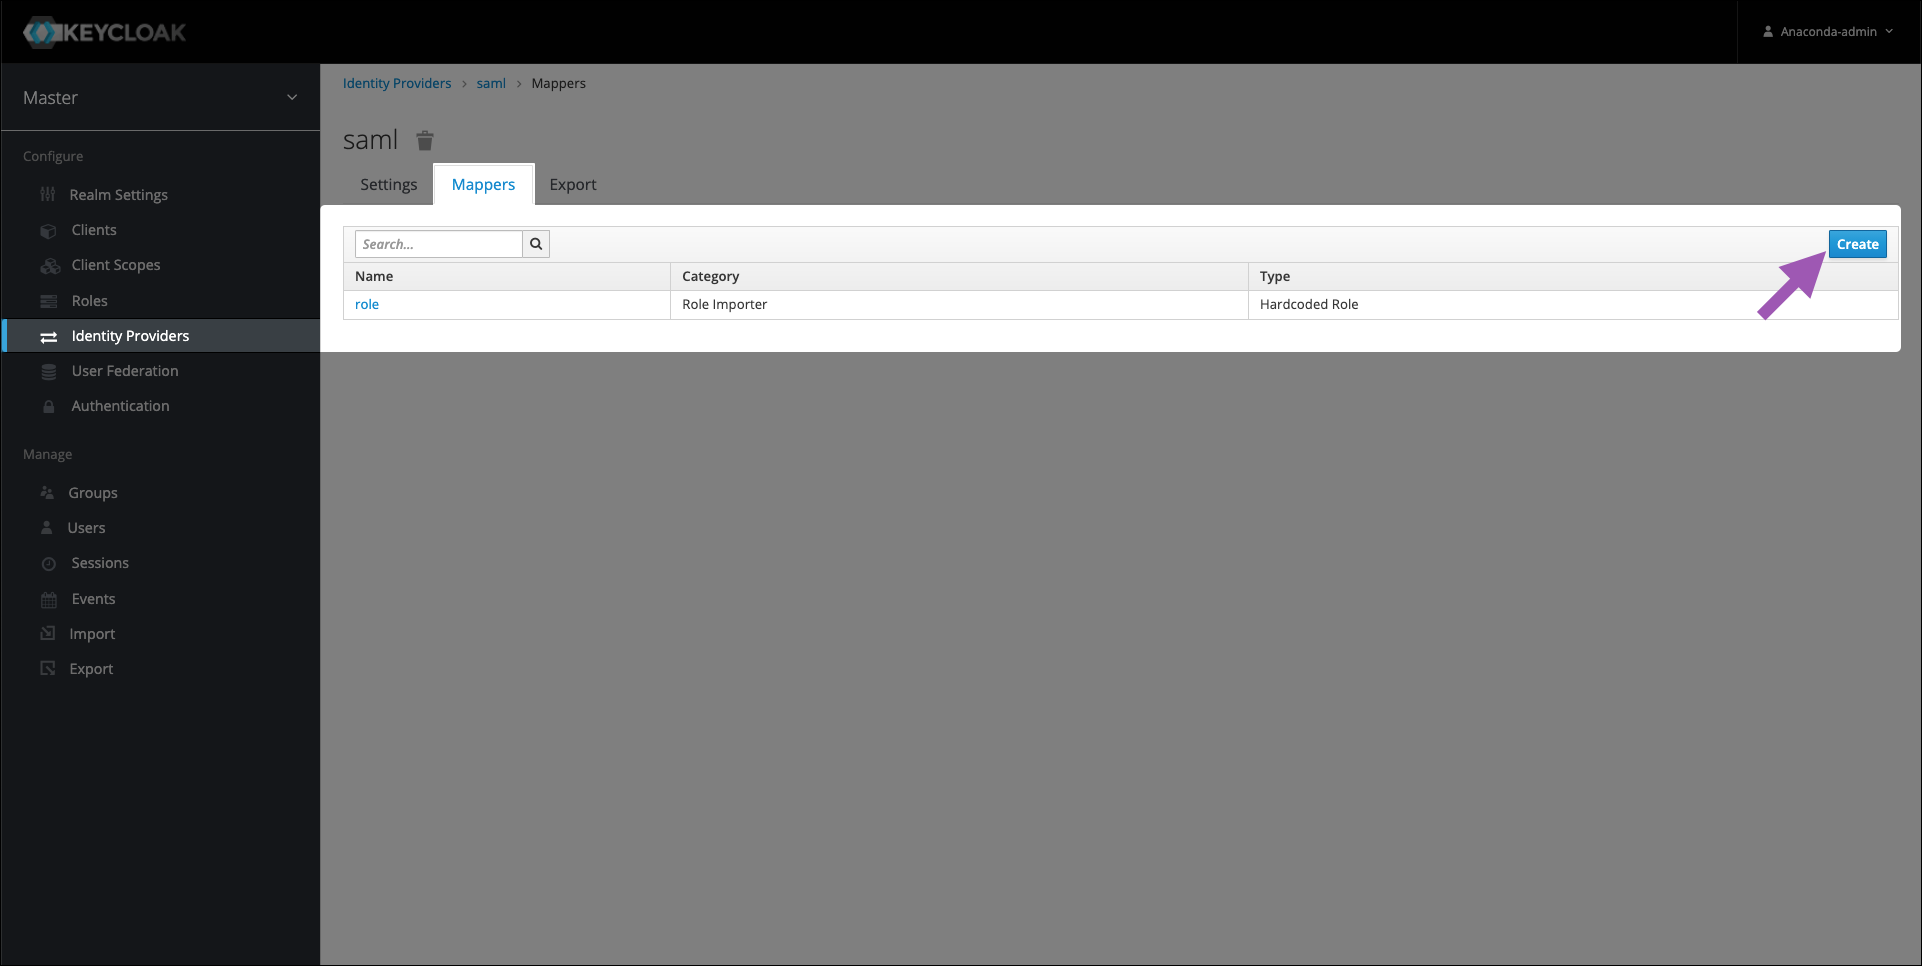
4. Select the **Mappers** tab.
5. Click **Create**.
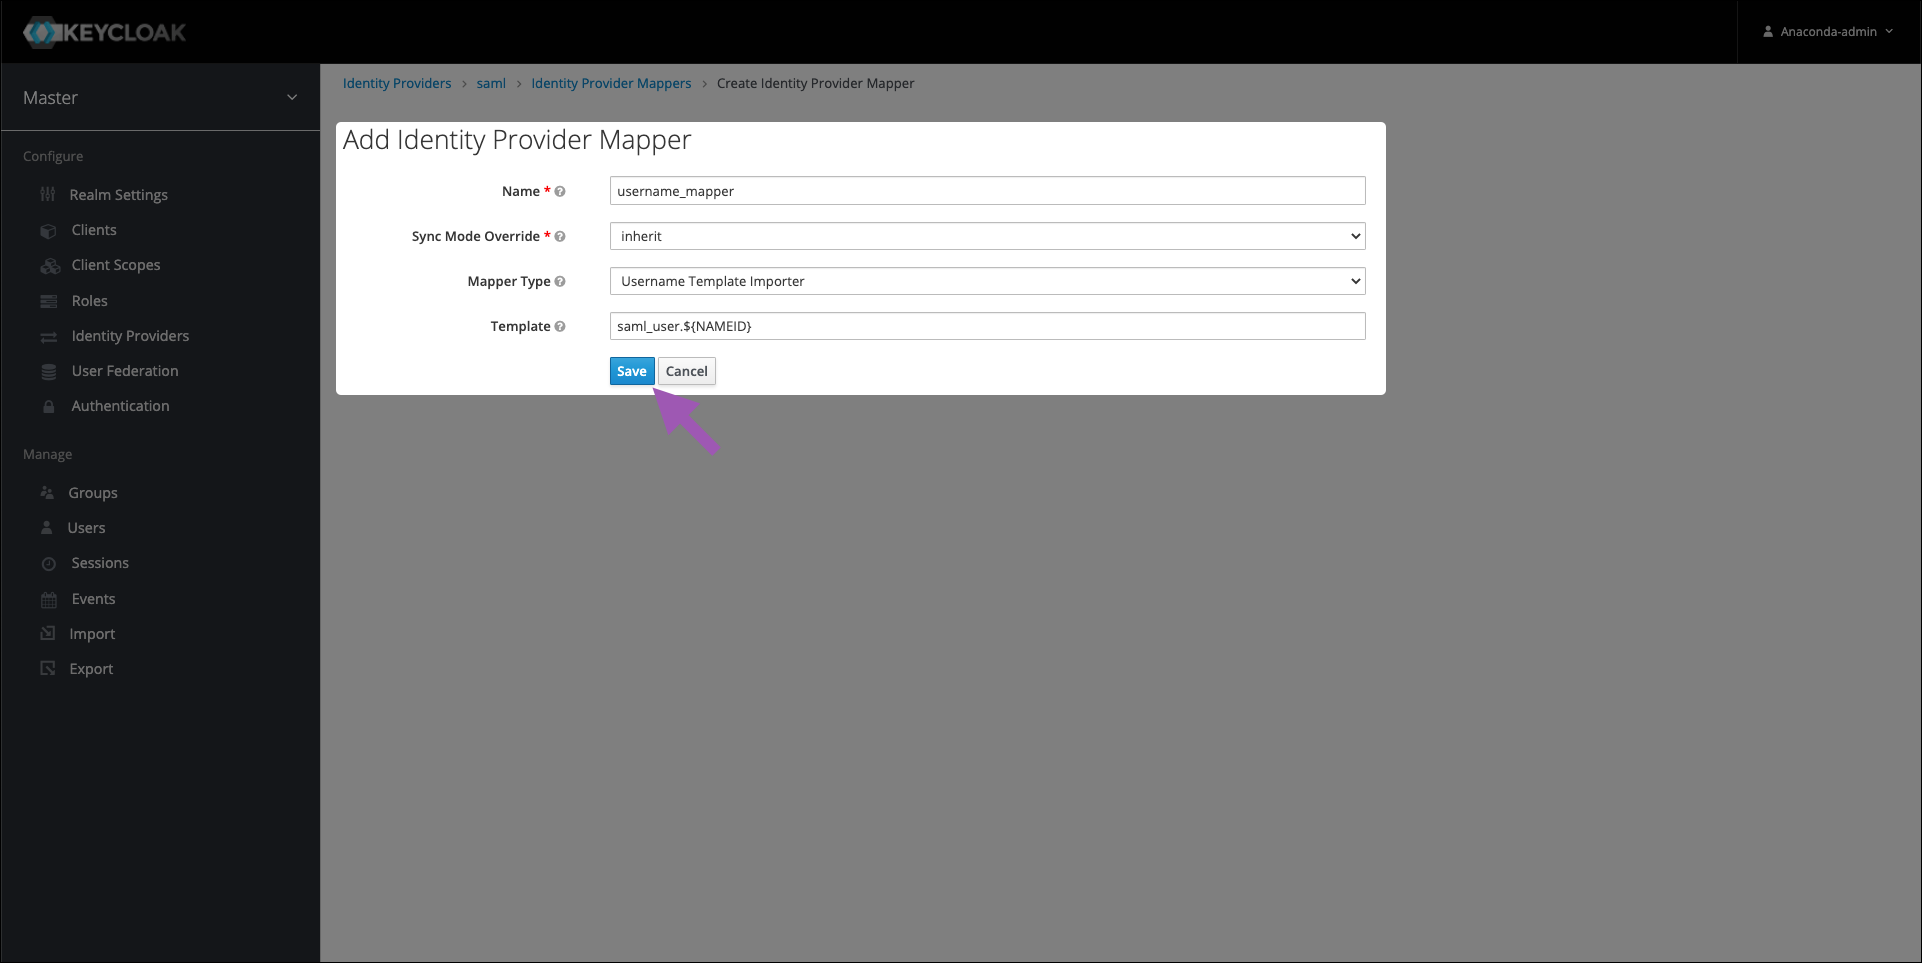
 6. Enter a name for your mapper.
7. Open the **Synch Mode Override** dropdown and select **inherit**.
8. Open the **Mapper Type** dropdown and select **Username Template Importer**.
9. Enter the template to use to format the imported usernames. Hover your mouse over the question mark icon beside the **Template** field for an example.
10. Click **Save**.
6. Enter a name for your mapper.
7. Open the **Synch Mode Override** dropdown and select **inherit**.
8. Open the **Mapper Type** dropdown and select **Username Template Importer**.
9. Enter the template to use to format the imported usernames. Hover your mouse over the question mark icon beside the **Template** field for an example.
10. Click **Save**.