> ## Documentation Index
> Fetch the complete documentation index at: https://anaconda.com/docs/llms.txt
> Use this file to discover all available pages before exploring further.
# Generating custom Anaconda installers
As an Data Science & AI Workbench Administrator, you can [create custom environments](#creating-an-environment). These environments include specific packages and their dependencies. You can then [create a custom installer](#creating-a-custom-installer-for-an-environment) for the environment, that can be shipped to HDFS and used in Spark jobs.
Custom installers enable IT and Hadoop administrators to maintain close control of a Hadoop cluster while also making these tools available to data scientists who need Python libraries. They provide an easy way to ship multiple custom Anaconda distributions to multiple Hadoop clusters.
***
## Creating an environment
1. Log in to the console using the Administrator credentials [configured after installation](../install/config).
2. Select **Environments** in the left menu.
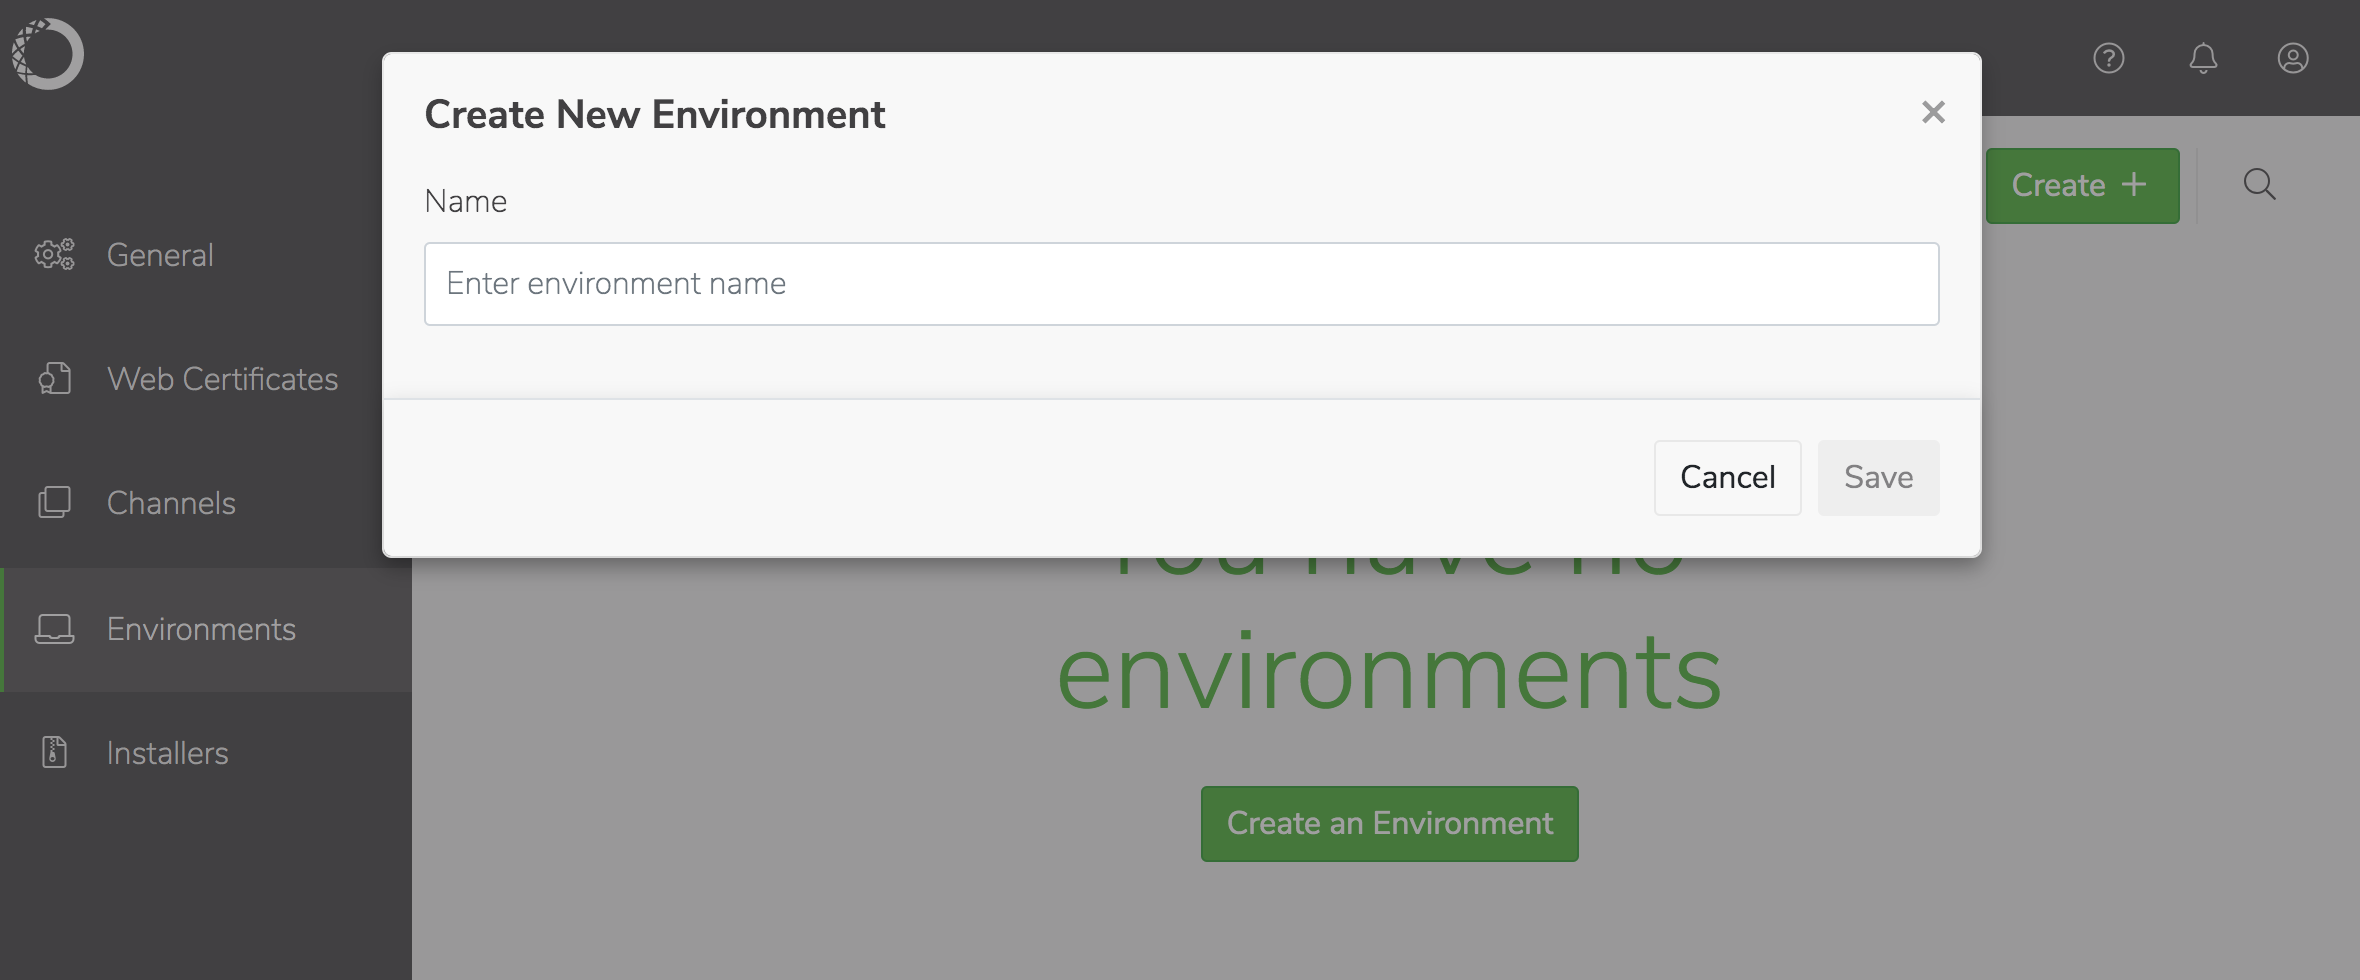
3. Click **Create** in the upper-right corner, give the environment a unique name and click **Save**.
Environment names can contain alphanumeric characters and underscores only.
 4. Check the channel you want to choose packages from, then select the specific packages—and version of each—you want to include in the installer.
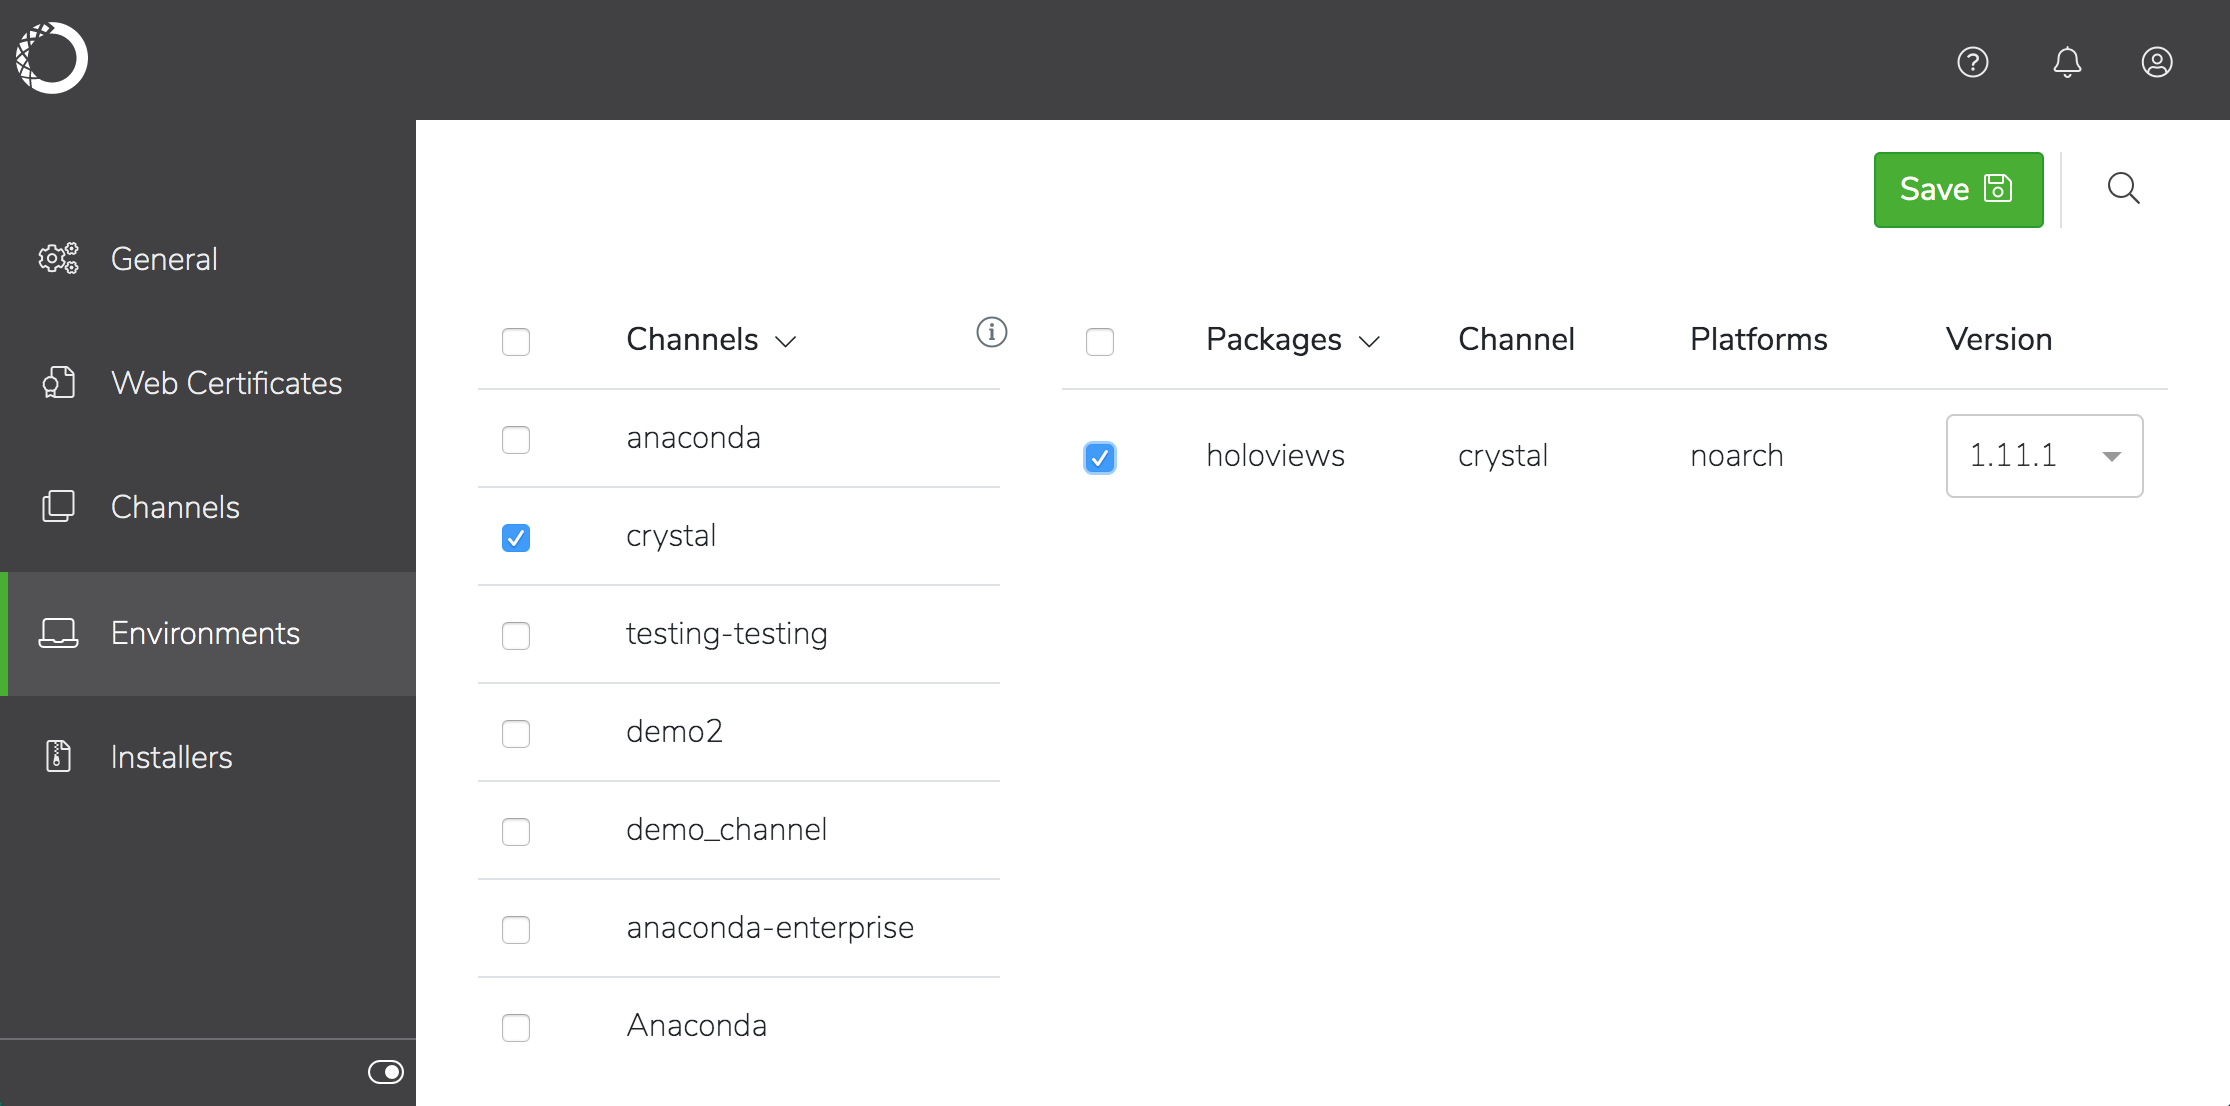 5. Click **Save** in the window banner to create the environment.
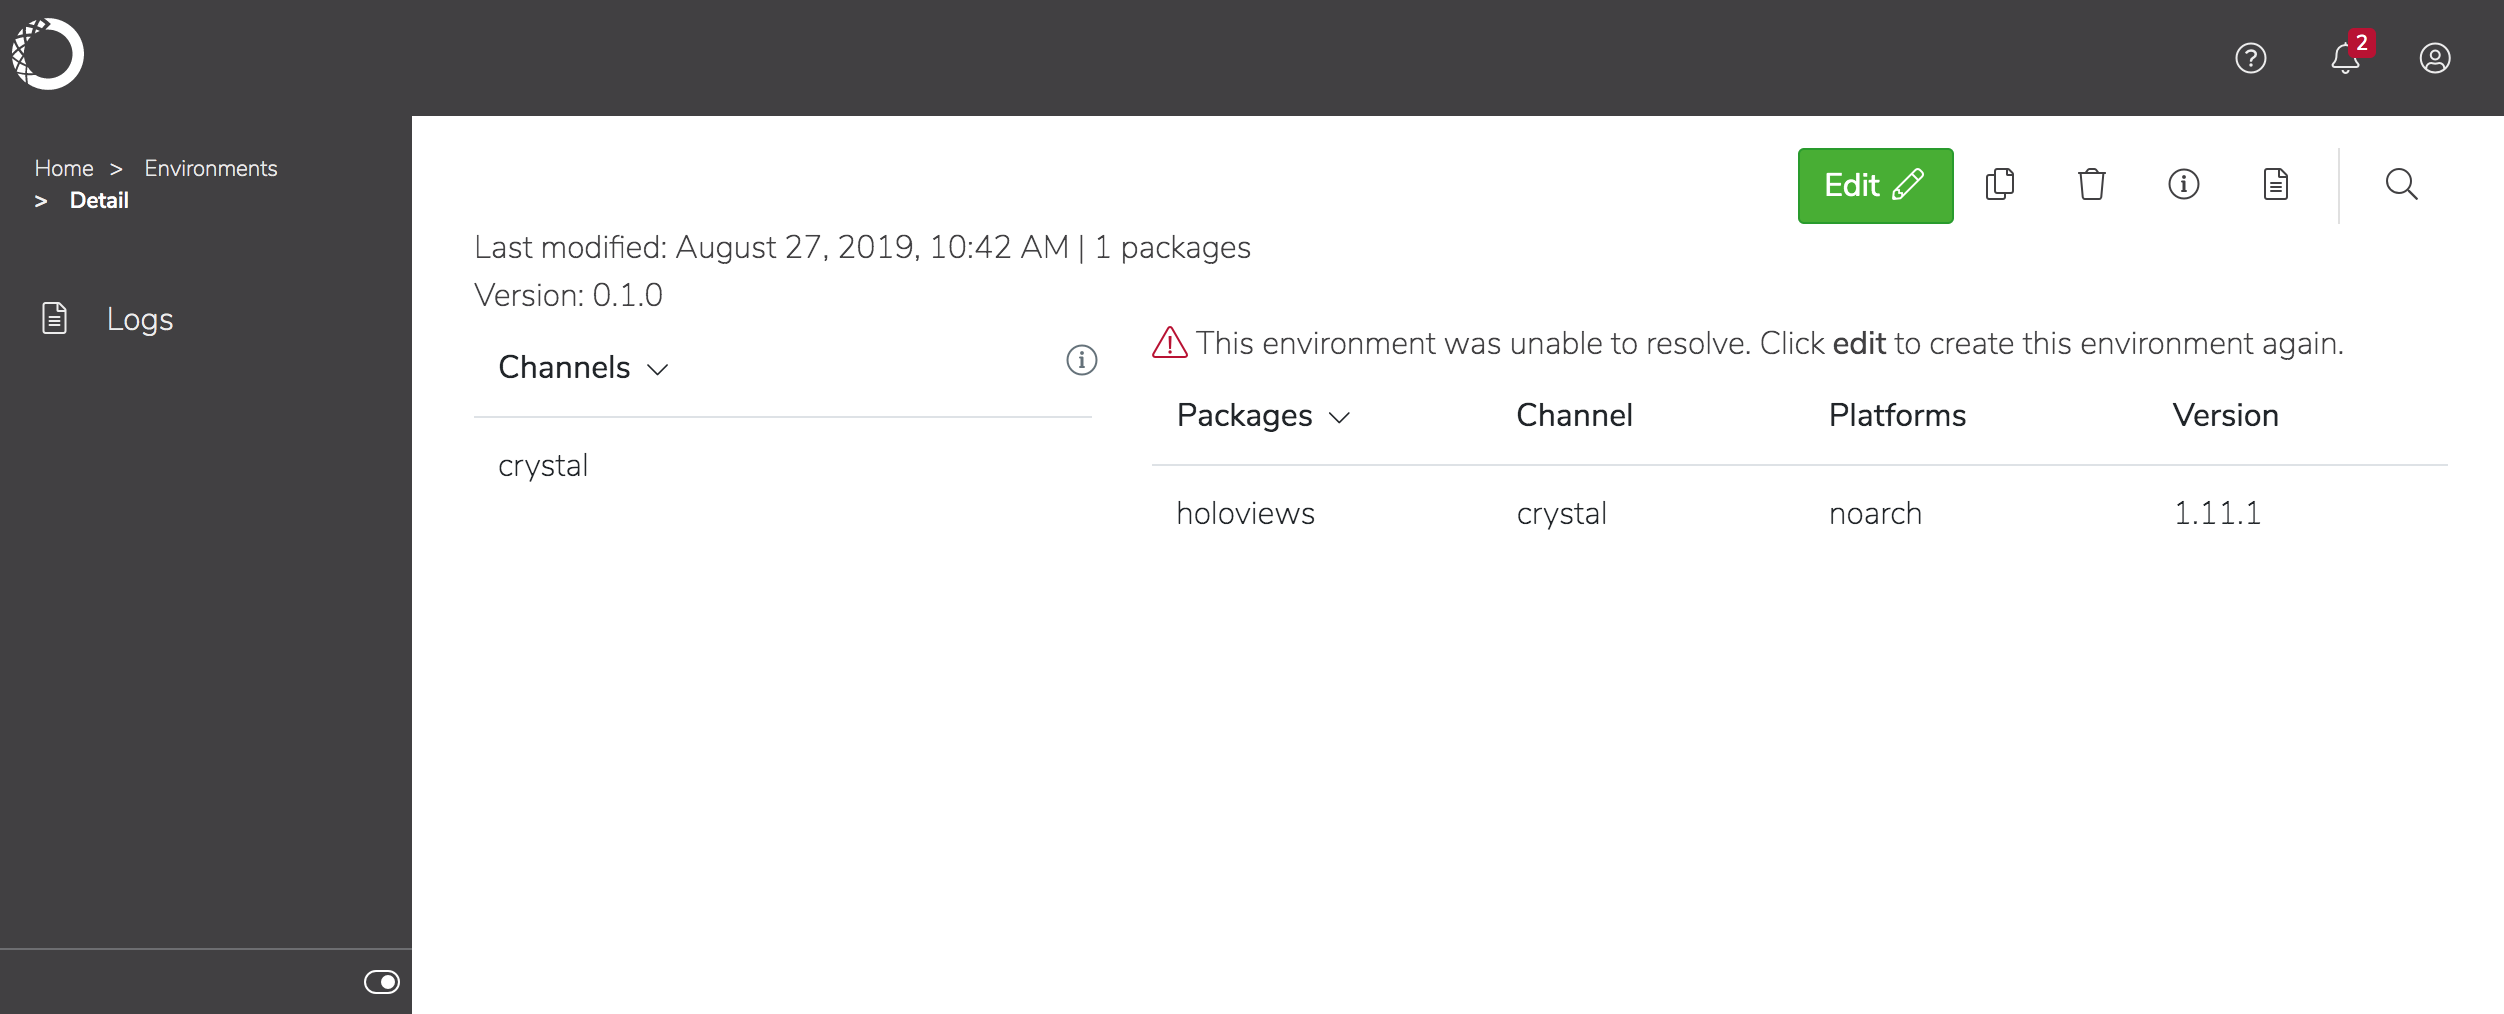
Workbench resolves all the package dependencies and displays the environment in the list. If there is an issue resolving the dependencies, you’ll be notified and prompted to edit the environment.
5. Click **Save** in the window banner to create the environment.
Workbench resolves all the package dependencies and displays the environment in the list. If there is an issue resolving the dependencies, you’ll be notified and prompted to edit the environment.
 You can now use the environment as a basis for creating additional versions of the environment or other environments.
### To edit an existing environment
1. Click on an environment name to view details about the packages included in the environment, then click **Edit**.
2. Change the channels and/or packages included in the environment, and enter a version number for the updated package before clicking **Save**. The new version is displayed in the list of environments.
### To copy an environment
1. Select the environment in the list and click the **Duplicate Environment** icon .
2. Enter a unique name for the environment and click **Save**. The new environment is displayed in the list of environments.
Now that you’ve created an environment, you can create an installer for it.
## Creating a custom installer for an environment
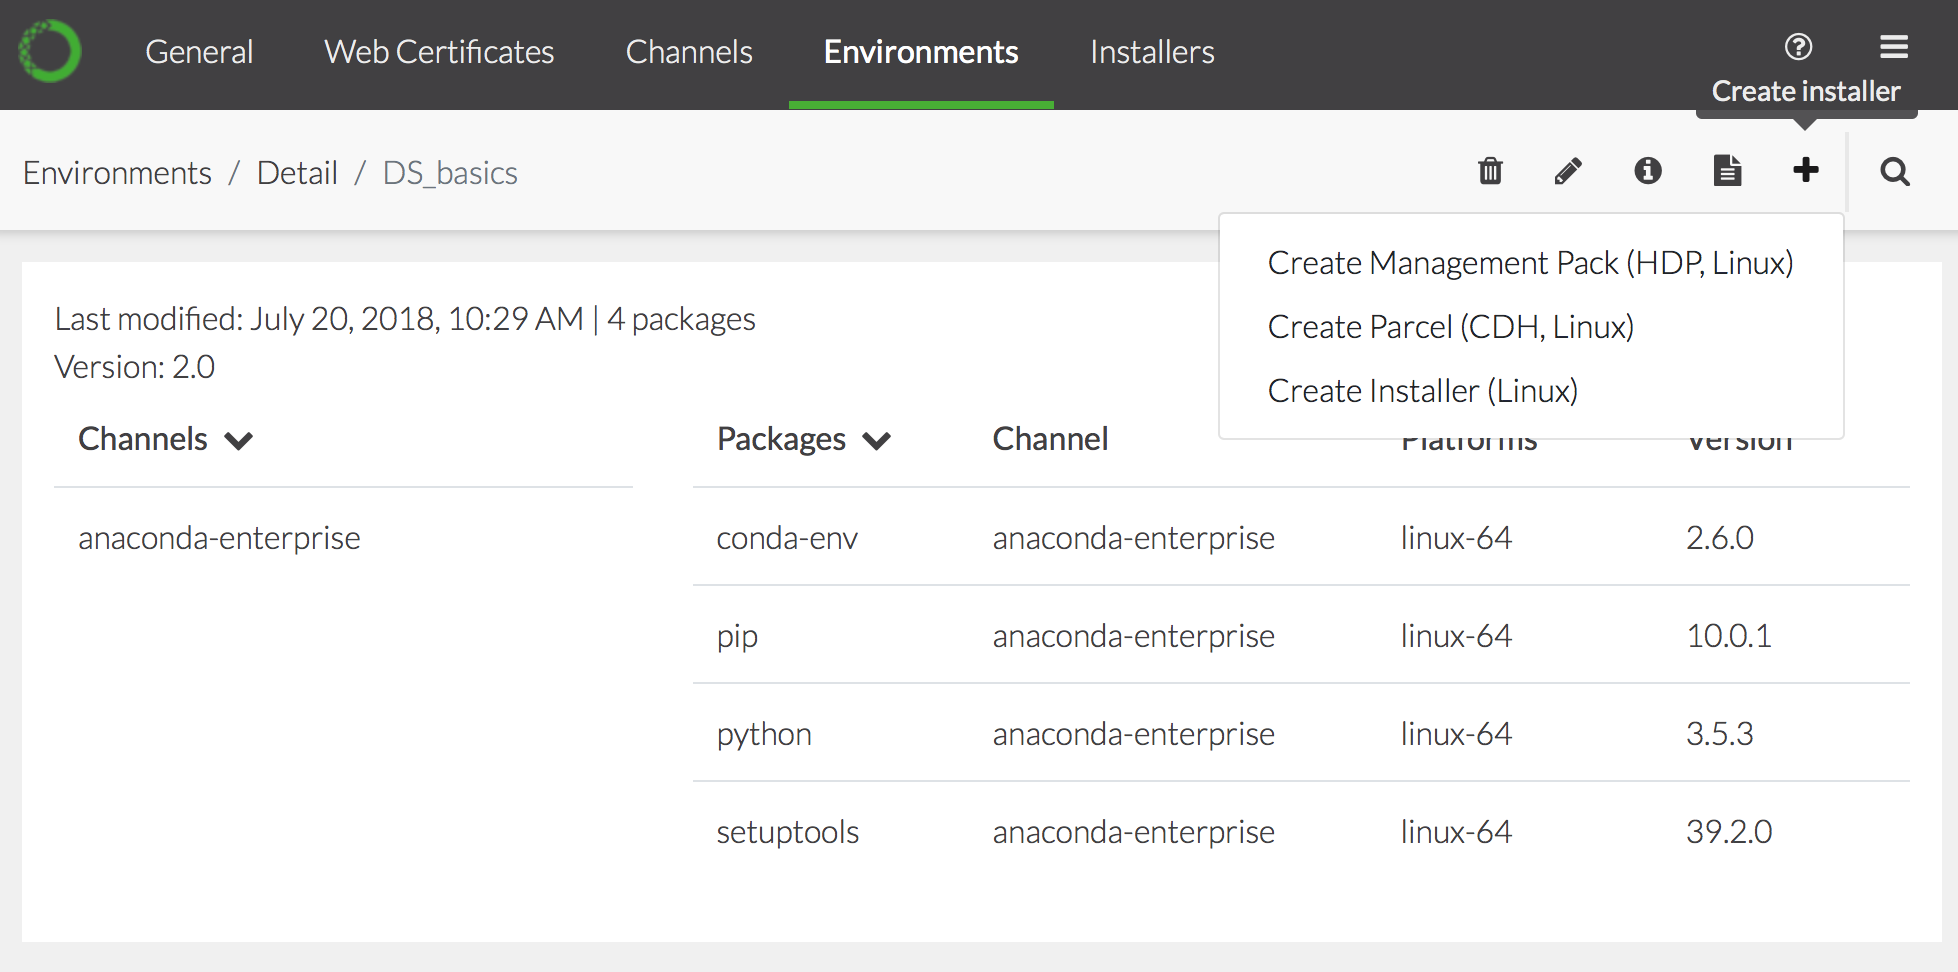
1. Select the environment in the list, click the **Create installer** icon , and select the type of installer you want to create:
You can now use the environment as a basis for creating additional versions of the environment or other environments.
### To edit an existing environment
1. Click on an environment name to view details about the packages included in the environment, then click **Edit**.
2. Change the channels and/or packages included in the environment, and enter a version number for the updated package before clicking **Save**. The new version is displayed in the list of environments.
### To copy an environment
1. Select the environment in the list and click the **Duplicate Environment** icon .
2. Enter a unique name for the environment and click **Save**. The new environment is displayed in the list of environments.
Now that you’ve created an environment, you can create an installer for it.
## Creating a custom installer for an environment
1. Select the environment in the list, click the **Create installer** icon , and select the type of installer you want to create:
 Workbench creates the installer and displays it in the **Installers** list:
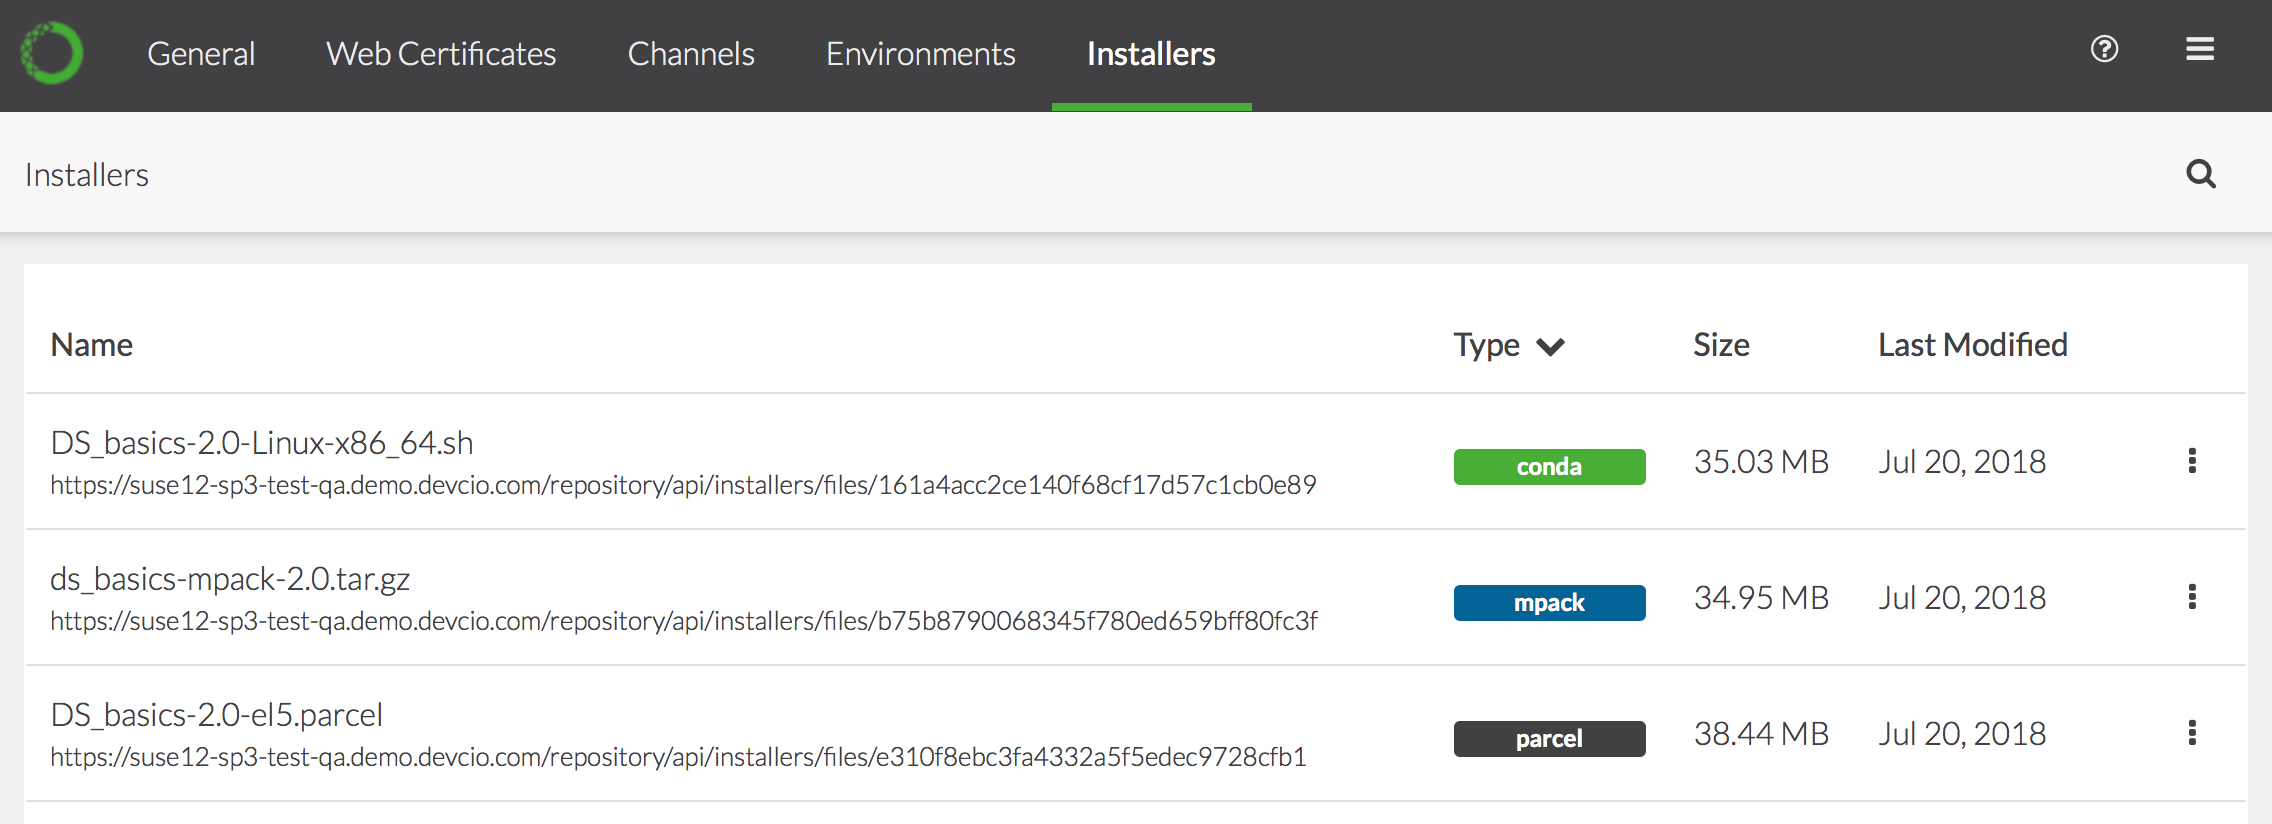 2. To view the relevant logs, download or delete the installer, click the icon and choose the appropriate command.
**If you created a management pack**, you’ll need to install it on your Hortonworks HDP cluster and add it to your local Ambari server to make it available to users. For more information, see [this blog post about generating custom management packs](https://www.anaconda.com/blog/developer-blog/self-service-open-data-science-custom-anaconda-management-packs-hortonworks-hdp/).
**If you created a parcel**, you’ll need to install it on your CDP cluster to make it [available to users](https://docs.cloudera.com/cdp-private-cloud-base/7.1.7/installation/topics/cdpdc-using-local-parcel-repository).
Alternatively, you can directly download the Parcel onto your CDP cluster [as described here](/docs/data-science/5.7.1/data-science-workflows/installers).
2. To view the relevant logs, download or delete the installer, click the icon and choose the appropriate command.
**If you created a management pack**, you’ll need to install it on your Hortonworks HDP cluster and add it to your local Ambari server to make it available to users. For more information, see [this blog post about generating custom management packs](https://www.anaconda.com/blog/developer-blog/self-service-open-data-science-custom-anaconda-management-packs-hortonworks-hdp/).
**If you created a parcel**, you’ll need to install it on your CDP cluster to make it [available to users](https://docs.cloudera.com/cdp-private-cloud-base/7.1.7/installation/topics/cdpdc-using-local-parcel-repository).
Alternatively, you can directly download the Parcel onto your CDP cluster [as described here](/docs/data-science/5.7.1/data-science-workflows/installers).