> ## Documentation Index
> Fetch the complete documentation index at: https://anaconda.com/docs/llms.txt
> Use this file to discover all available pages before exploring further.
# Keycloak Upgrade
With the release of Anaconda Enterprise 5.6, significant improvements have been made to our Keycloak implementation. For details, please see the [release notes](/docs/data-science/5.6.1/reference/release-notes).
Upgrading to Anaconda Enterprise 5.6 requires Keycloak configuration changes to access your instance. You’ll need to add a protocol mapper to the `roles` client scope, then add a service account with permissions to the `anaconda-platform` client.
* [Adding the protocol mapper](#adding-the-protocol-mapper)
* [Adding the service account](#adding-the-service-account)
## Adding the protocol mapper
After your upgrade to Anaconda Enterprise 5.6 completes:
1. Open a browser and log in to your Keycloak admin panel using your existing Keycloak credentials. Your Keycloak admin panel can be found at `www.YOUR\_DOMAIN/auth/admin`.
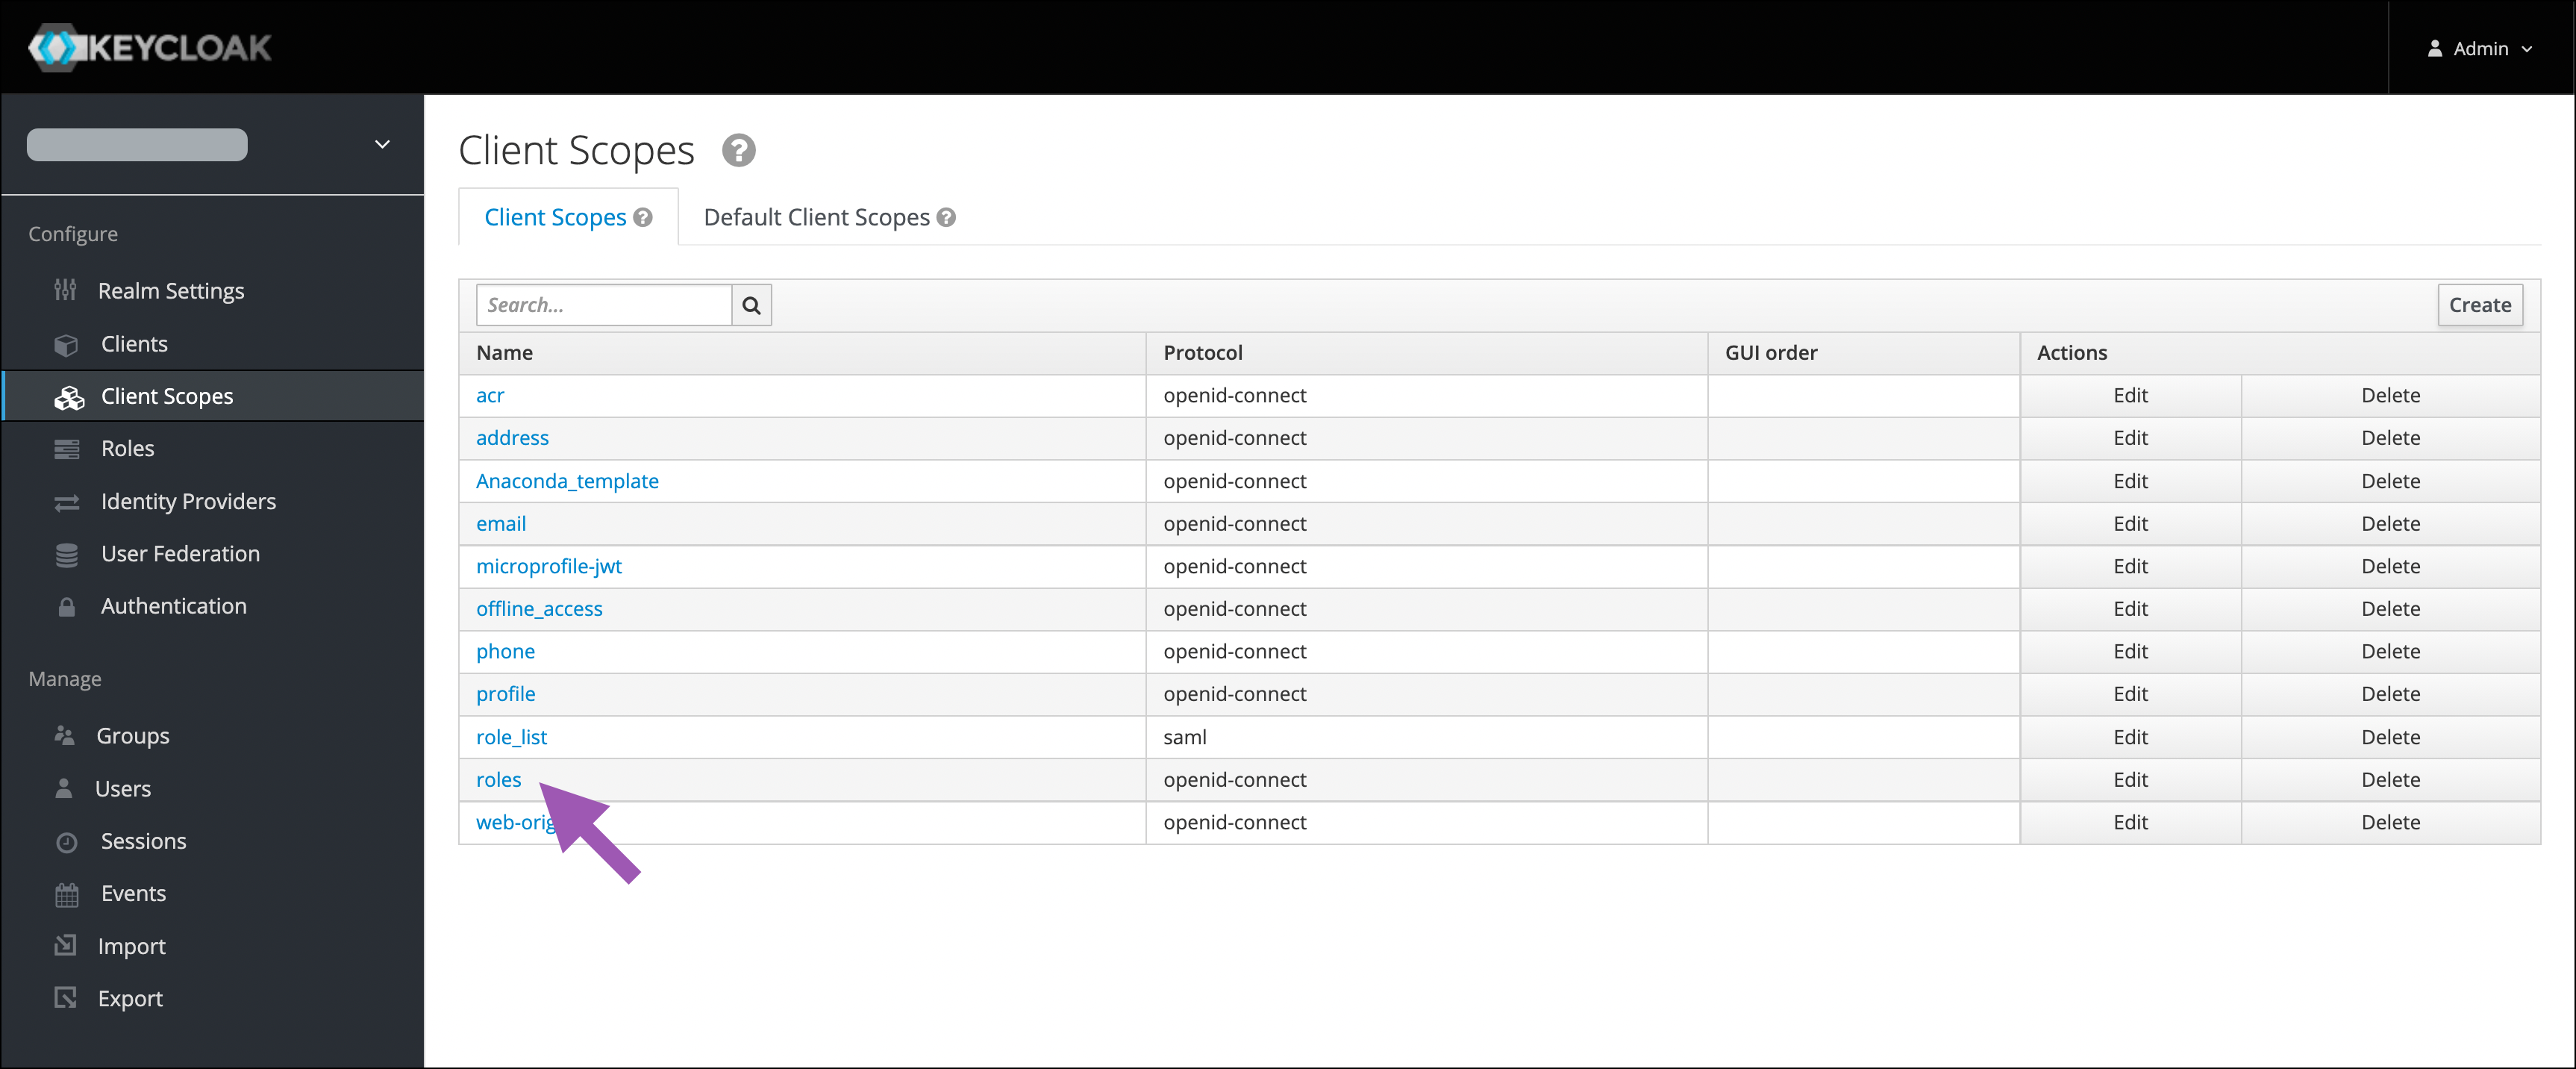
2. Navigate to the **Client Scopes** page from the left-hand navigation menu, then select **roles** from the list.
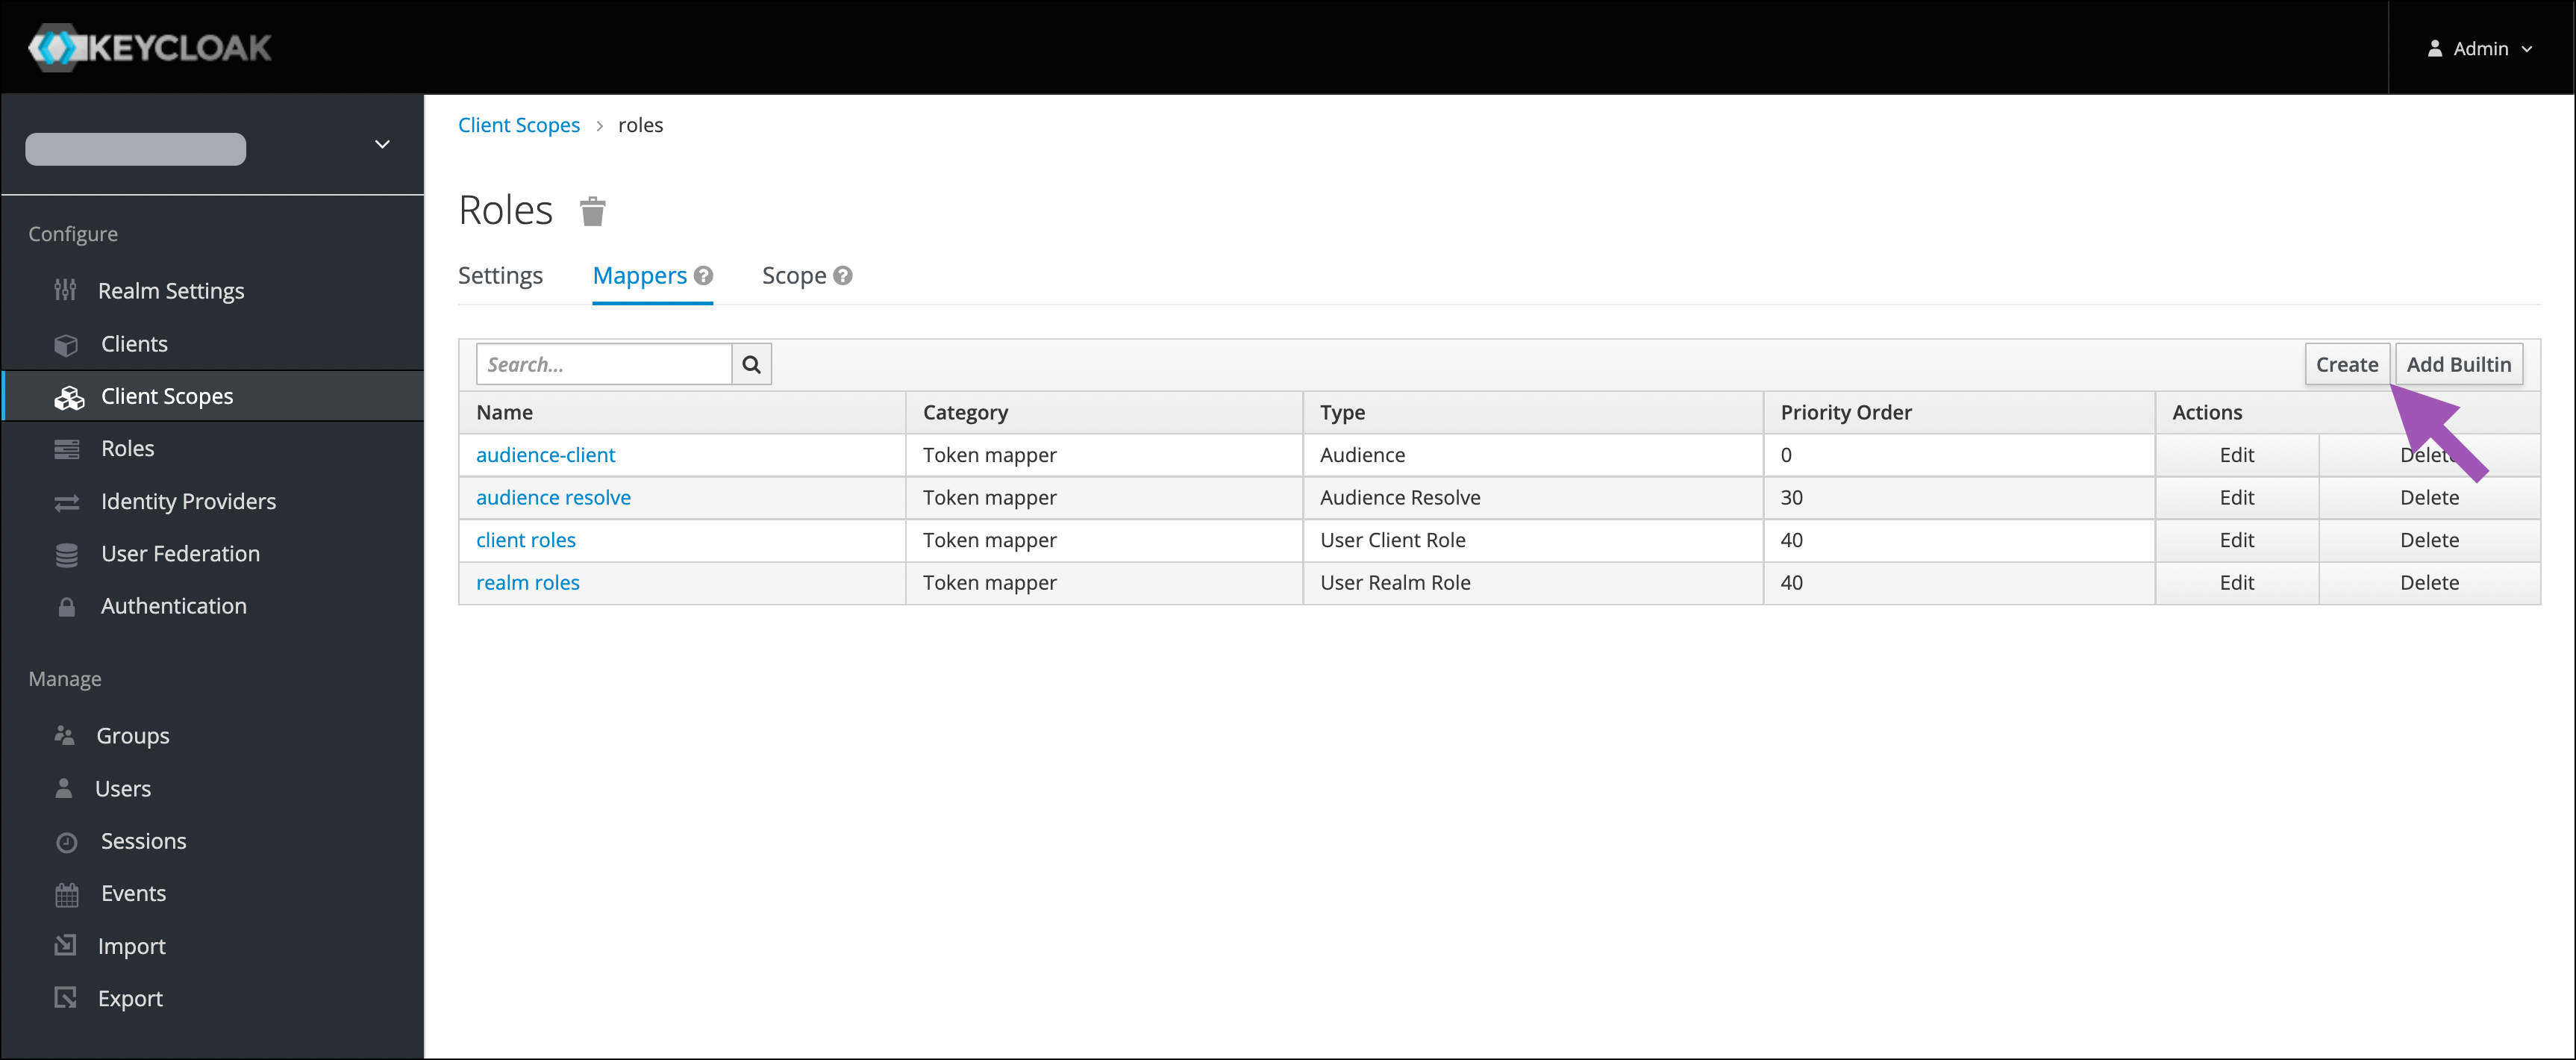
 3. Select the **Mappers** tab at the top of the page, then click **Create** to begin creating a new protocol mapper for this client scope.
 4. Fill in the fields and set the toggle switches as indicated:
* **Name**: my-app-audience
* **Mapper Type**: Audience
* **Included Client Audience**: anaconda-platform
* **Add to ID token**: `ON`
* **Add to access token**: `ON`
4. Fill in the fields and set the toggle switches as indicated:
* **Name**: my-app-audience
* **Mapper Type**: Audience
* **Included Client Audience**: anaconda-platform
* **Add to ID token**: `ON`
* **Add to access token**: `ON`
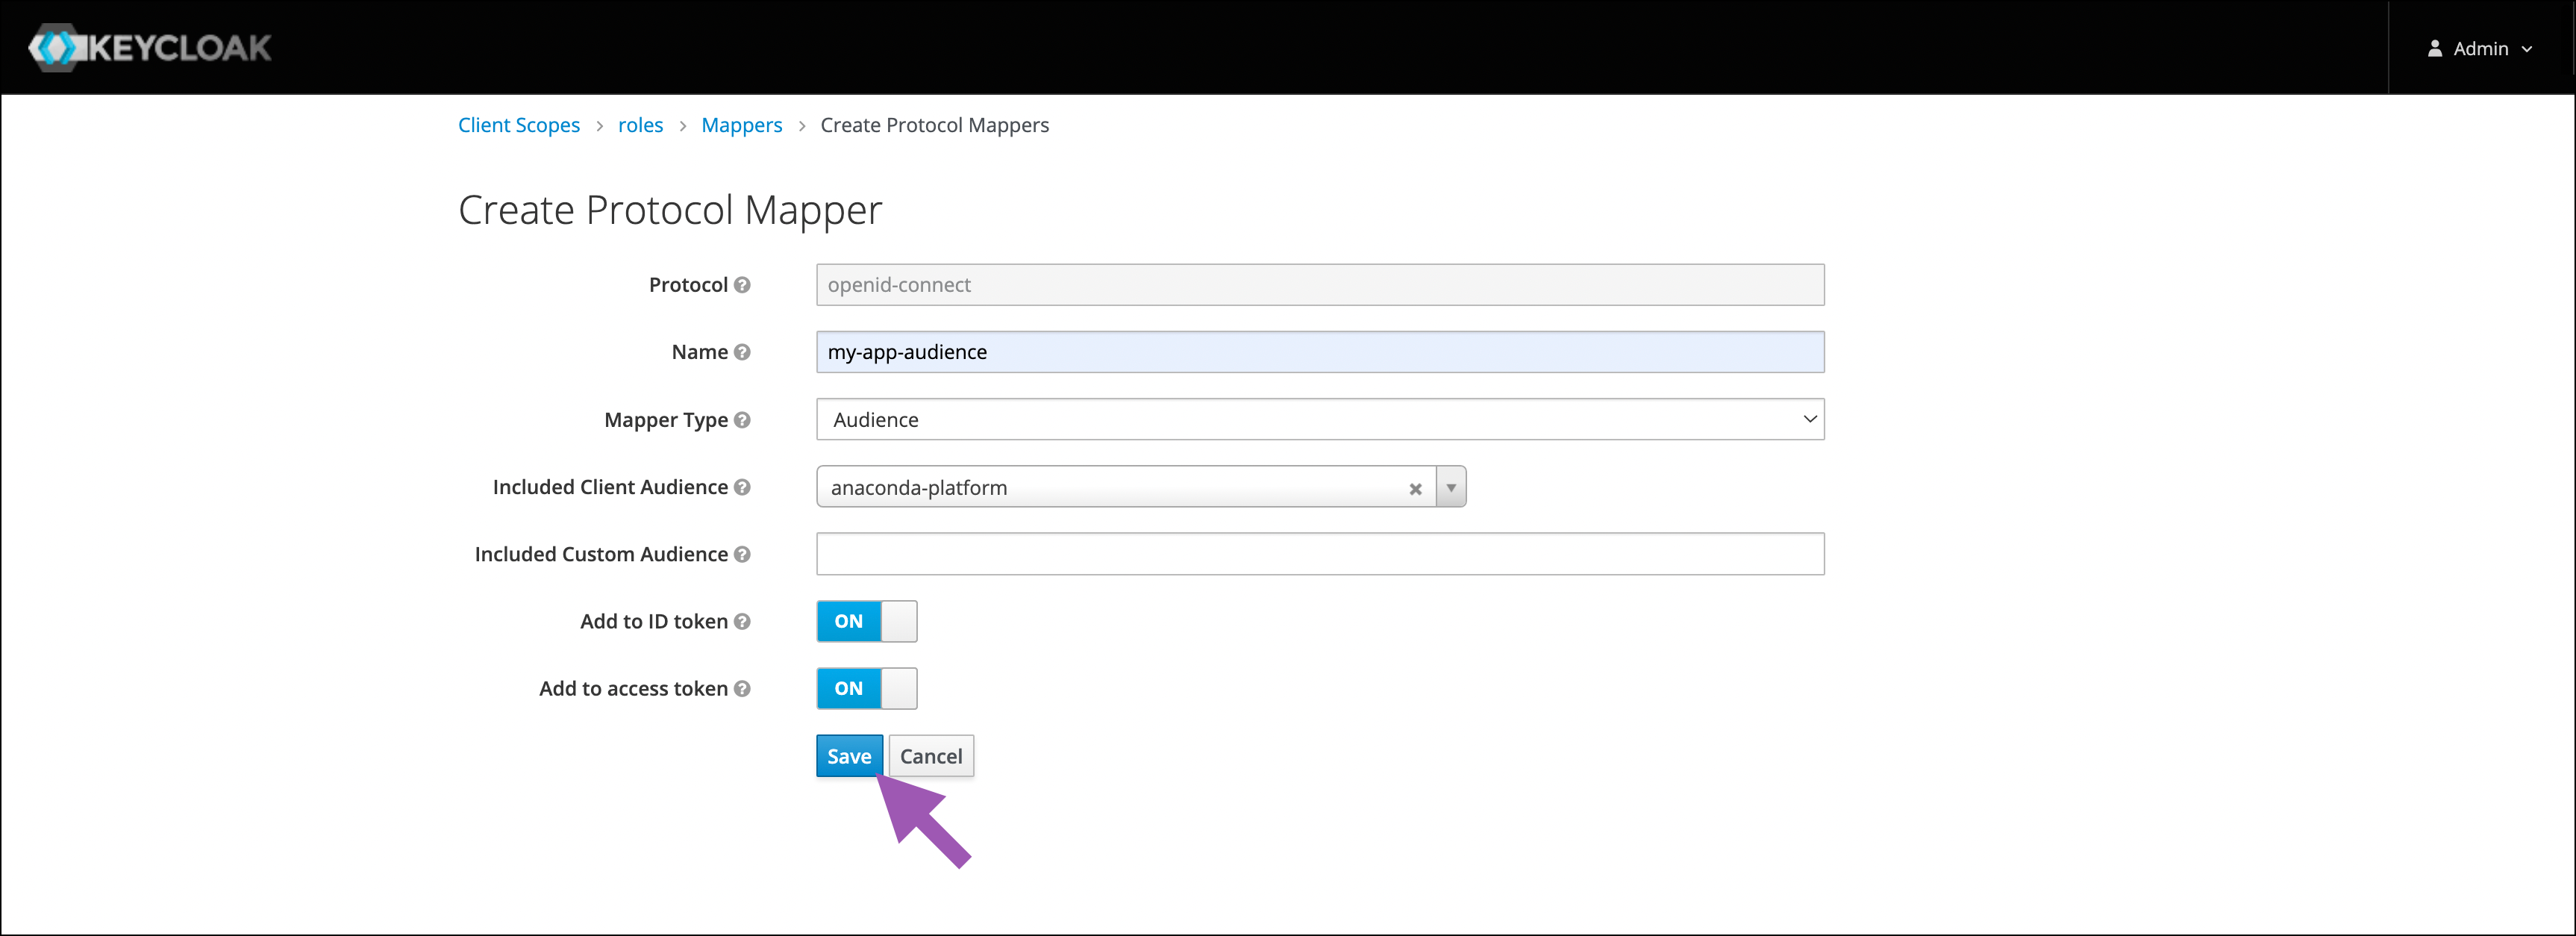 5. Click **Save**.
## Adding the service account
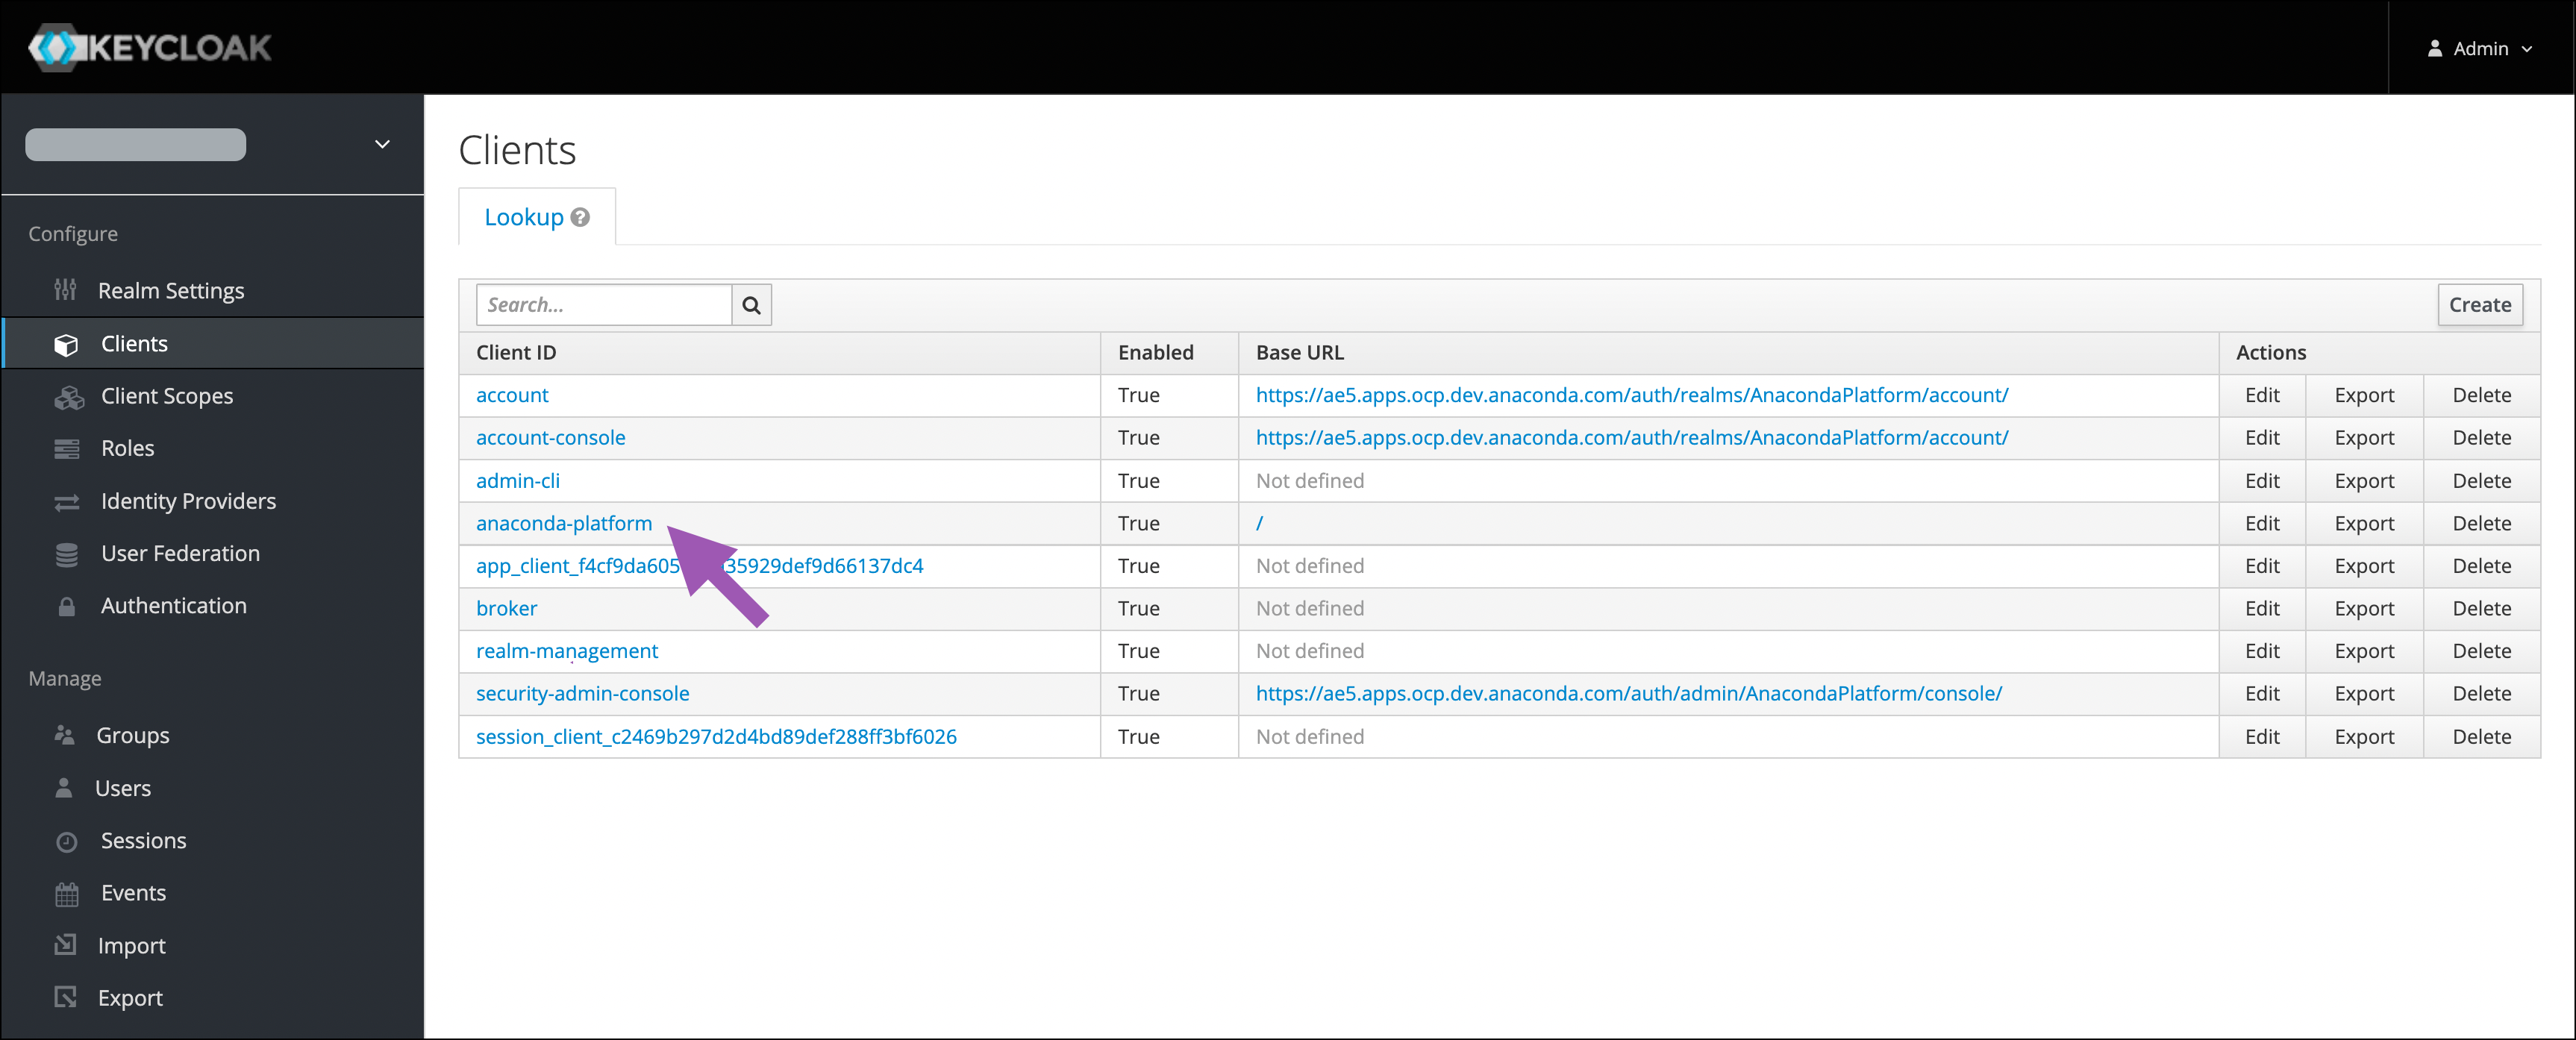
1. Navigate to the **Clients** page from the left-hand navigation menu, then select *anaconda-platform* from the list.
5. Click **Save**.
## Adding the service account
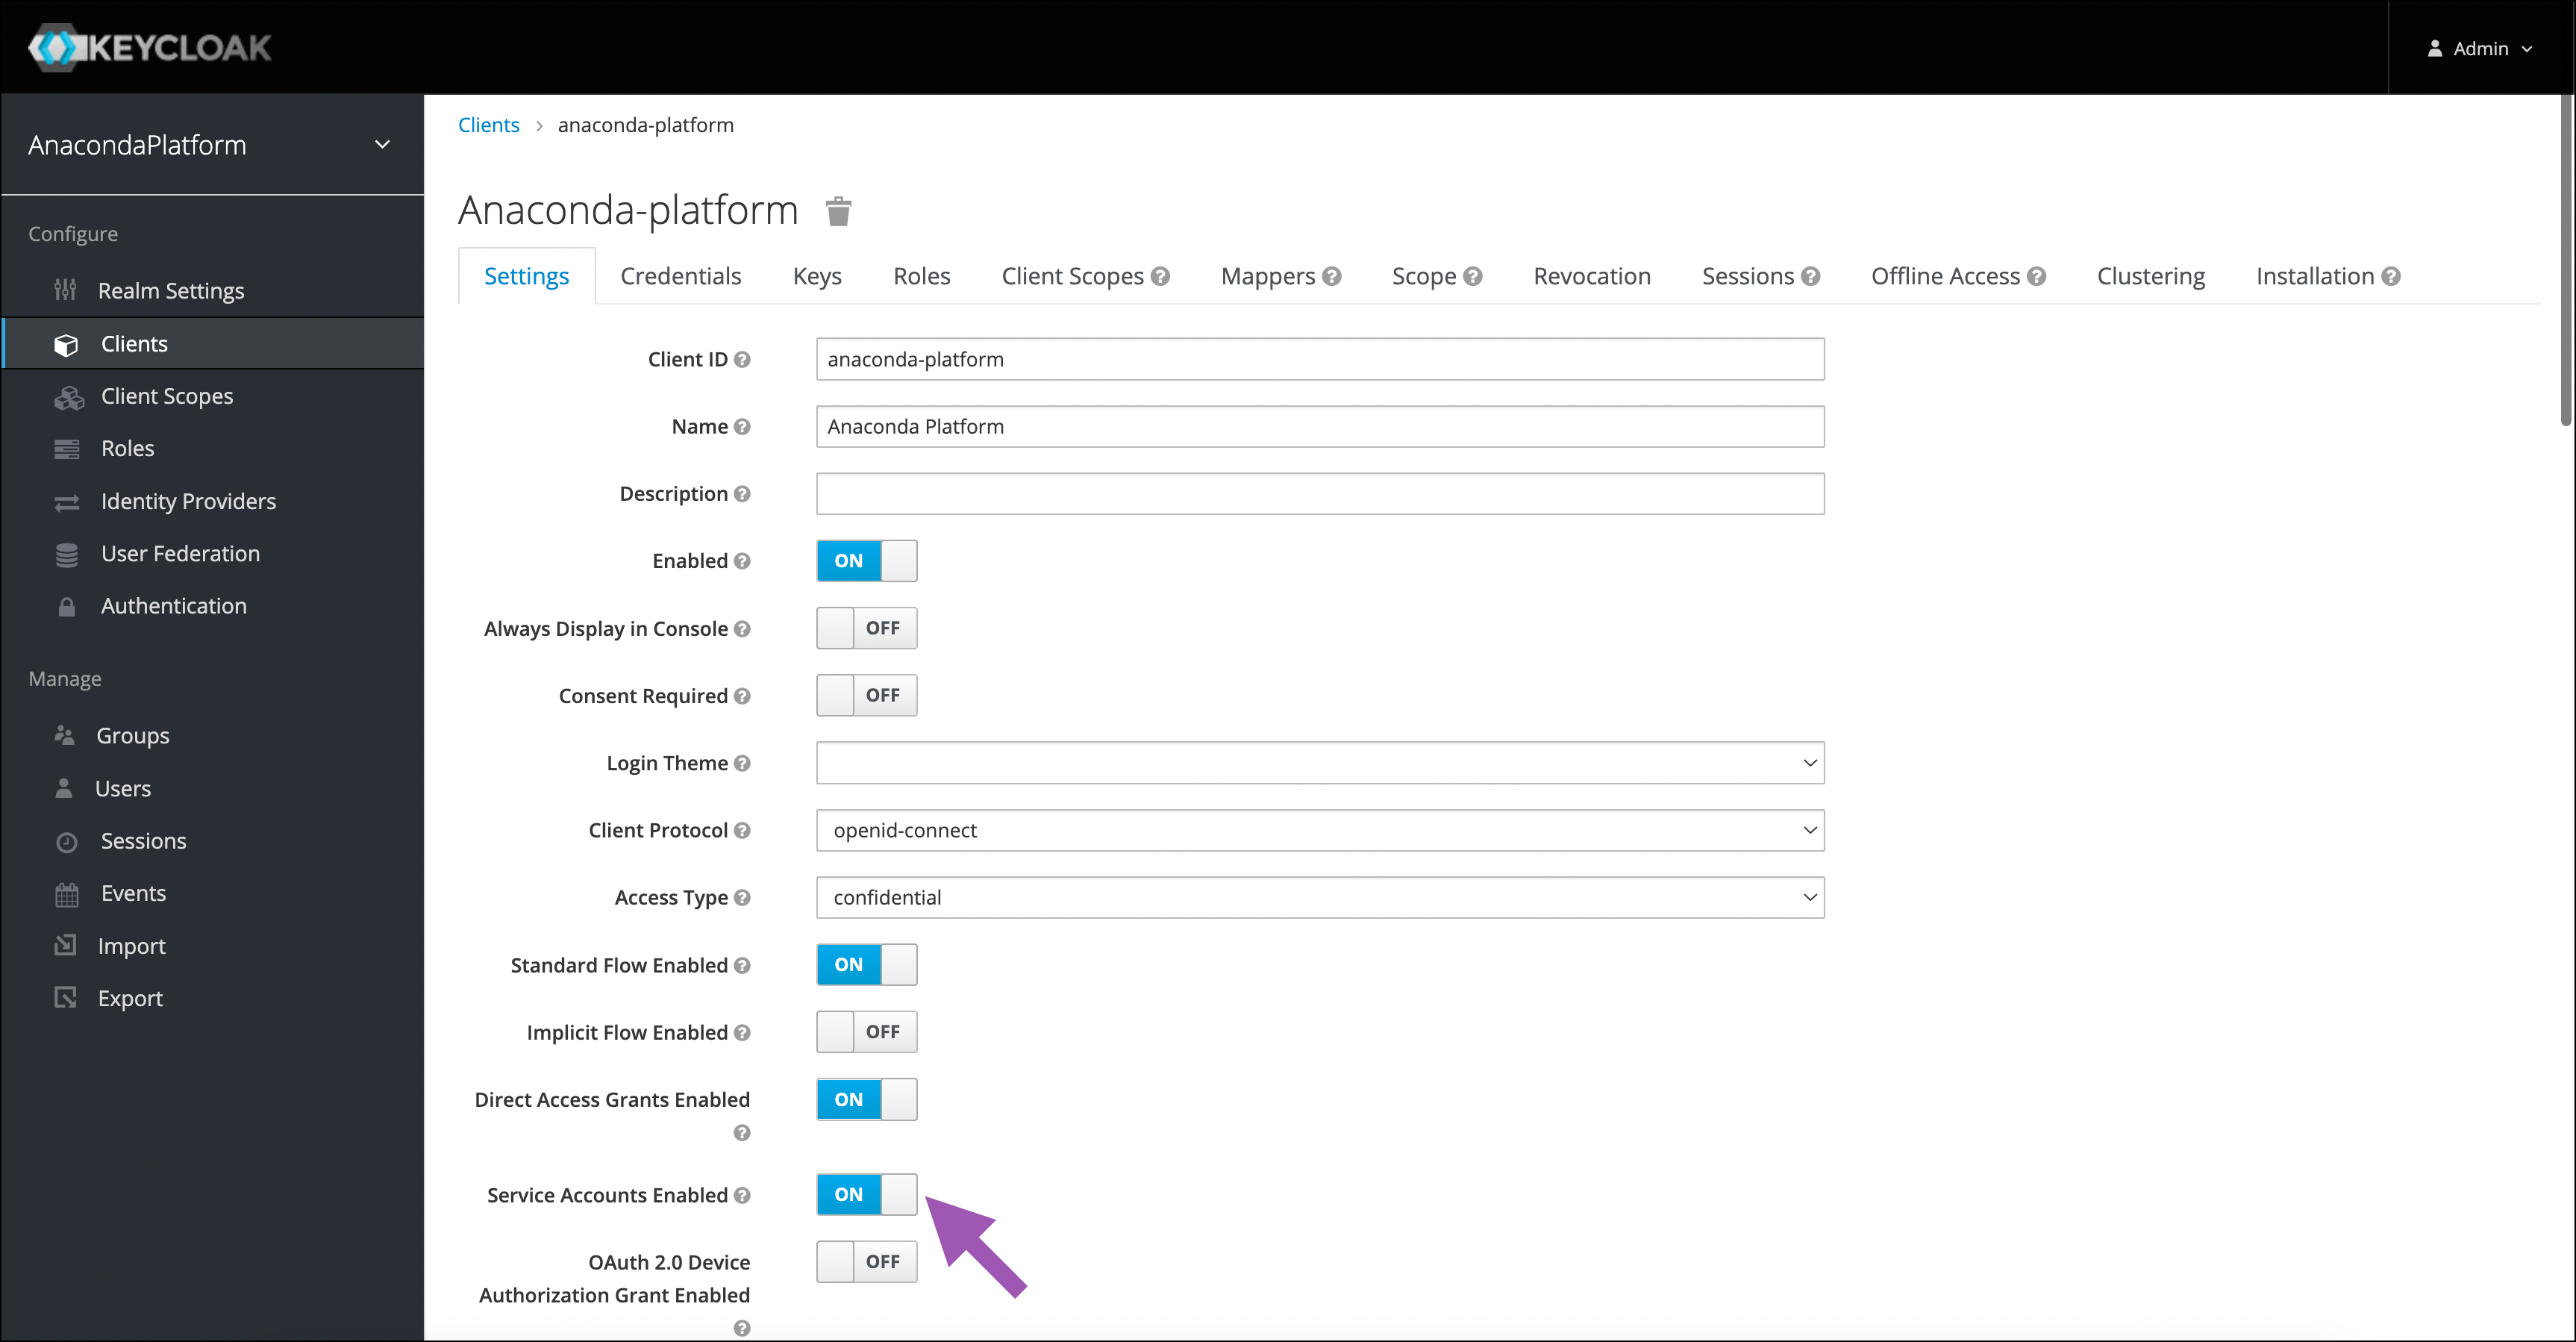
1. Navigate to the **Clients** page from the left-hand navigation menu, then select *anaconda-platform* from the list.
 2. Set the **Service Accounts Enabled** toggle to ON, then click **Save** at the bottom of the page.
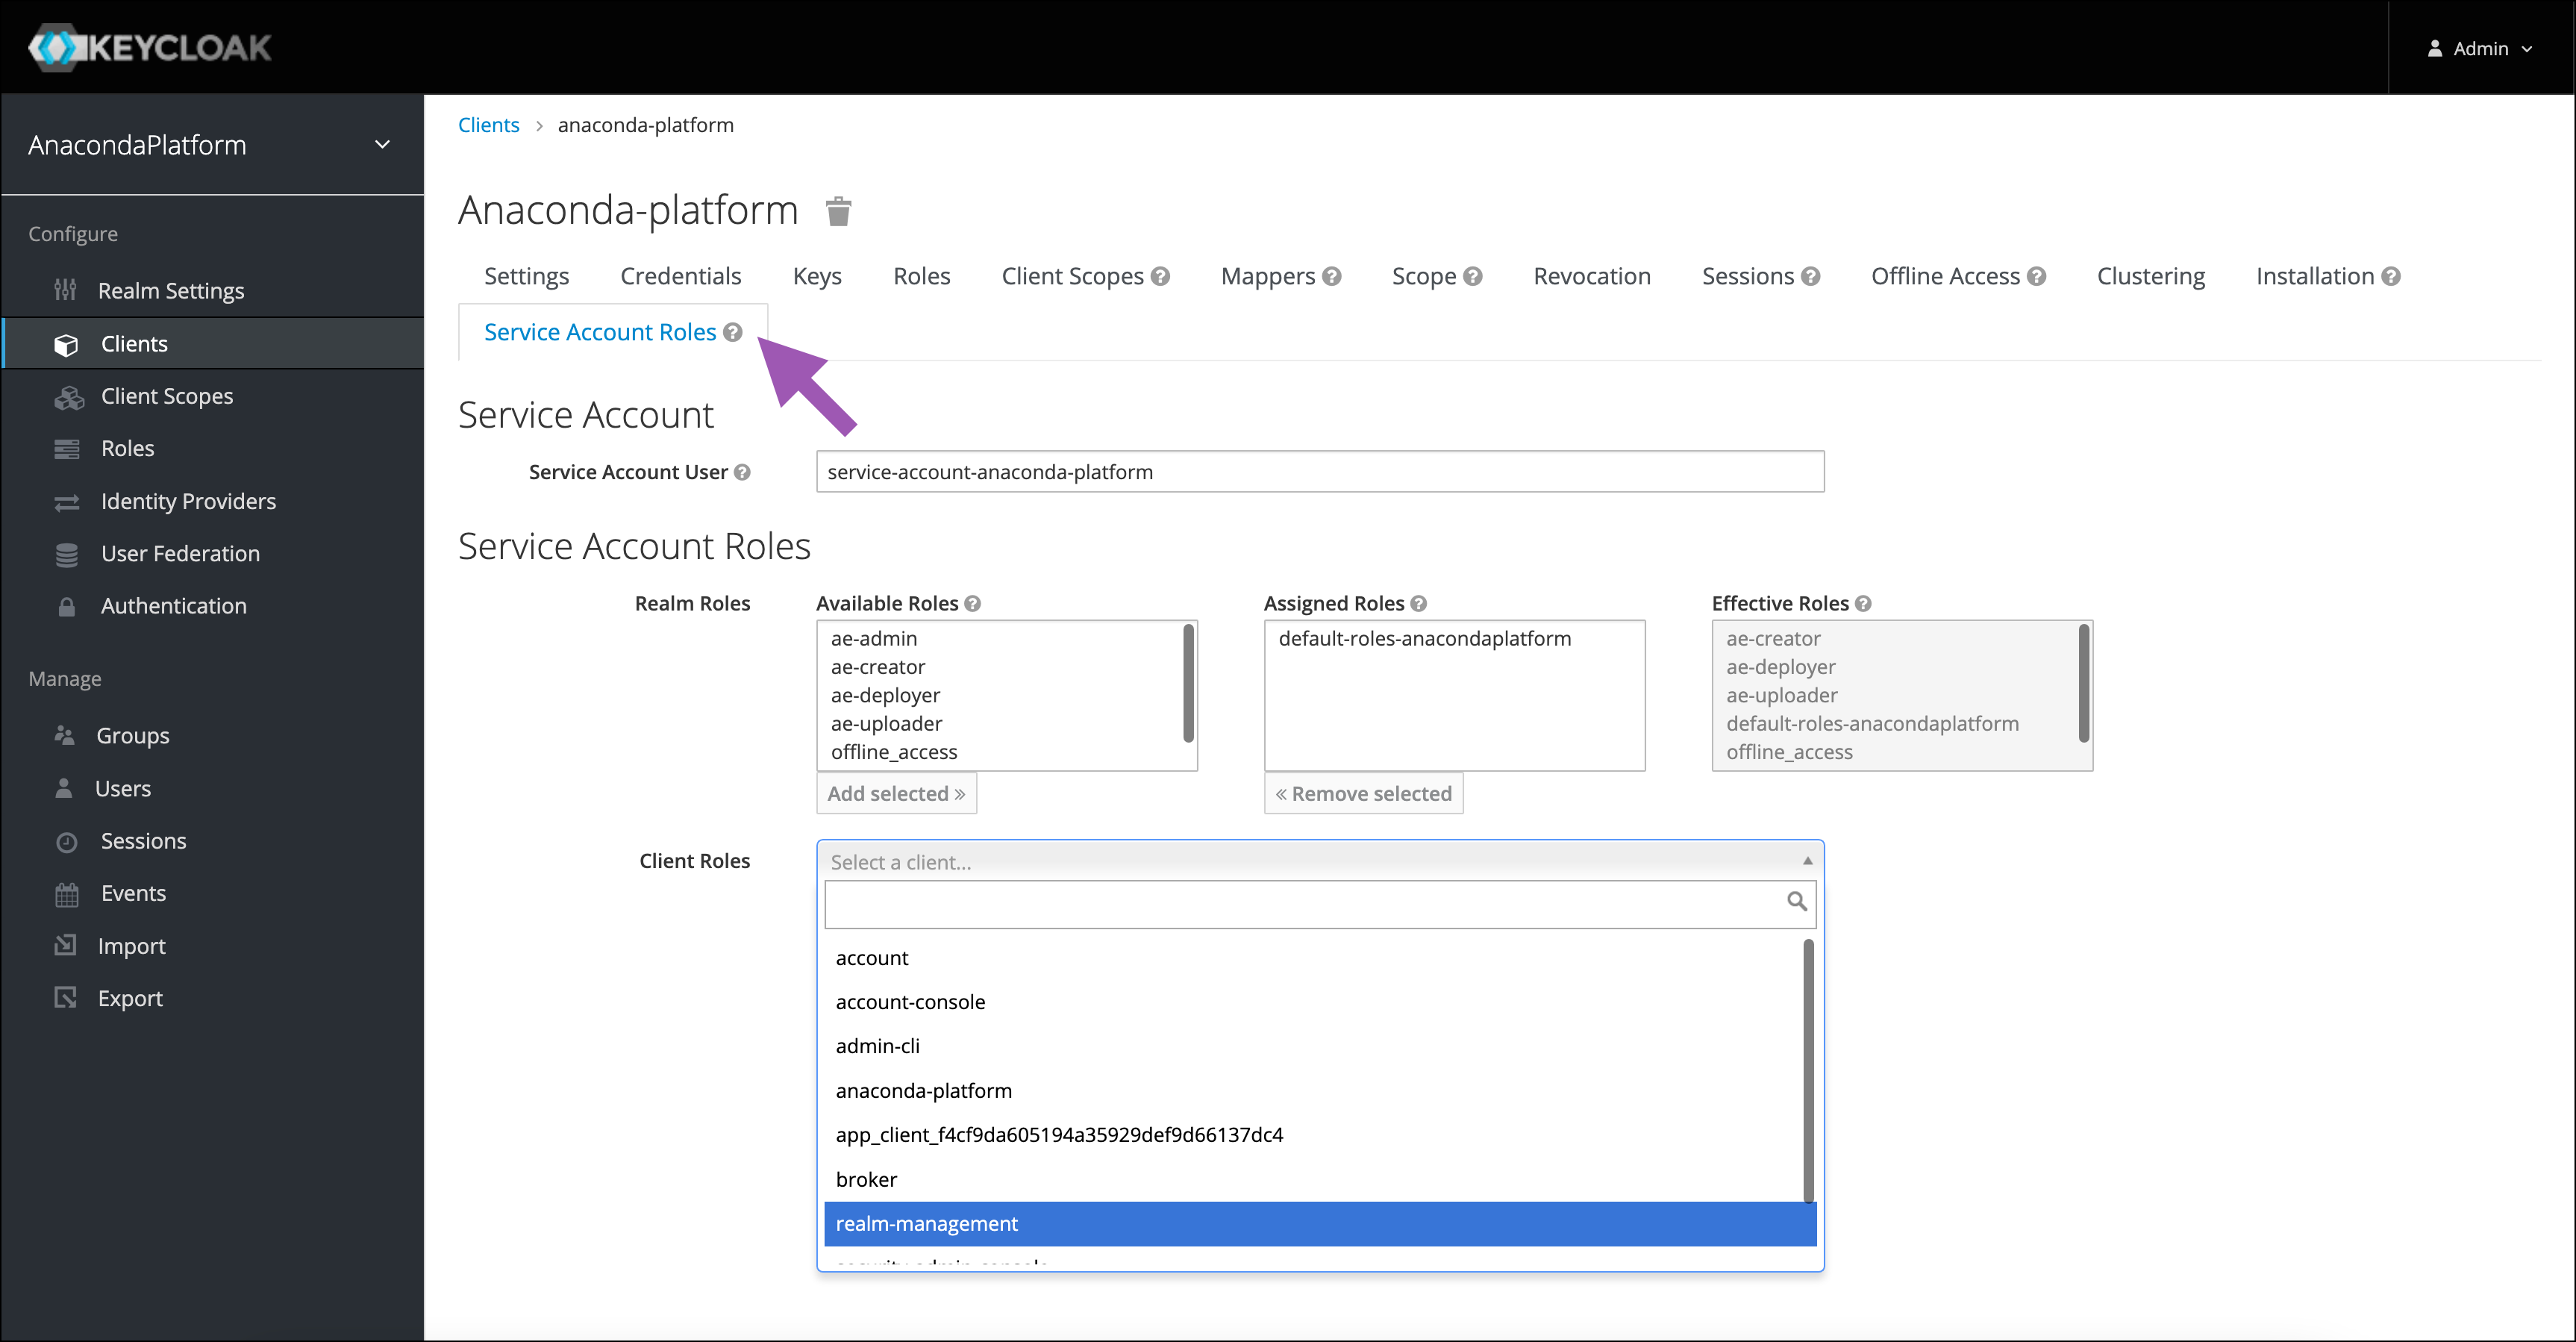
 3. Select the new **Service Account Roles** tab at the top of the page, then open the **Client Roles** dropdown menu and select *realm-management*.
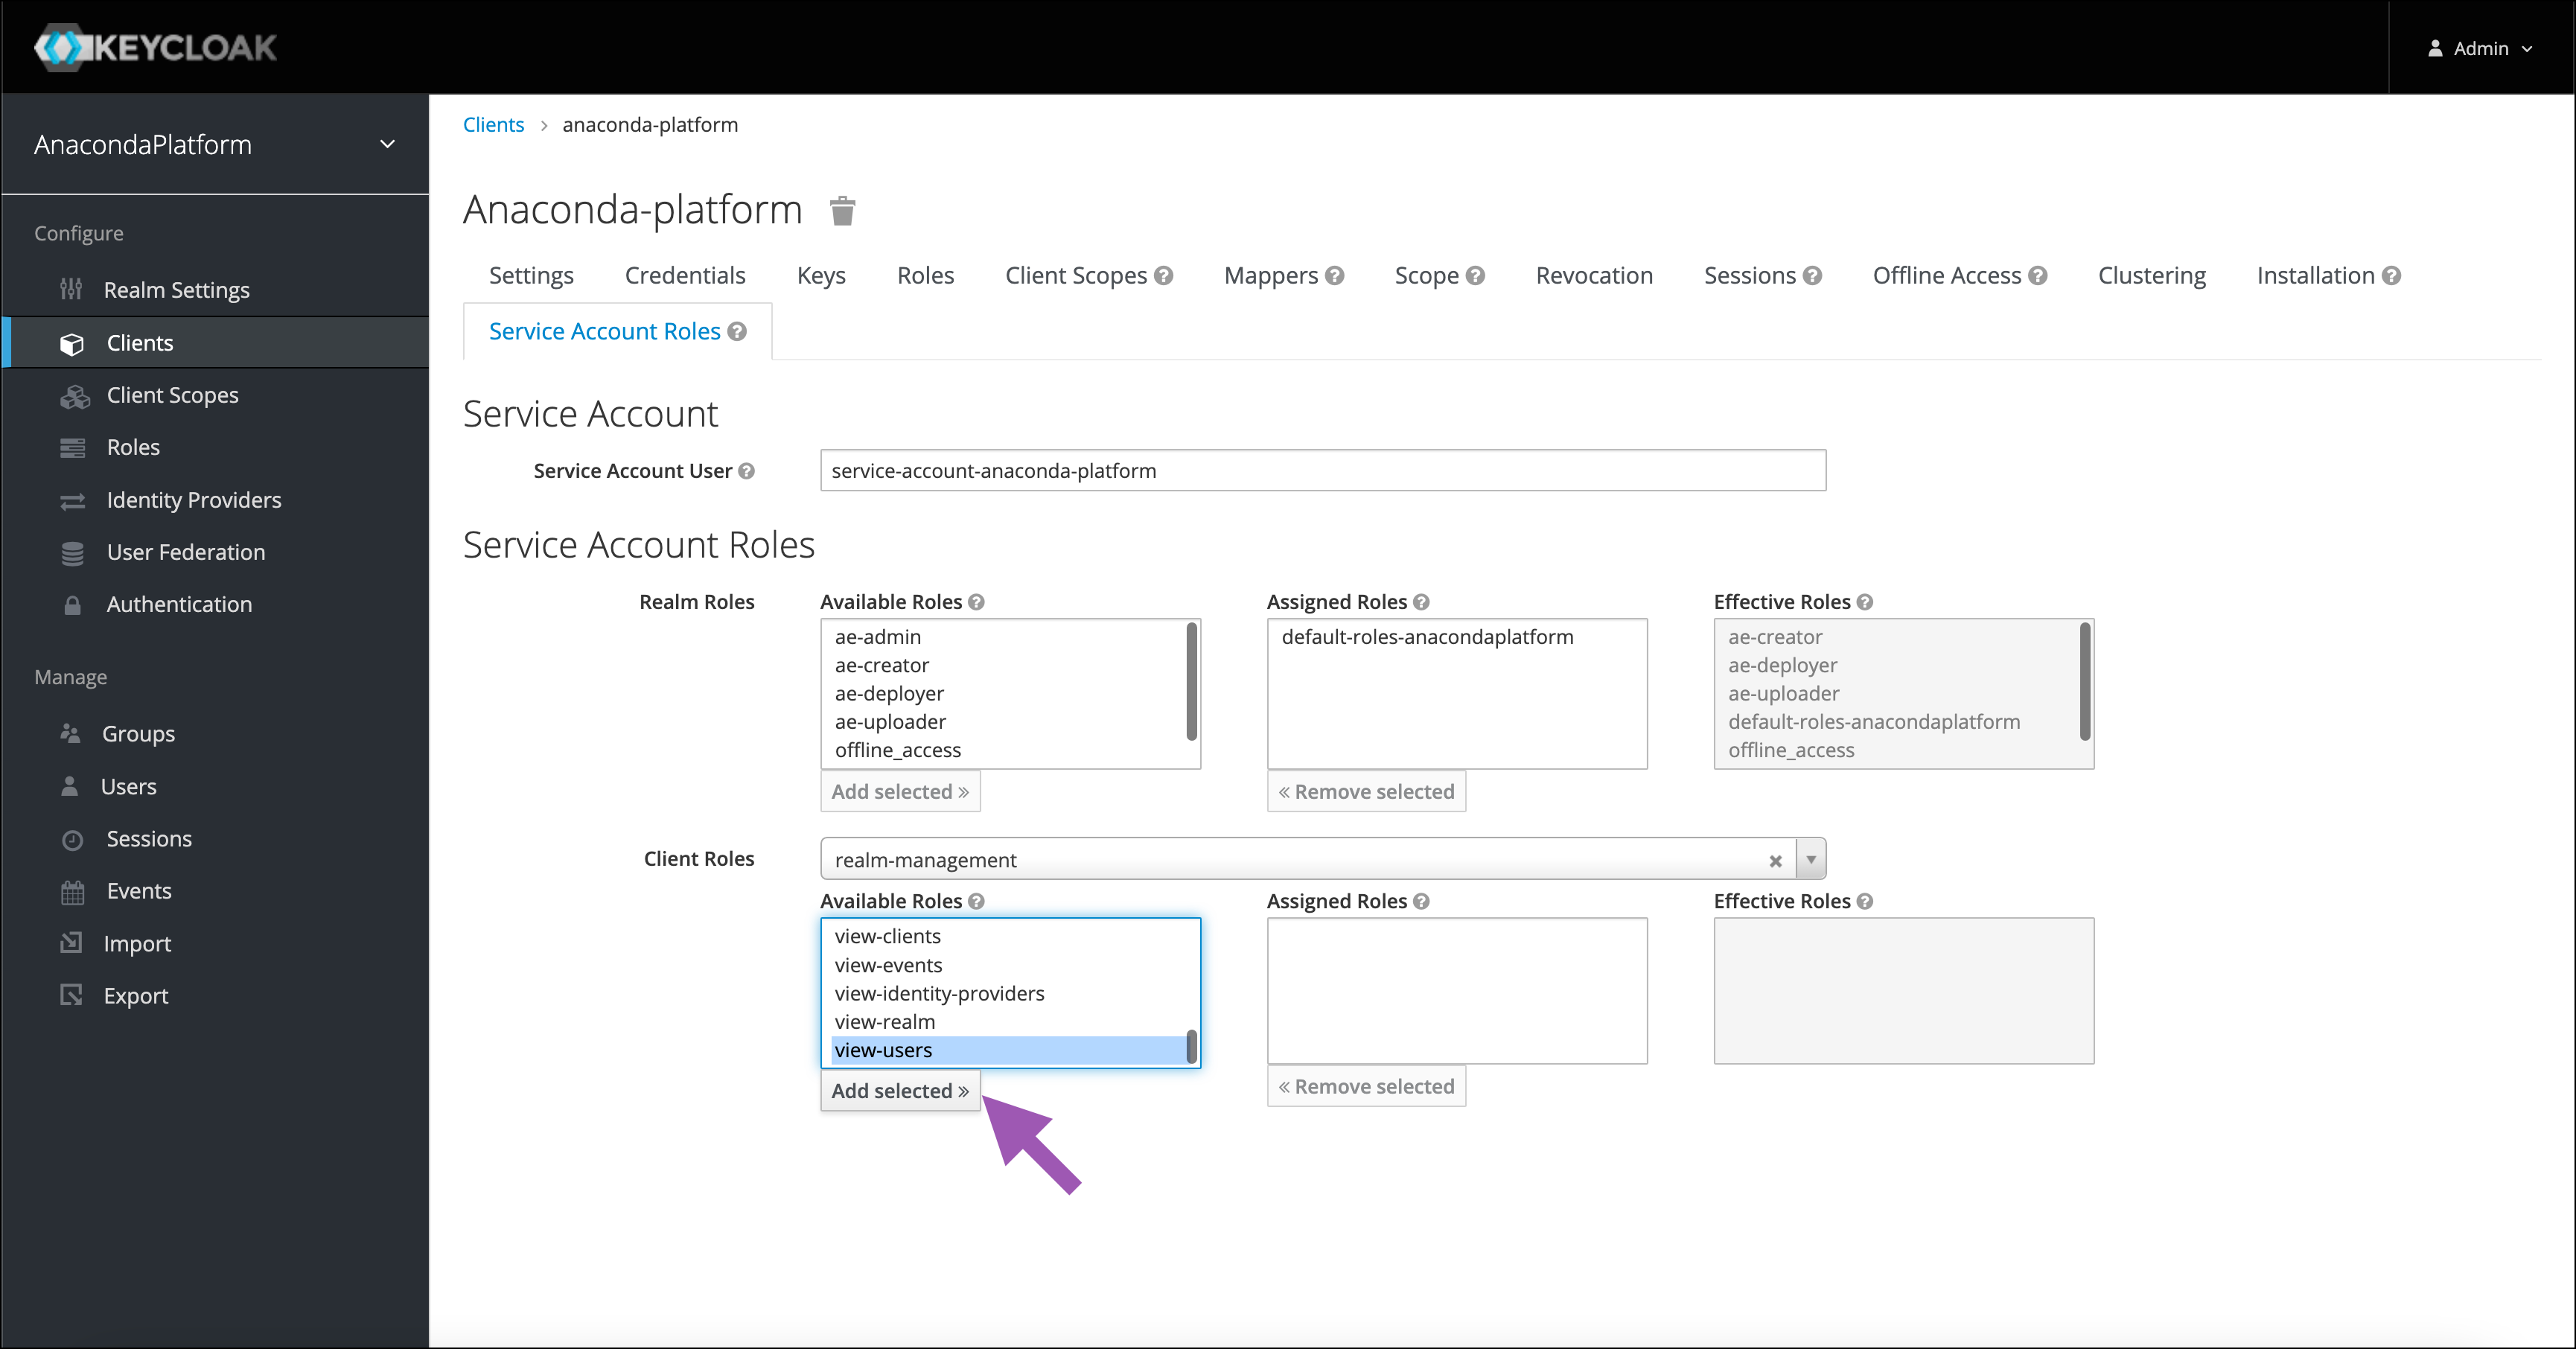
 4. Select *view-users* from the **Available Roles** list and then click **Add Selected >>**.
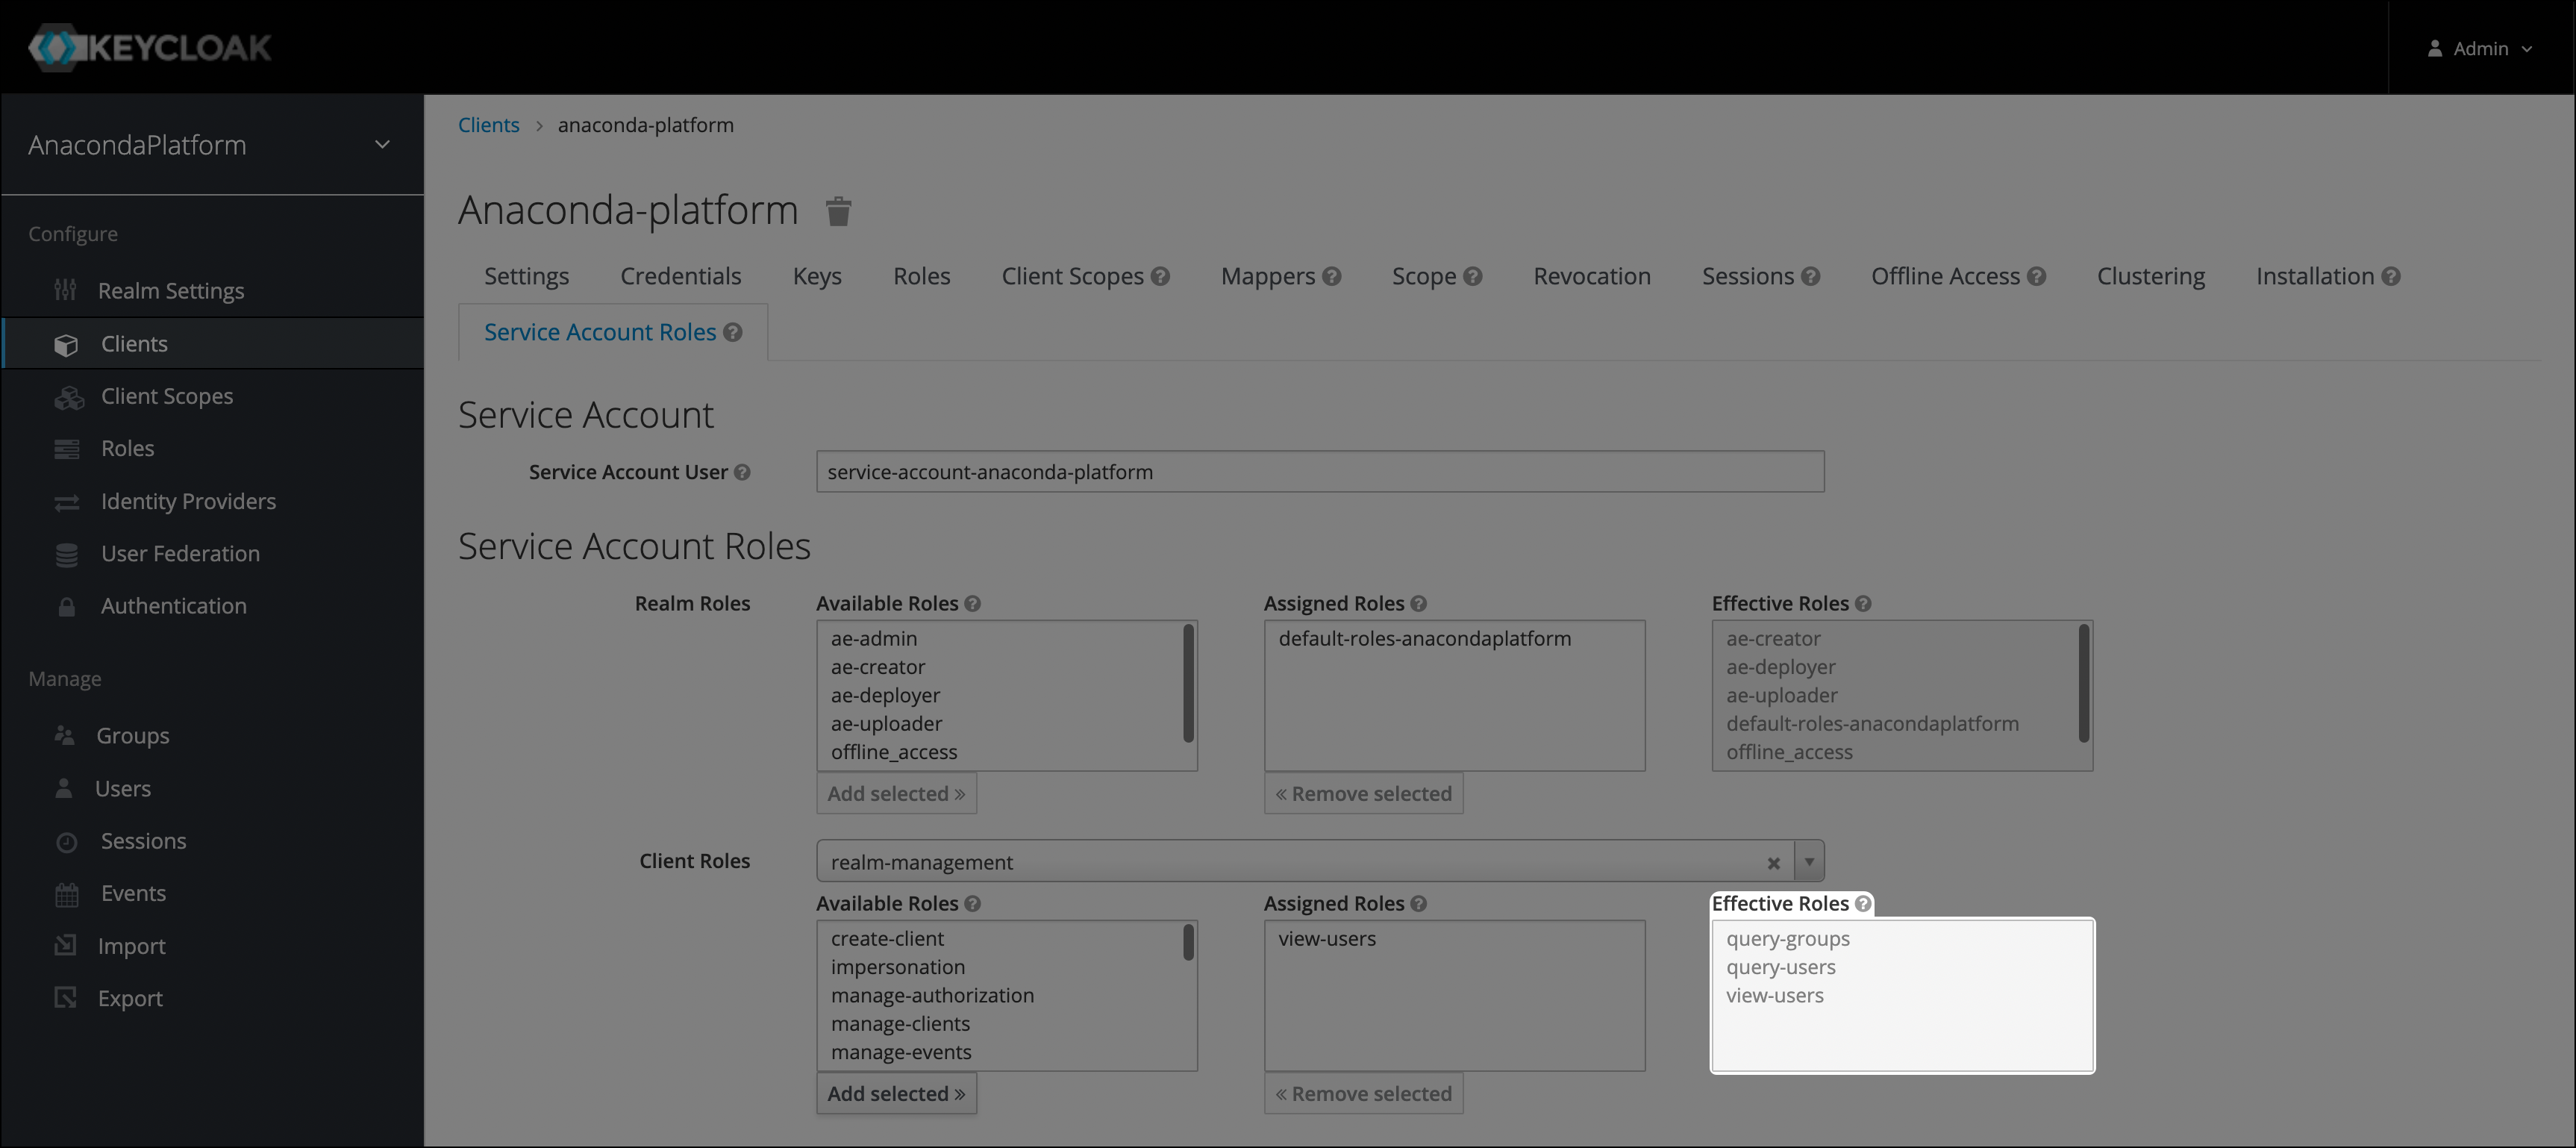
 5. Verify that the *view-users*, *query-users*, and *query-groups* roles appear in the **Effective Roles** list.
 Success! You can now log in to your instance from an existing account and use AE5 normally.