> ## Documentation Index
> Fetch the complete documentation index at: https://anaconda.com/docs/llms.txt
> Use this file to discover all available pages before exploring further.
# Setting resource limits for sessions and deployments
You can separate system-level pods from user-level sessions and deployments as long as you have a multi-node setup (that is, a master node and at least one worker node). Contact support to complete this operation.
Each project editor session and deployment uses compute resources on the Anaconda Enterprise cluster. If Anaconda Enterprise users need to run applications which require more memory or compute power than provided by default, you can customize your installation to include these resources and allow users to access them while working within AE.
After the server resources are installed as nodes in the cluster, you create custom *resource profiles* to configure the number of cores and amount of memory/RAM available to users—so that it corresponds to your specific system configuration and the needs of your users.
For example, if your installation includes nodes with GPUs, add a GPU resource profile so users can use the GPUs to accelerate computation within their projects—essential for machine learning model training. For installation requirements, see [Installation requirements](../../install/reqs).
Resource profiles apply to all nodes, users, editor sessions, and deployments in the cluster. So if your installation includes nodes with GPUs that you want to make available for users to acclerate computation within their projects, you’d create a GPU resource profile. Any resource profiles you configure are listed for users to select from when [configuring a project](../../data-science-workflows/projects/dependencies) and [deploying a project](../../data-science-workflows/deployments/project). Anaconda Enterprise finds the node that matches their request.
**To add a resource profile for a resource you have installed:**
1. Log in to Anaconda Enterprise, select the **Menu** icon in the top right corner and click the **Administrative Console** link displayed at the bottom of the slide out window.
2. Click **Manage Resources**.
3. Log in to the Operations Center using the Administrator credentials [configured after installation](../../install/config).
4. Select **Configuration** from the menu on the left.
5. Use the **Config map** drop-down menu to select the `anaconda-enterprise-anaconda-platform.yml` configuration file.
6. **Make a manual backup copy of this file before editing it**, as any changes you make will impact how Anaconda Enterprise functions.
7. Scroll down to the `resource-profiles` section:
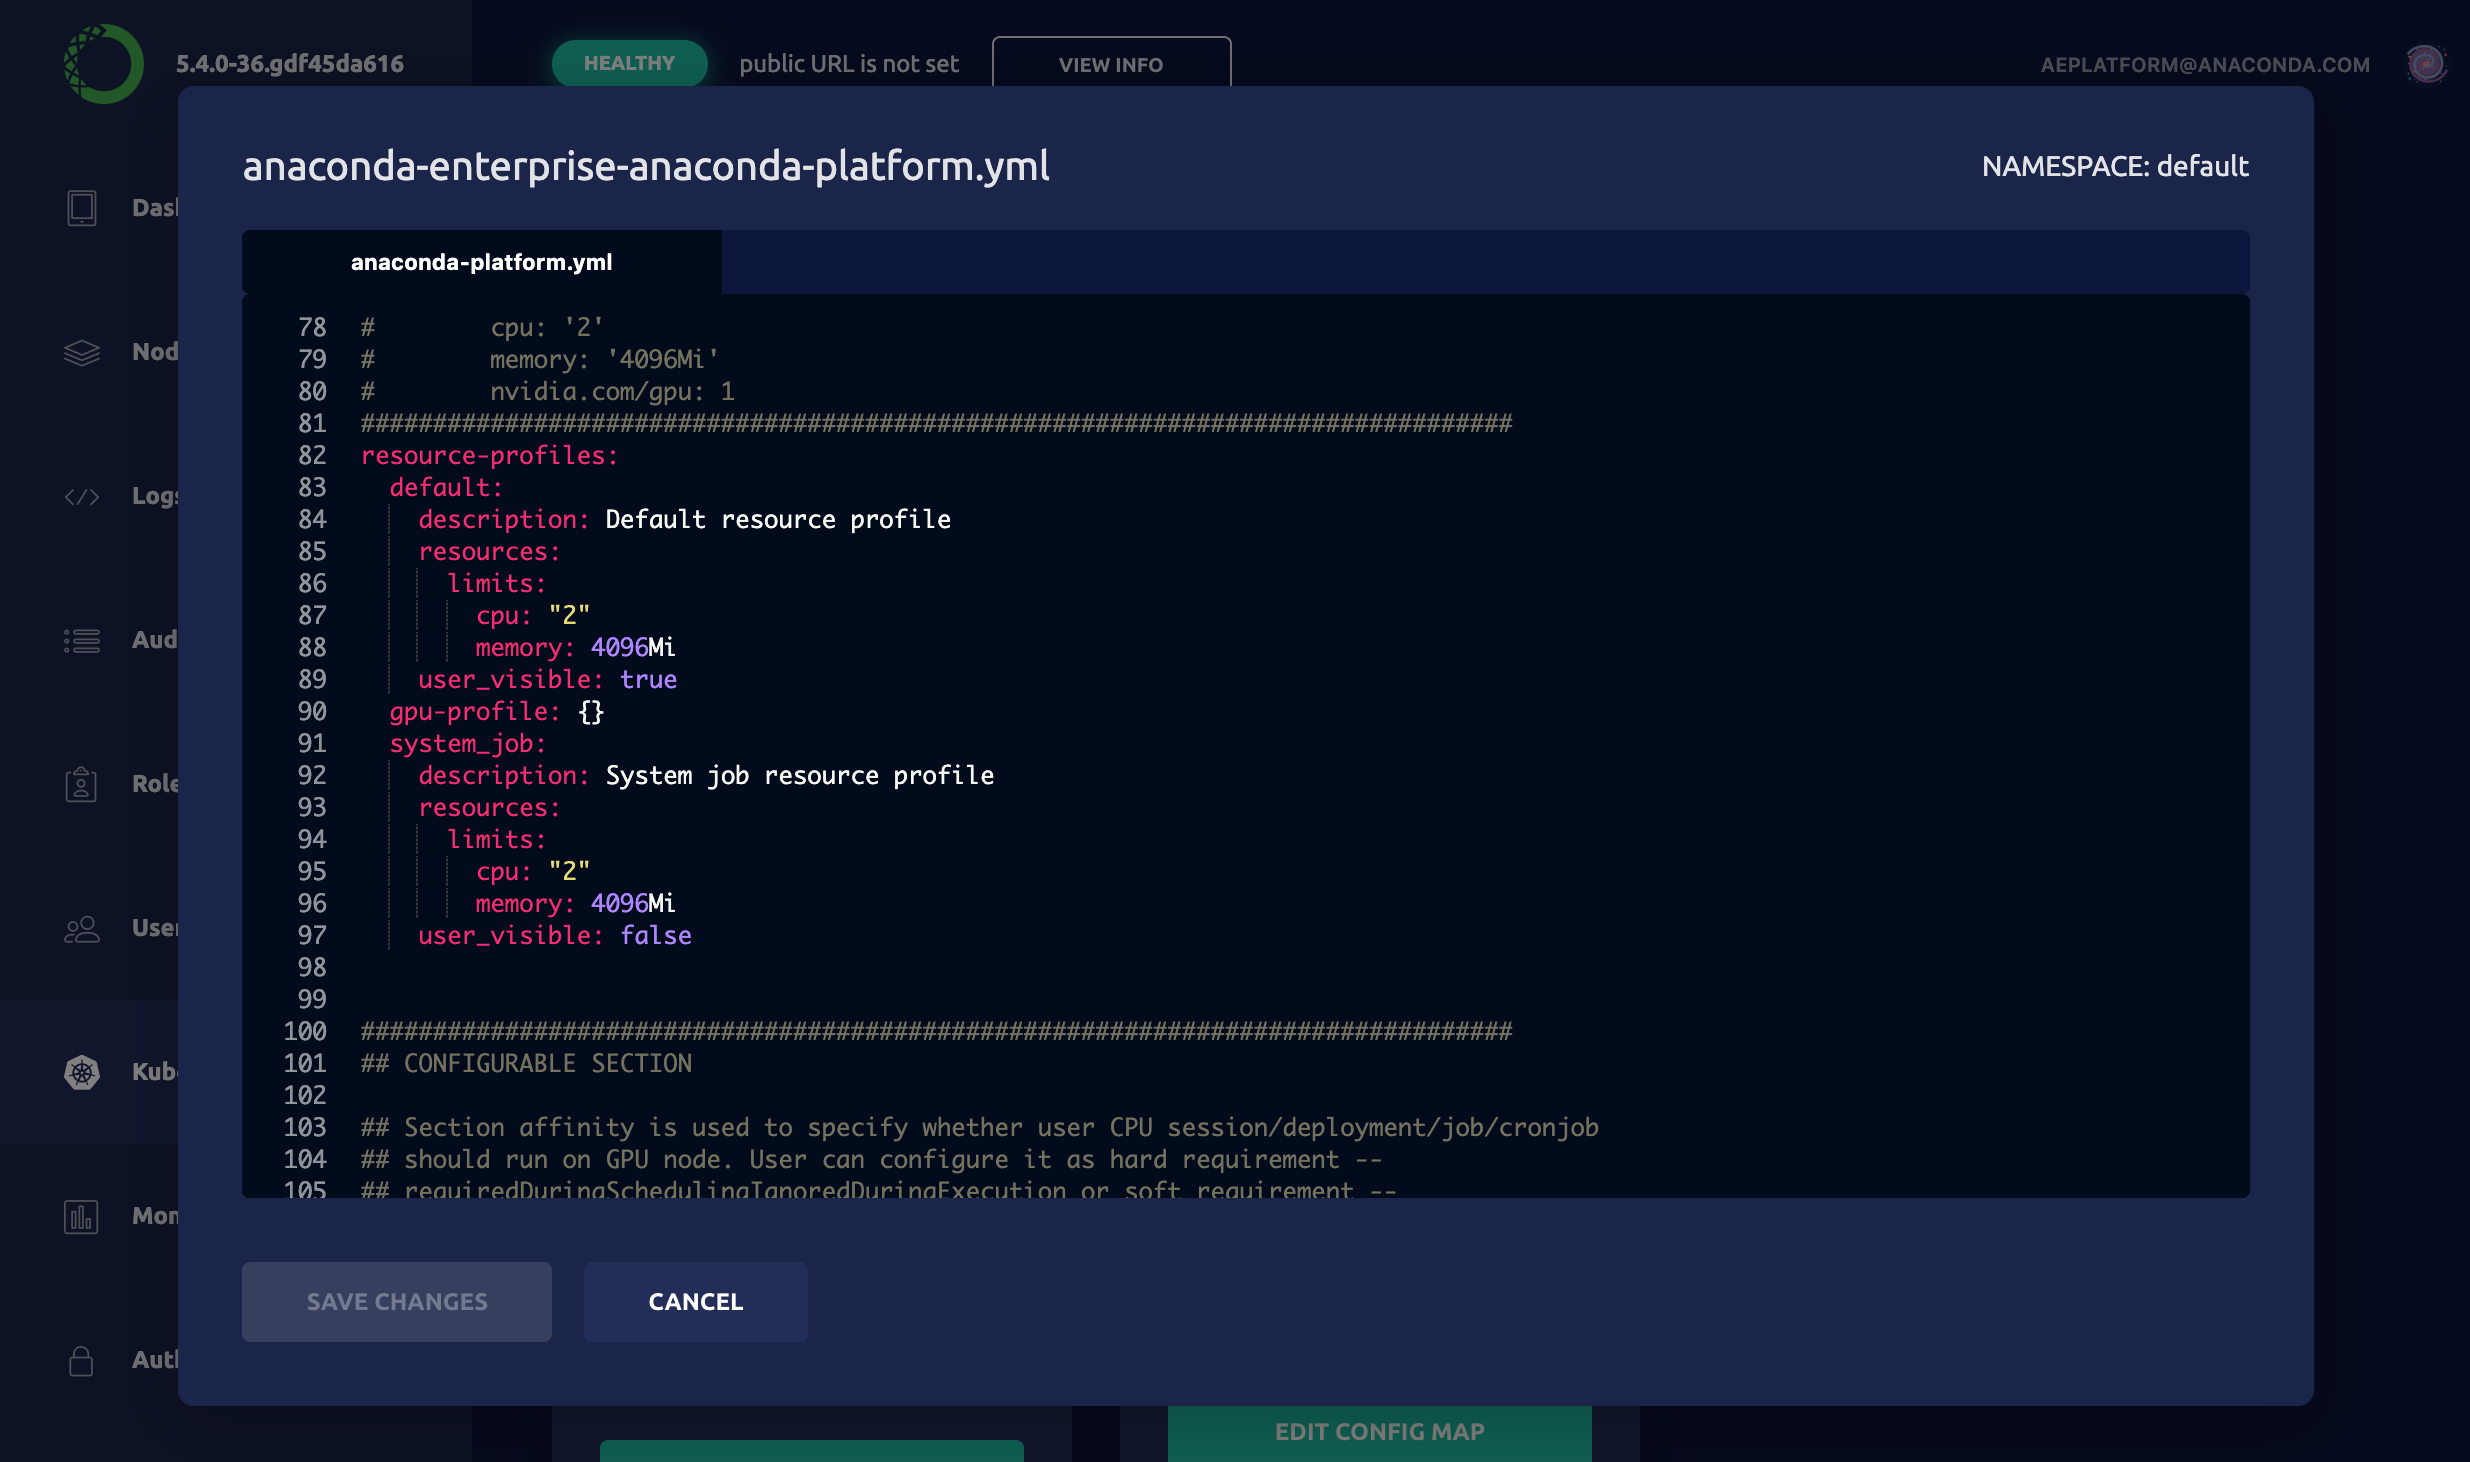 8. Add an additional resource following the format of the default specification. For example, to create a GPU resource profile, add the following to the `resource-profiles` section of the Config map:
```
gpu-profile:
description: 'GPU resource profile'
user_visible: true
resources:
limits:
cpu: '4'
memory: '8Gi'
nvidia.com/gpu: 1
```
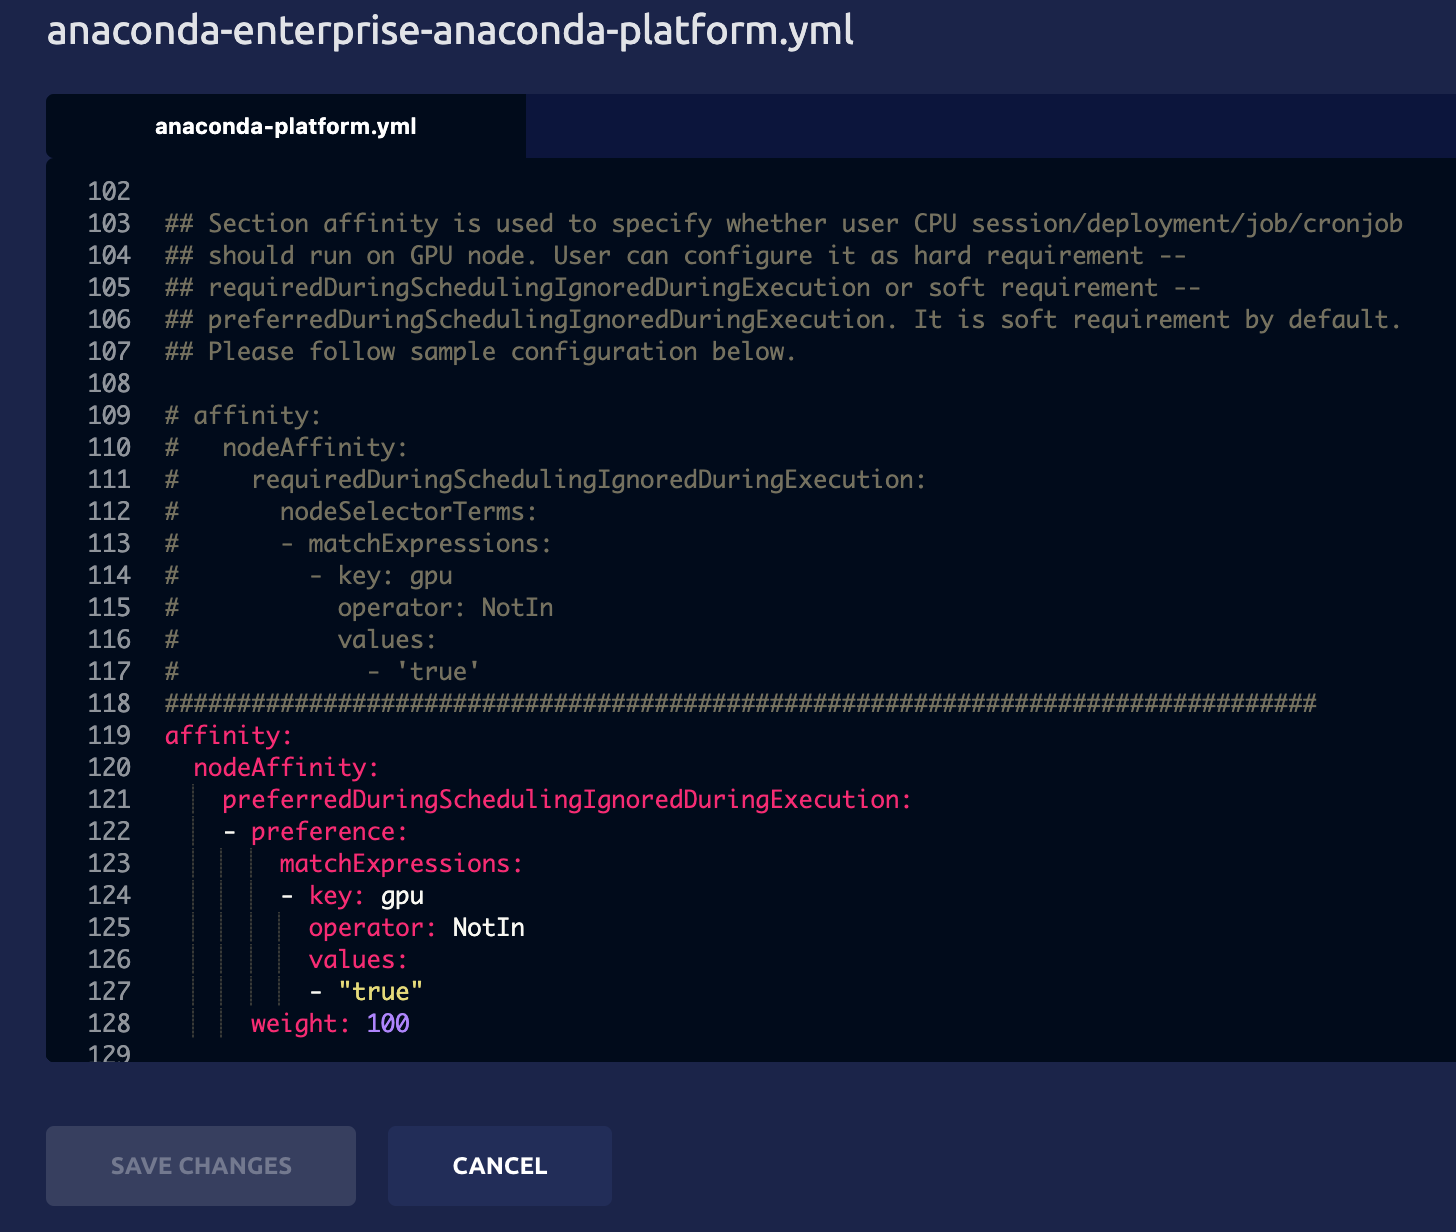
By default, CPU sessions and deployments are also allowed to run on GPU nodes. *To reserve GPU nodes for only those sessions and deployments that require a GPU*—by preventing CPU sessions and deployments from accessing GPU nodes—comment out the following additional specification included after the `gpu-profile` entry:
8. Add an additional resource following the format of the default specification. For example, to create a GPU resource profile, add the following to the `resource-profiles` section of the Config map:
```
gpu-profile:
description: 'GPU resource profile'
user_visible: true
resources:
limits:
cpu: '4'
memory: '8Gi'
nvidia.com/gpu: 1
```
By default, CPU sessions and deployments are also allowed to run on GPU nodes. *To reserve GPU nodes for only those sessions and deployments that require a GPU*—by preventing CPU sessions and deployments from accessing GPU nodes—comment out the following additional specification included after the `gpu-profile` entry:
 Resource profiles are listed in alphabetical order—after any defaults—so if you want them to appear in a particular order in the drop-down list that users see, be sure to name them accordingly.
9. Click **Apply** to save your changes.
**To update the Anaconda Enterprise server with your changes, you’ll need to do the following:**
Restart the workspace and deploy services by running the following command:
```
kubectl delete pods -l 'app in (ap-workspace, ap-deploy)'
```
Then check the project **Settings** and **Deploy** UI to verify that each resource profile you added or edited appears in the **Resource Profile** drop-down menu.
Resource profiles are listed in alphabetical order—after any defaults—so if you want them to appear in a particular order in the drop-down list that users see, be sure to name them accordingly.
9. Click **Apply** to save your changes.
**To update the Anaconda Enterprise server with your changes, you’ll need to do the following:**
Restart the workspace and deploy services by running the following command:
```
kubectl delete pods -l 'app in (ap-workspace, ap-deploy)'
```
Then check the project **Settings** and **Deploy** UI to verify that each resource profile you added or edited appears in the **Resource Profile** drop-down menu.