> ## Documentation Index
> Fetch the complete documentation index at: https://anaconda.com/docs/llms.txt
> Use this file to discover all available pages before exploring further.
# Updating TLS/SSL certificates
You can replace the self-signed certificates generated as part of the [initial post-install configuration](../../install/config) at any time.
Before you begin, follow the processes outlined below. Then you can update the Anaconda Enterprise platform to use your own certificates using [the Anaconda Enterprise Admin Console](../../install/certs#using-the-admin-console) or [the command line](../../install/certs#using-the-command-line).
**Before you begin:**
1. Ask all users to save their work, stop any sessions and deployments, and log out of the platform while you update the certificates.
2. Backup your current Anaconda Enterprise configuration following the [backup process](../../install/migrate/backup-restore).
3. Gather all of the following information and files related to your certificates, so you have it available to copy and paste from in the procedure that follows:
* Registered domain name for the server
* SSL certificate for `servername.domain.tld`, named `tls.crt`
* SSL private key for `servername.domain.tld`, named `tls.key`
* Root SSL certificate (such as [this default Root CA](https://curl.haxx.se/ca/cacert.pem)), named `rootca.crt`. *A root certificate is optional but recommended.*
* Intermediate SSL certificate chain/bundle, named `intermediate.pem` (This certificate may also appear as the second entry in your `fullchain.pem` file.)
* Wildcard domain name
* Wildcard certificate for `*.servername.domain.tld`, named `wildcard.crt`.
* Wildcard private key for `*.servername.domain.tld`, named `wildcard.key`.
4. After you’ve gathered all the information above, follow the steps below that correspond to whether you will use the Admin console or [the command line](../../install/certs#using-the-command-line) to update the Anaconda Enterprise platform to use your certificates.
**To update the platform using the Admin console:**
1. Log in to Anaconda Enterprise, select the **Menu** icon in the top right corner and click the **Administrative Console** link displayed at the bottom of the slide out window.
2. Log in to the console using the Administrator credentials [configured after installation](../../install/config).
3. Select **Web Certificates** from either the top-level menu or the slide out menu.
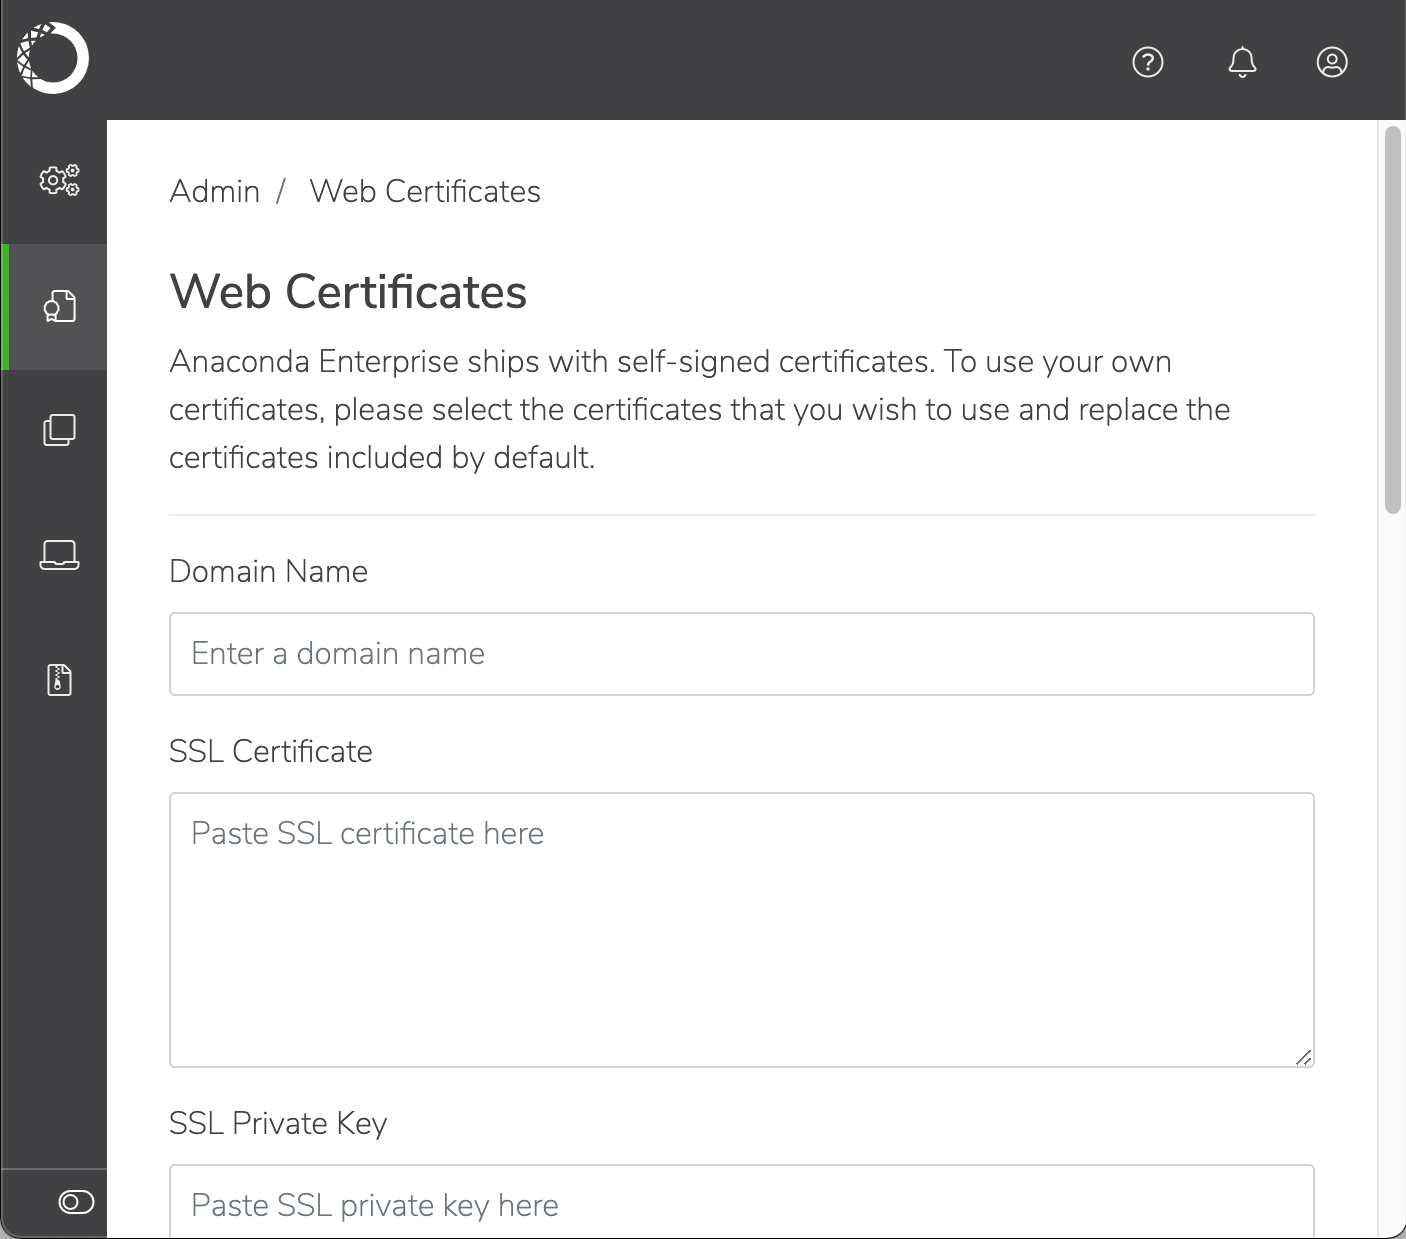 4. Copy and paste the certificate and key information from the files you gathered previously into the appropriate fields.
5. Click **Save** to update the platform with your changes.
The default SSL certificate file names generated by the installer vary slightly between versions. *If you have upgraded from a previous version of Anaconda Enterprise*, you might need to [update your configuration](./settings) to make sure all services are referencing the correct SSL certificate filenames (see below).
| Previous | Updated |
| :------------ | :------------- |
| `rootca.pem` | `rootca.crt` |
| `cert.pem` | `tls.crt` |
| `privkey.pem` | `tls.key` |
| `tls.crt` | `wildcard.crt` |
| `tls.key` | `wildcard.key` |
The `keystore.jks` filename remains unchanged.
**To update the platform using the command line:**
*On the system where the certificate and private key reside:*
1. Install `openjdk`. For example, use the following command to install `java-1.8.0-openjdk` on CentOS 7.5:
```
yum install java-1.8.0-openjdk -y
```
2. Run the following command to create the `keystore.jks` file that will be used by Java:
```
openssl pkcs12 -passout pass:anaconda -export -in CERT.PEM -inkey KEY.PEM -out certificate.p12 -name auth
keytool -importkeystore -deststorepass anaconda -destkeypass anaconda -destkeystore keystore.jks -srckeystore certificate.p12 -srcstoretype PKCS12 -srcstorepass anaconda -alias auth
```
If you’re using a certificate provided by Let’s Encrypt, use `FULLCHAIN.PEM` instead of `CERT.PEM`.
3. Create an updated Root CA to use with the system:
```
cat ROOT.CA /etc/ssl/certs/ca-bundle.trust.crt > updated-trust-ca.crt
```
If you’re using a certificate provided by Let’s Encrypt your can obtain the Root CA [here](https://letsencrypt.org/certs/isrgrootx1.pem.txt).
You must also prepend the `CHAIN.PEM` to the Root CA.
For RHEL-based systems, the path to the trusted CA is: `/etc/ssl/certs/ca-bundle.trust.crt`.
For Ubuntu-based systems, the path the system CA is `/etc/ssl/certs/ca-certificates.crt`.
4. Setup the basic structure of the `certificates.yaml` file, that you’ll be updating in the next several steps:
```
cat > certificates.yaml <> certificates.yaml
base64 -i --wrap=0 CERT.PEM >> certificates.yaml
```
6. Add the private key for the certificate:
```
printf "\n tls.key: " >> certificates.yaml
base64 -i --wrap=0 KEY.PEM >> certificates.yaml
```
7. Add the SAN certificate to the file. For example `*.test.anaconda.com`:
```
printf "\n wildcard.crt: " >> certificates.yaml
base64 -i --wrap=0 CERT.PEM >> certificates.yaml
```
8. Add the private key for the SAN certificate:
```
printf "\n wildcard.key: " >> certificates.yaml
base64 -i --wrap=0 KEY.PEM >> certificates.yaml
```
9. Add the keystore you generated in Step 2:
```
printf "\n keystore.jks: " >> certificates.yaml
base64 -i --wrap=0 keystore.jks >> certificates.yaml
```
10. Add the updated Root CA that you created in Step 3:
```
printf "\n rootca.crt: " >> certificates.yaml
base64 -i --wrap=0 updated-trust-ca.crt >> certificates.yaml
```
11. Add a new line at the end of the file:
```
printf '\n' >> certificates.yaml
```
12. Copy the file to the share directory inside gravity:
```
cp certificates.yaml /var/lib/gravity/planet/share
```
13. Run the following commands to enter gravity and list your secrets:
```
gravity enter
kubectl get secrets
```
14. In the next step you’ll be removing and recreating a secret, so create a backup of the existing secrets first:
```
kubectl get secret anaconda-enterprise-certs -o yaml --export > anaconda_certs.backup
```
15. Remove the existing secret, and recreate it from the file you placed in the share directory (in Step 12):
```
kubectl delete secret anaconda-enterprise-certs
kubectl create -f /ext/share/certificates.yaml
```
16. Restart all pods to update Anaconda Enterprise to use your certificate:
```
kubectl get pods | cut -d' ' -f1 | xargs kubectl delete pods
```
4. Copy and paste the certificate and key information from the files you gathered previously into the appropriate fields.
5. Click **Save** to update the platform with your changes.
The default SSL certificate file names generated by the installer vary slightly between versions. *If you have upgraded from a previous version of Anaconda Enterprise*, you might need to [update your configuration](./settings) to make sure all services are referencing the correct SSL certificate filenames (see below).
| Previous | Updated |
| :------------ | :------------- |
| `rootca.pem` | `rootca.crt` |
| `cert.pem` | `tls.crt` |
| `privkey.pem` | `tls.key` |
| `tls.crt` | `wildcard.crt` |
| `tls.key` | `wildcard.key` |
The `keystore.jks` filename remains unchanged.
**To update the platform using the command line:**
*On the system where the certificate and private key reside:*
1. Install `openjdk`. For example, use the following command to install `java-1.8.0-openjdk` on CentOS 7.5:
```
yum install java-1.8.0-openjdk -y
```
2. Run the following command to create the `keystore.jks` file that will be used by Java:
```
openssl pkcs12 -passout pass:anaconda -export -in CERT.PEM -inkey KEY.PEM -out certificate.p12 -name auth
keytool -importkeystore -deststorepass anaconda -destkeypass anaconda -destkeystore keystore.jks -srckeystore certificate.p12 -srcstoretype PKCS12 -srcstorepass anaconda -alias auth
```
If you’re using a certificate provided by Let’s Encrypt, use `FULLCHAIN.PEM` instead of `CERT.PEM`.
3. Create an updated Root CA to use with the system:
```
cat ROOT.CA /etc/ssl/certs/ca-bundle.trust.crt > updated-trust-ca.crt
```
If you’re using a certificate provided by Let’s Encrypt your can obtain the Root CA [here](https://letsencrypt.org/certs/isrgrootx1.pem.txt).
You must also prepend the `CHAIN.PEM` to the Root CA.
For RHEL-based systems, the path to the trusted CA is: `/etc/ssl/certs/ca-bundle.trust.crt`.
For Ubuntu-based systems, the path the system CA is `/etc/ssl/certs/ca-certificates.crt`.
4. Setup the basic structure of the `certificates.yaml` file, that you’ll be updating in the next several steps:
```
cat > certificates.yaml <> certificates.yaml
base64 -i --wrap=0 CERT.PEM >> certificates.yaml
```
6. Add the private key for the certificate:
```
printf "\n tls.key: " >> certificates.yaml
base64 -i --wrap=0 KEY.PEM >> certificates.yaml
```
7. Add the SAN certificate to the file. For example `*.test.anaconda.com`:
```
printf "\n wildcard.crt: " >> certificates.yaml
base64 -i --wrap=0 CERT.PEM >> certificates.yaml
```
8. Add the private key for the SAN certificate:
```
printf "\n wildcard.key: " >> certificates.yaml
base64 -i --wrap=0 KEY.PEM >> certificates.yaml
```
9. Add the keystore you generated in Step 2:
```
printf "\n keystore.jks: " >> certificates.yaml
base64 -i --wrap=0 keystore.jks >> certificates.yaml
```
10. Add the updated Root CA that you created in Step 3:
```
printf "\n rootca.crt: " >> certificates.yaml
base64 -i --wrap=0 updated-trust-ca.crt >> certificates.yaml
```
11. Add a new line at the end of the file:
```
printf '\n' >> certificates.yaml
```
12. Copy the file to the share directory inside gravity:
```
cp certificates.yaml /var/lib/gravity/planet/share
```
13. Run the following commands to enter gravity and list your secrets:
```
gravity enter
kubectl get secrets
```
14. In the next step you’ll be removing and recreating a secret, so create a backup of the existing secrets first:
```
kubectl get secret anaconda-enterprise-certs -o yaml --export > anaconda_certs.backup
```
15. Remove the existing secret, and recreate it from the file you placed in the share directory (in Step 12):
```
kubectl delete secret anaconda-enterprise-certs
kubectl create -f /ext/share/certificates.yaml
```
16. Restart all pods to update Anaconda Enterprise to use your certificate:
```
kubectl get pods | cut -d' ' -f1 | xargs kubectl delete pods
```